Vanilla Bean Cheesecake
Vanilla Bean Cheesecake is incredibly decadent, smooth, and silky with a pronounced vanilla bean flavor. This heavenly cheesecake is a simple but classic cheesecake decorated with homemade vanilla bean whipped cream. It’s perfect for every occasion and holiday!
Try our other classic cheesecake recipes like New York Cheesecake and Strawberry Cheesecake.
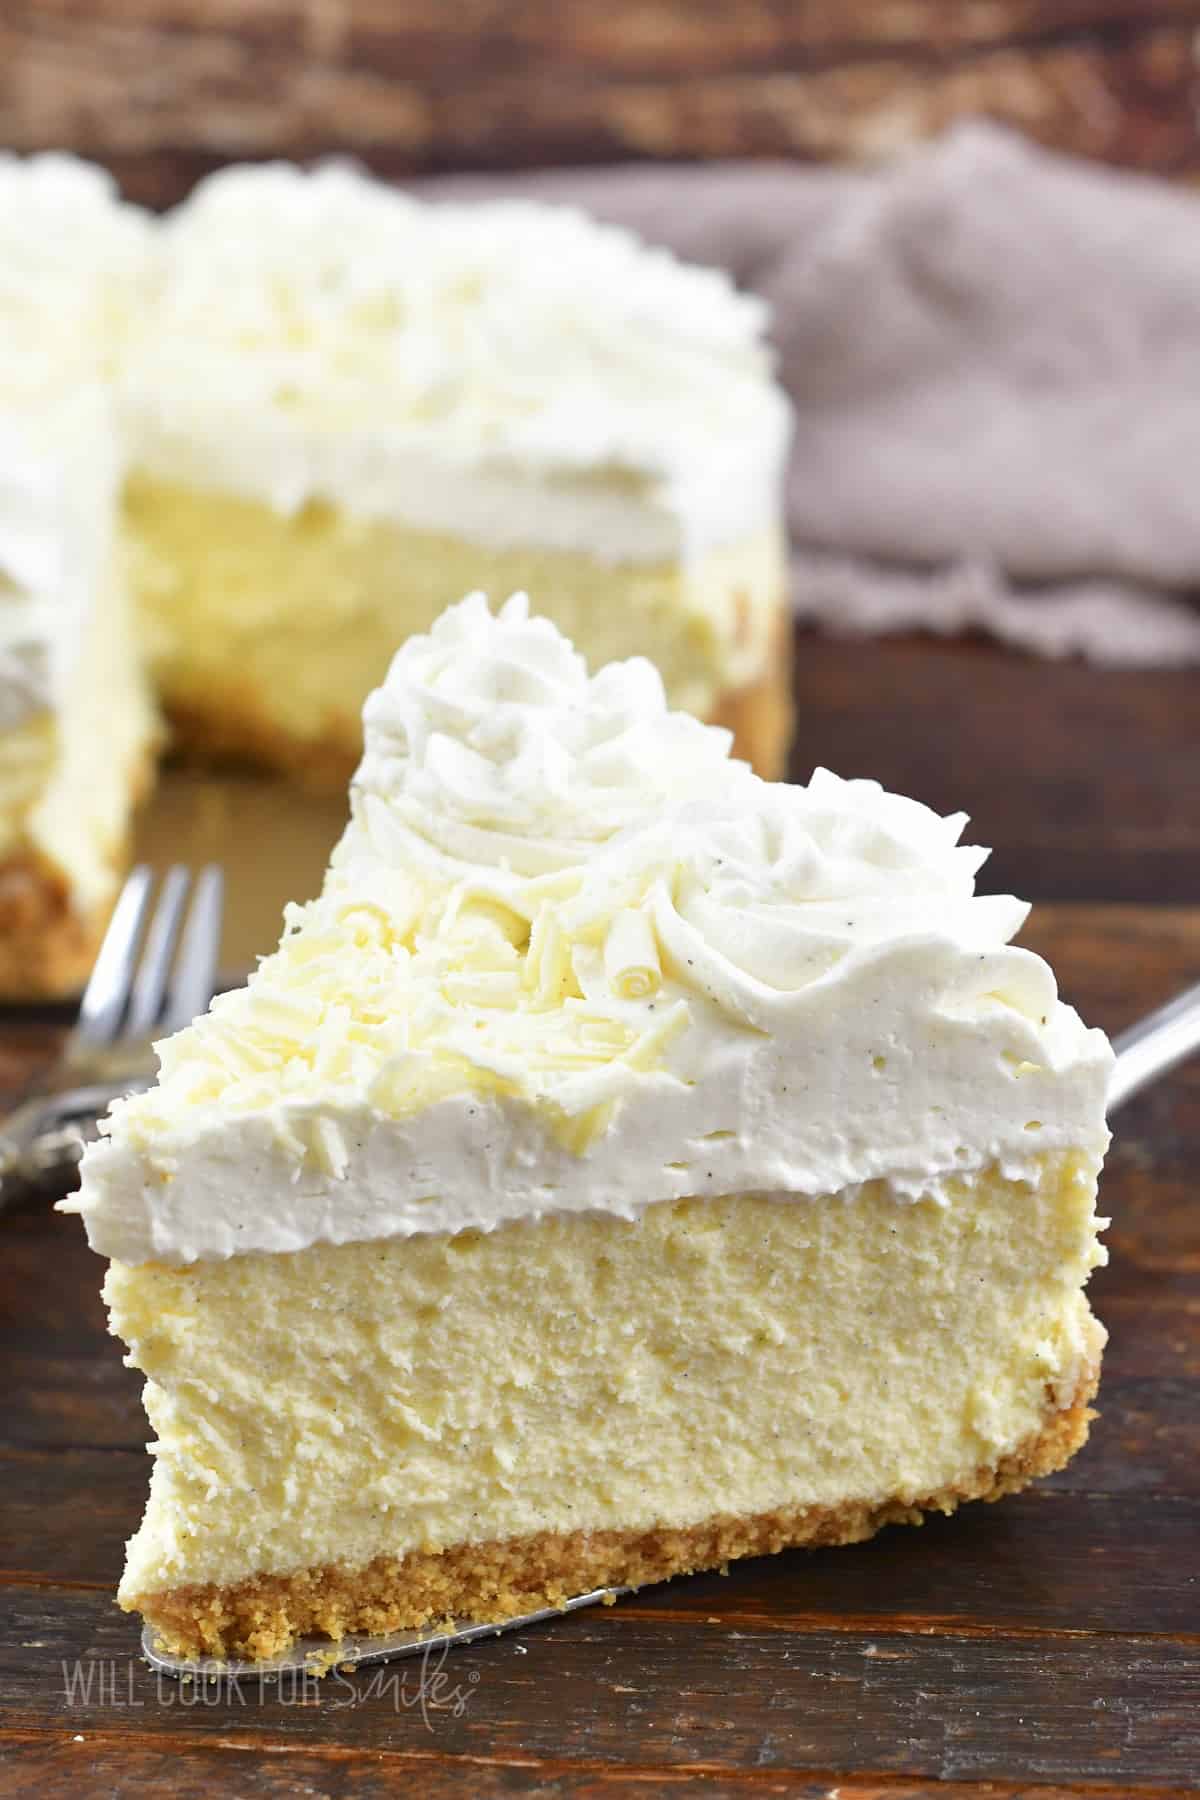
Table of Contents
There’s a reason why many people say that simple is always best. This easy cheesecake recipe really shows that you just can’t beat a classic!
It’s got all of the flavor and texture that you want in a decadent cheesecake with none of the unnecessary frills. What really elevates this recipe a step above most others is the use of pure vanilla and vanilla beans. Pure vanilla extract and whole vanilla beans really bring that flavor home in the most wonderful way.
While vanilla is an admittedly simple flavor, it has the most incredible magic power! It can really transform so many recipes, from simple muffins to decadent cakes, into something really flavorful and aromatic. This cheesecake is sweet, but not too sweet… Real vanilla flavor enhances the sweetness and aroma without being overpowering.
This beautiful, classic cheesecake is perfect to make any time of the year, for any holiday! I’ve served this cheesecake for birthday, Christmas parties, Easer, anniversary dinners, and more. And every single time, this dessert is a huge hit!
Tips on Using Vanilla Beans:
Not all vanilla is the same, and it absolutely does matter what you get! When purchasing vanilla beans or vanilla extract, quality matters.
Tahitian vanilla vs Madagascar vanilla: I am team Madagascar vanilla all the way! Madagascar vanilla has a rich, full-bodied, strong vanilla flavor that we are most familiar with. It’s great for baking, especially when it stands on its own as a flavor. Tahitian vanilla has a more floral, fruity, and delicate flavor (more scent, but not much flavor). Mexican vanilla has a bit of a spice to it. You can always try all three and make your own decision on which one you prefer.
Pure vanilla extract will come with a price tag. If you are used to buying the cheapest bottle of vanilla extract that’s on the supermarket shelves, you are most likely getting an artificial vanilla imitation, not an actual extract. The difference between the two is quite noticeable. When possible, try to get pure vanilla extract!
When choosing vanilla beans, make sure to choose beans that are plump and soft. If the beans feel stiff and on the harder side, they likely already started to dry out. When looking inside the package, look for plump and glossy looking beans. Dry, old beans will look more shriveled and not glossy.
It’s best to get new vanilla beans when you need to use them, but if you got your hands on a bulk package of vanilla beans, store them properly. Don’t rely on the lid or zip-top that came with the container or bag. Store the beans in a bag that you can vacuum seal if possible. Get as much air as you can out of the bag and seal it tight. Store at room temperature in a dark place.
Cheesecake Ingredient Notes
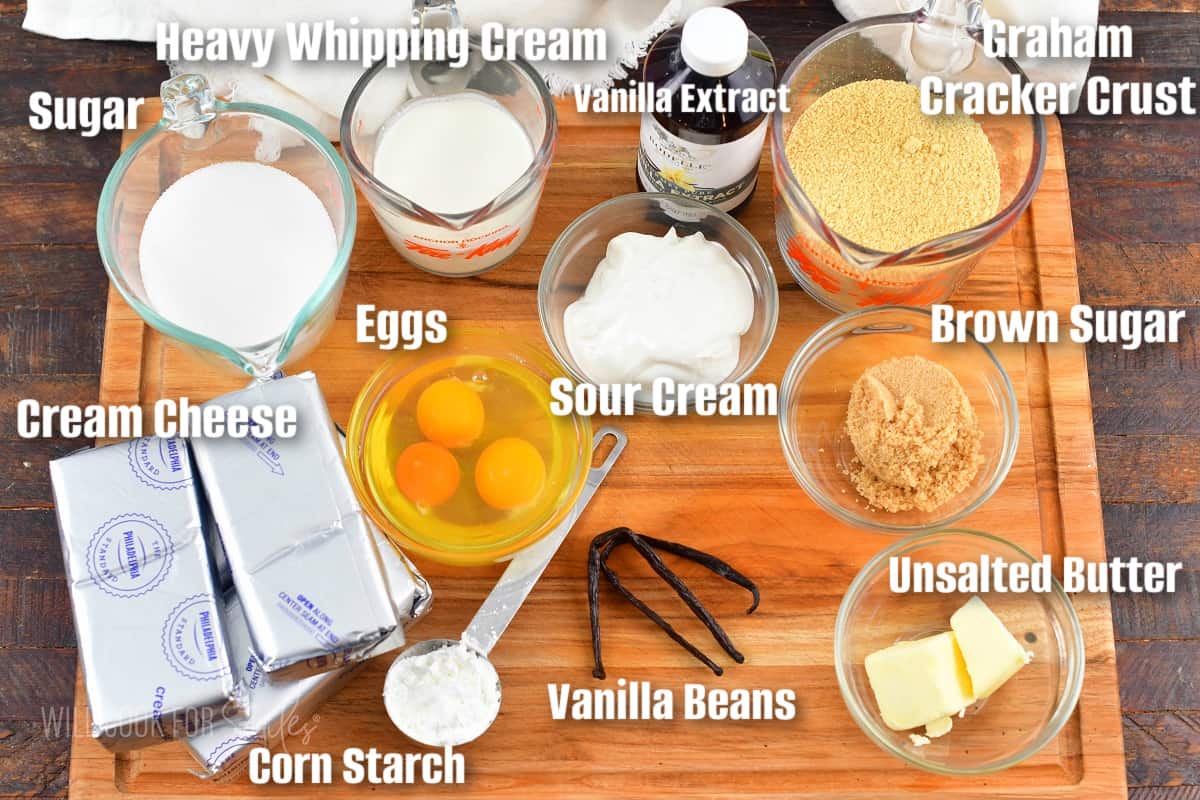
Cream Cheese – don’t try to make the cheesecake “lighter” by using anything other than the original, full fat cream cheese. It will change the texture. Use full fat, original cream cheese and make sure to take it out of the refrigerator 30-45 minutes before starting to bake.
Vanilla beans – make sure to get fresh vanilla bean pods. Vanilla beans should feel soft and plump. If they feel hard and dry, they are no longer good to use because they’ve dried out.
Heavy whipping cream – white it’s best to use heavy whipping cream, you can use half and half but do not go any less fat than that. Note that half and half is thinner than heavy whipping cream so use about a tablespoon less.
Eggs – take the eggs out of the refrigerator 30-45 minutes before cooking to let them warm up to room temperature.
Graham cracker crumbs – if you can’t find graham cracker crumbs at the store, you can get regular graham crackers and pulse them in a food processor until they blend into crumbs. (See GLUTEN FREE notes in Recipe FAQs.)
See recipe card for complete information on ingredients and quantities.
How to Remove Beans from the Vanilla Pods
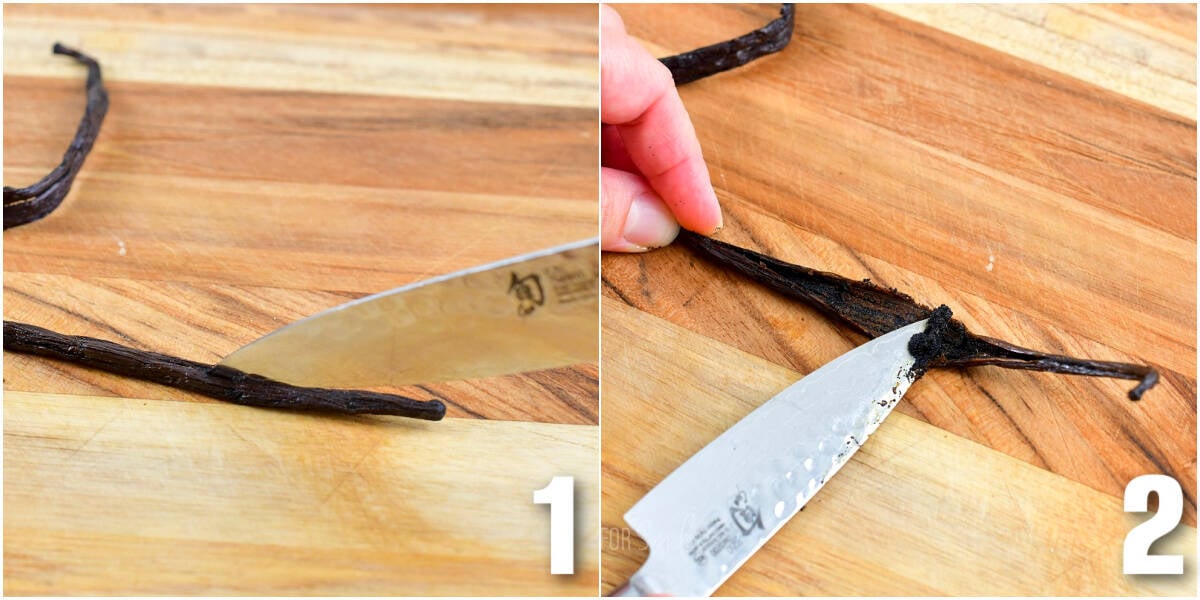
Hold the pod by one end on a cutting board. Slice through the top of the pod (1), lengthwise, all the way from one end to the other.
Open the pod and expose the beans inside. Hold the bean pod down and use the dull part of the knife to scrape the beans out (2) of the pod. Scrape all the way from top to bottom.
How To Use Empty Vanilla Bean Pods
After you’ve used the vanilla beans from the pod, don’t throw away the scraped pods!
You can use it to flavor other things like white granulated sugar, coffee, creamer, milk, and more. Simply put the pods into a food storage container with granulated sugar or ground coffee and keep it there.
Or, add the beans to the container with half and half or creamer.
If you’re making pudding, add the pods to the milk when you’re heating it up.
How To Make Vanilla Bean Cheesecake
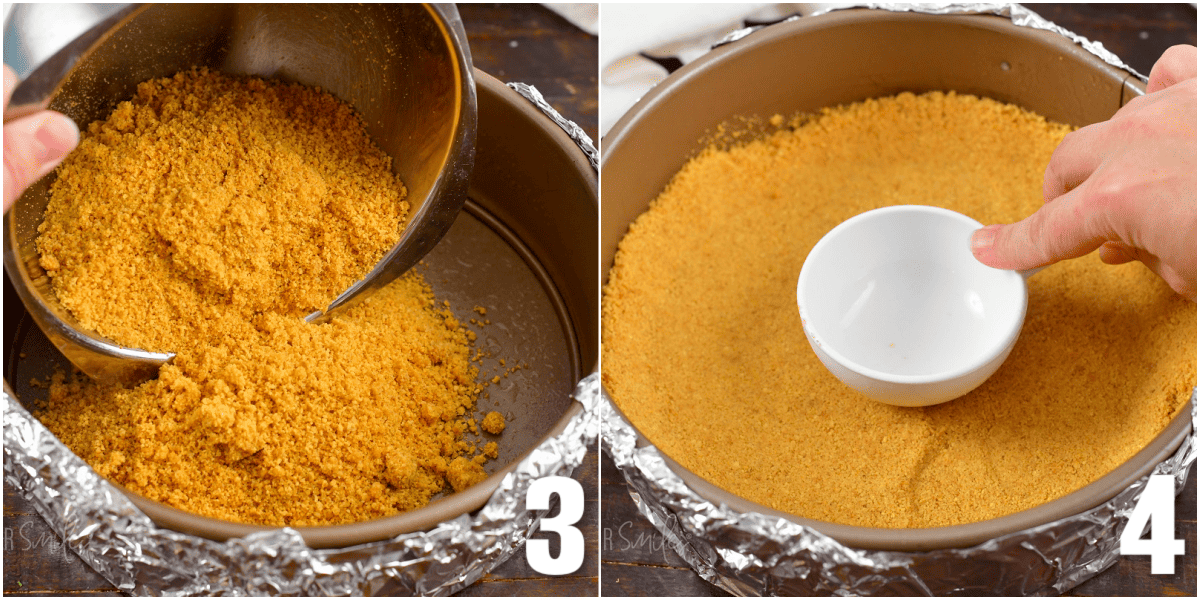
Create the crust. Combine the graham cracker crumbs, melted butter, vanilla extract and brown sugar. Mix them together and spread the buttery crumb mixture (3) in the prepared springform. Pat it evenly along the bottom and a little up the sides (4).
Make the cheesecake filling. Beat the cream cheese and vanilla beans in the bowl of an electric mixer until smooth and fluffy. Scrape the sides, start beating again, and pour in the sugar as it’s beating. Then add the eggs in one at a time. Beat until smooth, continuing to scrape the sides as needed.
Add the sour cream, vanilla extract, and heavy cream, continuing to beat it all together. Lower the speed and add the cornstarch. Once it’s all evenly mixed and fully combined, transfer the filling to the springform pan (5) and spread it evenly (6).
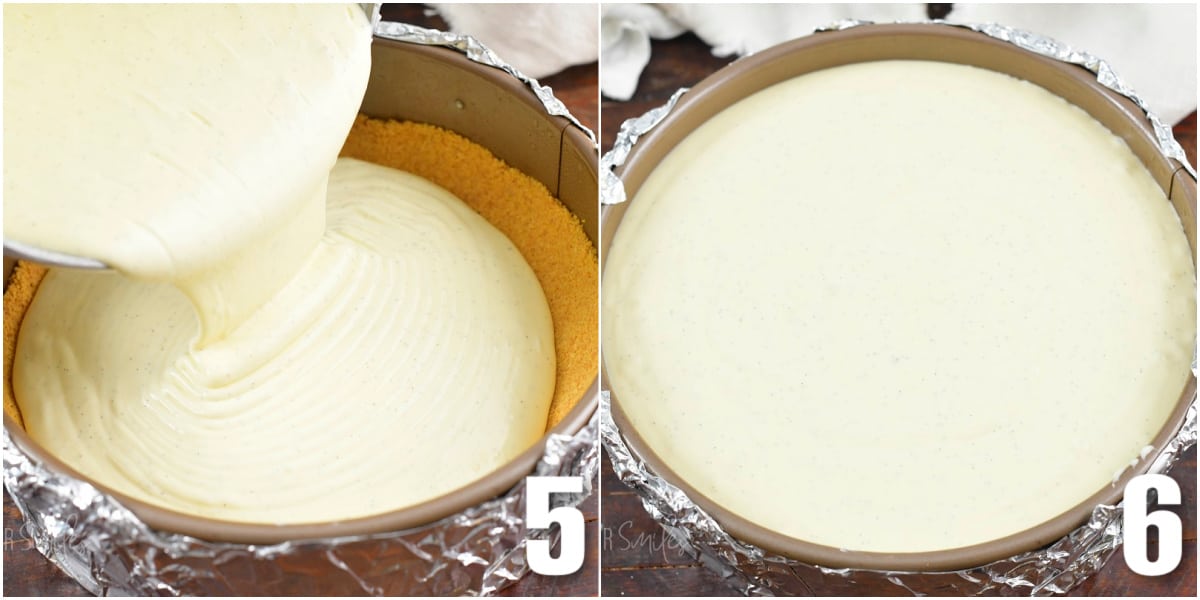
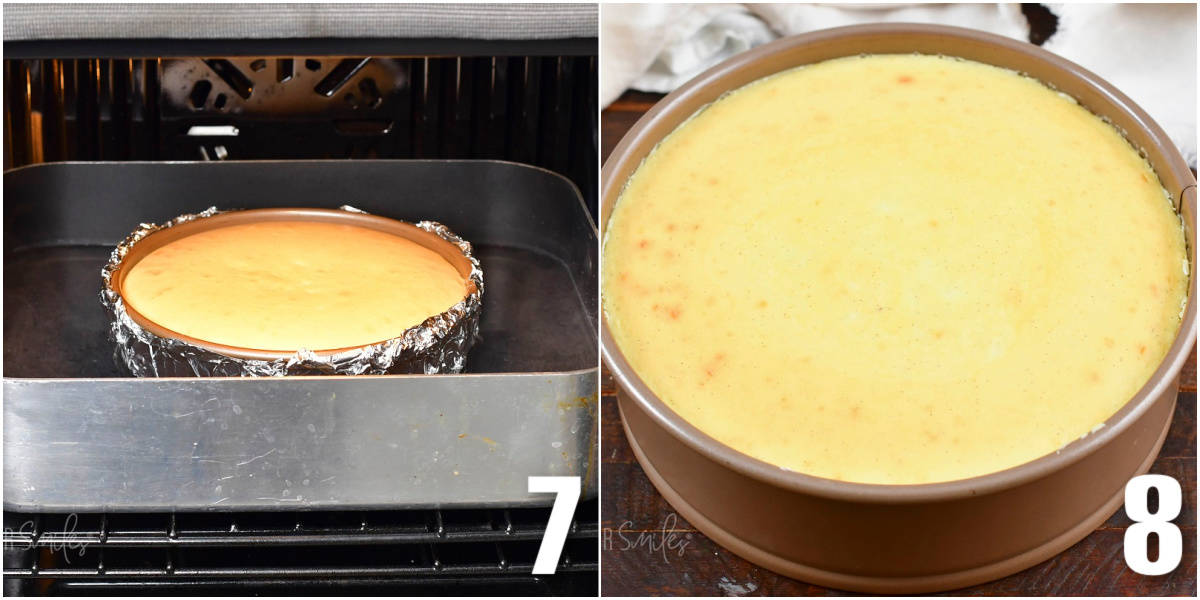
Bake the cheesecake in the water bath. Place the large roasting pan in the oven first, then place the cheesecake filled springform pan inside of it. Add hot water to the larger roasting pan until it’s about halfway up the side of the springform pan (7).
Bake for about 85-90 minutes. Turn off the oven, open the oven doors, and let the cheesecake rest for 10 minutes. Take it out and rest it on the counter until cooled to room temperature (8). Cover the cheesecake and transfer it to the fridge to finish cooling for another 6 hours or overnight.
How To Make Vanilla Bean Whipped Cream
PRO TIP – Only add whipped cream on top of a COLD cheesecake. If it’s warm, the whipped cream will melt.
PRO TIP – pop the whisk attachment and the mixing bowl into the freezer for a couple of minutes to make sure it’s cold. And use cold heavy whipping cream straight from the refrigerator. Whipped cream comes together best to make when it’s cold.
Beat the cold heavy cream, vanilla bean, and sugar together with an electric mixer until stiff peaks form.
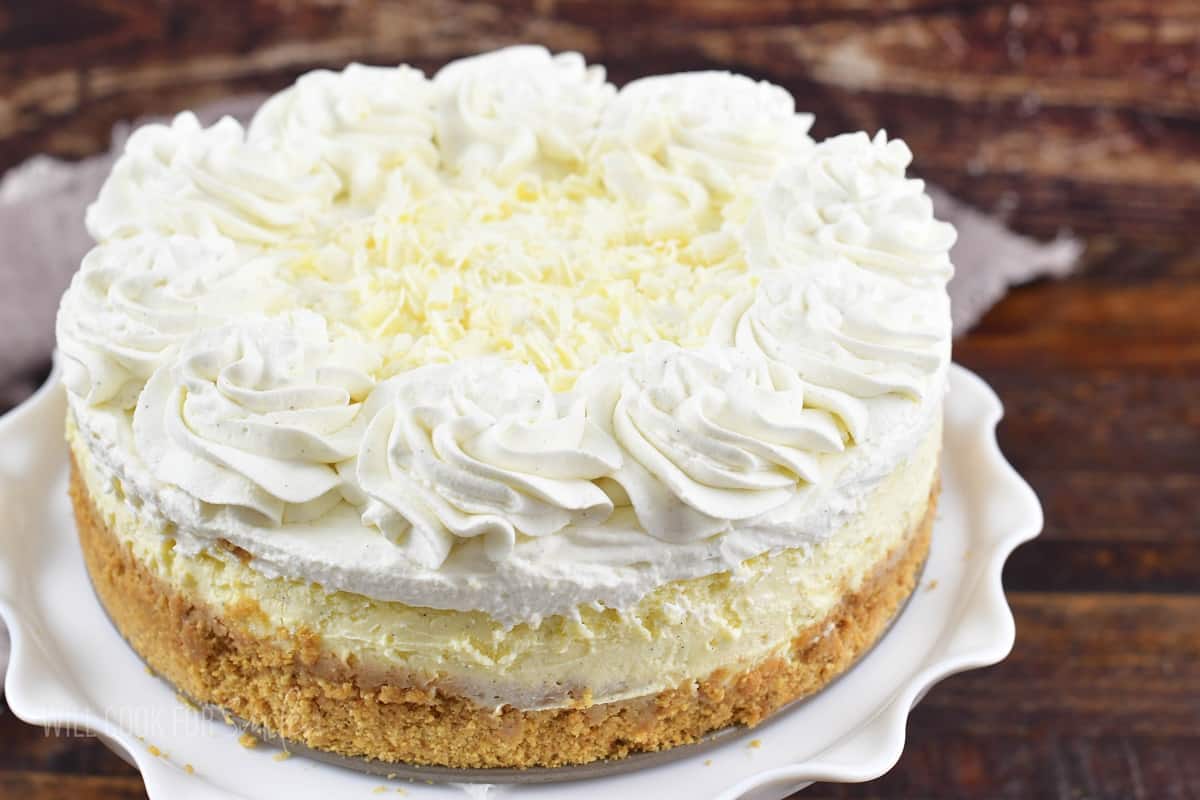
Use half of the whipped cream to frost the cheesecake, then use the rest to pipe decoratively.
Recipe FAQs
Make sure to store the cheesecake in the refrigerator and covered air-tight. Properly stored, cheesecake should last up to 5 days.
I recommend simply storing it in the very same pan it was baked in, covered tightly with plastic wrap or another air-tight wrap you use. Remember to cover it tightly every single time after you take out a slice!
Baking in a water bath technique is called “bain-marie.” This technique is done to prepare delicate desserts like crème brûlée, custards, and cheesecakes. The main reason for using a water bath for these desserts is to keep direct heat away from baking dish.
Because these desserts are heavy on the cream and eggs, if not baked evenly and slowly but exposed to direct heat, it would not be baked uniformly. The outside will be overdone and inside will still be gooey. Water bath ensures even baking throughout the whole dish by keeping layer of protection between the baking dish and oven heat.
Without the water bath, cheesecake will be sagging in the middle, is likely to crack, and most importantly, it will be overcooked on the outside and under-cooked on the inside
The only part of this cheesecake that contains gluten is the graham cracker crust. Use gluten free graham crackers and pulse them into crumbs to create a gluten free crust. Remaining ingredients should already be gluten free but double check the labels and nutritional information.
Freezing Instructions
Make sure to freeze the cheesecake WITHOUT any frosting or toppings! Don’t frost until ready to serve.
You can freeze cheesecake right on the bottom of the springform pan or you can take it off the pan and transfer it onto an aluminum foil covered cardboard.
Once cheesecake has been cooled to room temperature, run a butter knife along the inside of the springform pan to separate the cheesecake from the pan. Place the pan with the cheesecake into the freezer and freeze for about an hour.
Then, carefully take off the side portion of the springform. At this point, you can either keep the bottom of the springform with the cheesecake or transfer it onto a piece of thick cardboard cake holder covered with aluminum foil.
Wrap cheesecake and the bottom of the pan with plastic wrap, in 2-3 layers. Then, wrap the whole thing with aluminum foil. As an added protection from air, you can place the whole things in a large, zip-top freezer bag, but that’s not necessary.
Make sure to date and label before placing cheesecake back in the freezer. Cheesecake will keep in the freezer for 2-3 months.
To thaw frozen cheesecake, make sure to do it slowly, in the refrigerator! Take the cheesecake out of the freezer, take off the zip-top bag, and place into the refrigerator and slow-thaw overnight.
More Holiday Cheesecake Recipes to Try
If you’re planning on making this cheesecake for your next holiday, it’s a great idea! You can also check out a few other seasonal desserts we love:
If you’ve made my cheesecake recipe and found a lot of good information here, PLEASE leave a 🌟 star rating! Let me know how you liked it by leaving the 📝 comment below as well. Don’t forget to subscribe to my newsletter!
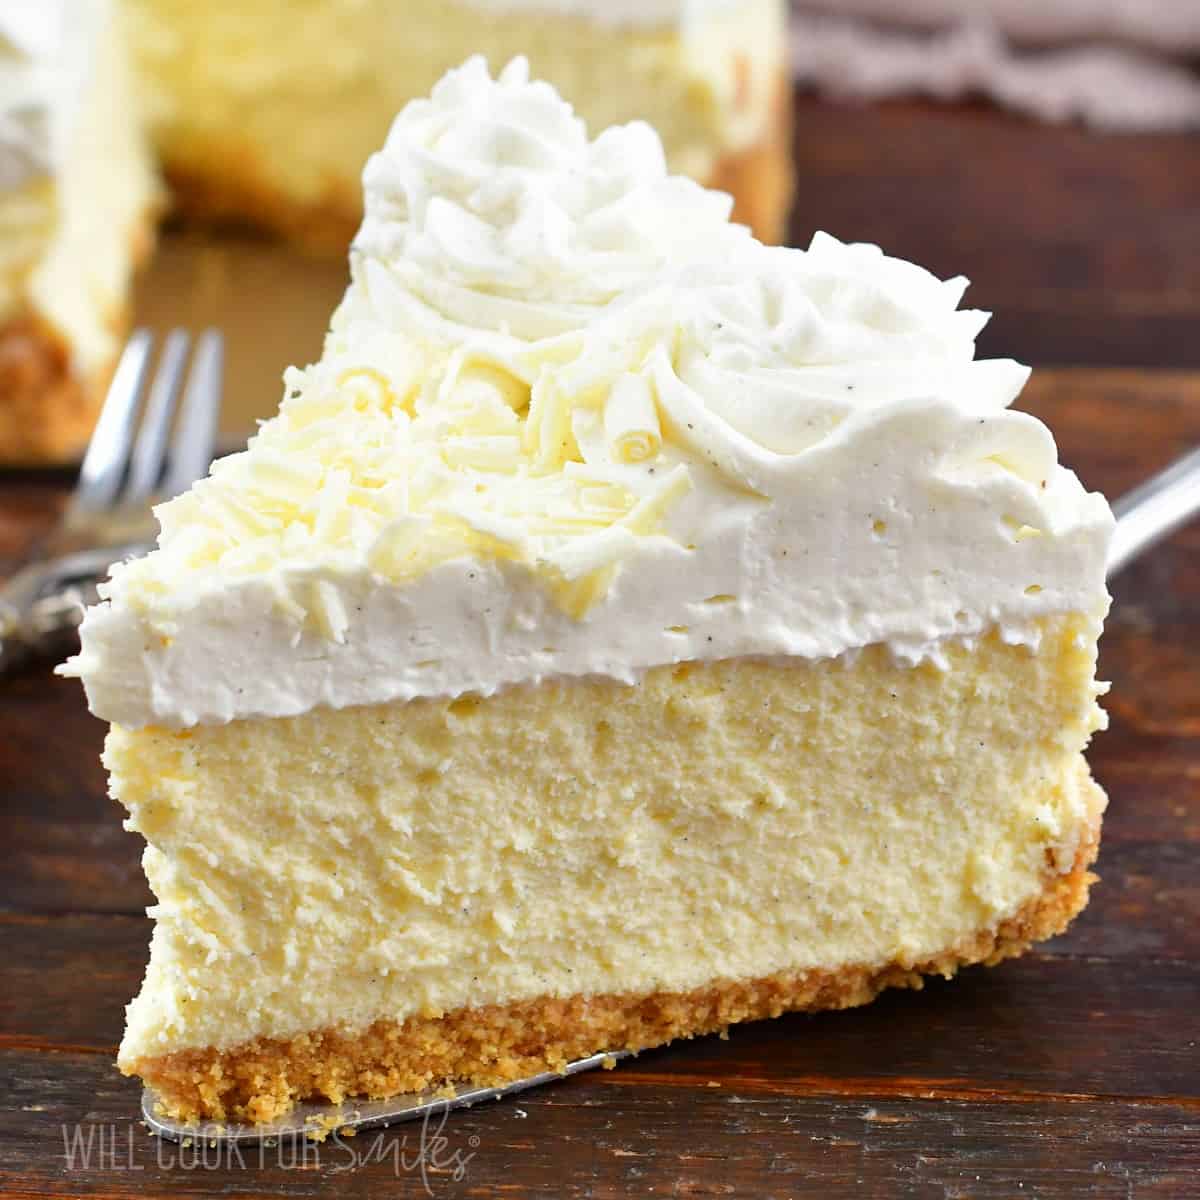
Vanilla Bean Cheesecake
Equipment
- Wide aluminum foil
- Measuring cups
Ingredients
For the Crust:
- 1 1/2 cups graham cracker crumbs
- 1/4 cup brown sugar
- 5 tbsp unsalted butter
- 1 tsp 100% pure vanilla extract
For the Cheesecake:
- 32 oz full fat cream cheese softened
- 1 cup white granulated sugar
- 3 eggs room temperature
- 1/3 cup heavy whipping cream
- 1/2 cup full fat sour cream
- 2 tsp corn starch
- 2 whole vanilla beans
- 1 tsp 100% pure vanilla extract
Vanilla Whipped Cream
- 2 cups heavy whipping cream
- 1/2 cup white granulated sugar
- 1 vanilla bean
- 1 tsp 100% pure vanilla extract
Instructions
Before Starting the Cheesecake:
- Preheat the oven to 325° and grease a 9 inch springform pan.You will need a large roasting pan that’s bigger and longer than the springform pan. (You can even use the aluminum foil disposable ones).If you are not sure about your springform holding up in water, you can wrap the outside of the springform pan in heavy duty aluminum foil from bottom up to the sides. Try to use a wide kind of foil so you would only need to use 1 solid sheet. (I recommend wrapping the outside of the springform in foil before adding the crust and cheesecake batter.)
- Although, there is a chance that a small amount of water will leak in, this will NOT ruin the cheesecake.
Crust:
- Combine graham cracker crumbs, melted butter, vanilla extract, and brown sugar in a mixing bowl and mix very well.
- Spray inside of the springform pan with some cooking spray, making sure you get the sides too.
- Spread crumb mixture in the bottom of the prepared springform, evenly pressing it over the bottom and a little up the sides.
Taking Out Vanilla Beans:
- Make sure to buy vanilla beans close to the time you need to use them. The longer vanilla beans sit, especially in a container that has been previously opened, the drier they become.
- Place the vanilla bean pod onto a cutting board and hold one end of it. Use a sharp pairing knife to slice through the top of the pod, lengthwise, all the way from one end to the other. (Make sure to always cut away from yourself.)
- Carefully open the vanilla pod to expose the beans on the inside. (If you accidentally cut through the whole vanilla pod, not a big deal! Just work with one half at a time.)
- Hold down the bean pod on one end to the cutting board, and use the dull part of the pairing knife to scrape the beans out of the pod. Make sure to scrape all the way from top to bottom.
- As you scrape the seeds, add them to the cream cheese block so you don't loose any beans.
Cheesecake Filling:
- In a bowl of an electric mixer, beat cream cheese (with the vanilla beans) on medium-high speed until smooth and fluffy. I give it a good 2-3 minutes of beating to get is soft and smooth. Scrape sides and bottom on the bowl and beat for another minute.
- Pour in sugar while beating and add eggs, one at a time. Beat it until smooth. Stop to scrape bottom and sides of the bowl.
- Add sour cream, vanilla extract, and heavy whipping cream and beat, still on medium-high speed, until all mixed very well.
- Lower the speed to low and beat in corn starch. Scrape sides and bottom of the bowl and mix for a few more seconds to make sure everything is evenly mixed.
- Transfer batter into the springform and spread in evenly.
Baking The Cheesecake:
- Preheat oven to 325°.
- Place a large roasting pan into the oven and place cheesecake springform inside the roasting pan. Carefully add hot water to the roasting pan, about half way up the side of the springform.
- Bake for 85-90 minutes. Turn off the oven and open the oven door half way. Let cheesecake rest for 10 minutes and take it out of the oven. Take the foil wrap off the pan.
- Let it rest for 10 minutes on the counter and then gently run a butter knife between sides of the cheesecakes and the springform to carefully separate it. (You don’t actually have to take the cheesecake out of the pan until ready to serve.)
- Cool cheesecake for an hour and then cover the pan with plastic wrap and refrigerate for 6 hours or overnight.
Vanilla Whipped Cream:
- TIPS: Make sure the bowl and the whisk attachment are clean and dry. Chill the bowl of the electric mixer in the refrigerator for a few minutes and don’t take the heavy whipping cream out until ready to whip. Make sure to frost COLD, chilled cheesecake so whipped cream doesn't begin to melt.
- Beat cold heavy whipping cream, vanilla beans, and sugar with a whisk attachment on medium-high speed. Slowly pour in vanilla extract while it's mixing and keep mixing until stiff peeks form. (Don't walk away, whipped cream forms pretty fast.)
- Use half of the whipped cream to spread over the cheesecake and another half to pipe rosettes or other decorative shapes.
Video
Notes
- Storing: Cheesecake will last up to 5 days in the refrigerator. Store it in the original baking pan and make sure to re-wrap the pan with plastic wrap air-tight after each time you take out a slice.
- Freezing: There are instructions on how to freeze the cheesecake in the post!
- Water Bath: DO use the water bath technique, it does strongly affect the texture of the cheesecake.
- How To Tell If Cheesecake If Done: You can tell the cheesecake is baked when the edges are set and the center is slightly soft and jiggly. As it cools in the oven and on the counter, the center will continue to set more and become more firm. DO NOT insert a knife or toothpick into the center since that may cause the dessert to crack.
- Cooling: DO cool the cheesecake is three steps: 10 minutes in the turned off oven, on the counter, and chill in the refrigerator.
Nutrition
All images and text ©Lyubov Brooke for ©Will Cook For Smiles. Please do not use my images without prior permission. If using my posts in collections and features, please link back to this post for the recipe.
Disclaimer: Nutrition information shown is not guaranteed to be 100% accurate as most ingredients and brands have variations.


Ingredients for whipped cream state granulated sugar, instructions say add powder sugar. Which is it please
Sorry about that it was a typo but I used granulated. I have been experimenting and can not tell the difference when I use granulated over powdered so you could use either one.
This is the best cheesecake I have ever had! I can’t believe I was able to make it! Everyone loved it!
I am so happy everyone loved it!
This is so good! Thanks for the recipe!
Glad you liked it, Hanna!
I made this recipe for Thanksgiving this year and I’m excited to taste this cheesecake! My cheesecakes look perfect and the smell of the vanilla is amazing. I was a little lazy so I used pre-made graham cracker crust. This recipe is enough for two cheesecakes if you are using those premade graham cracker crusts. I put a pan of water in the rack underneath the cheesecakes and cut the baking time in half since they were smaller cheesecakes. 40 minutes did the trick and no cracks!
Sounds perfect! That’s also great if you want to either freeze one or give one away 🙂
Thank you and happy holidays!