S’mores Cheesecake
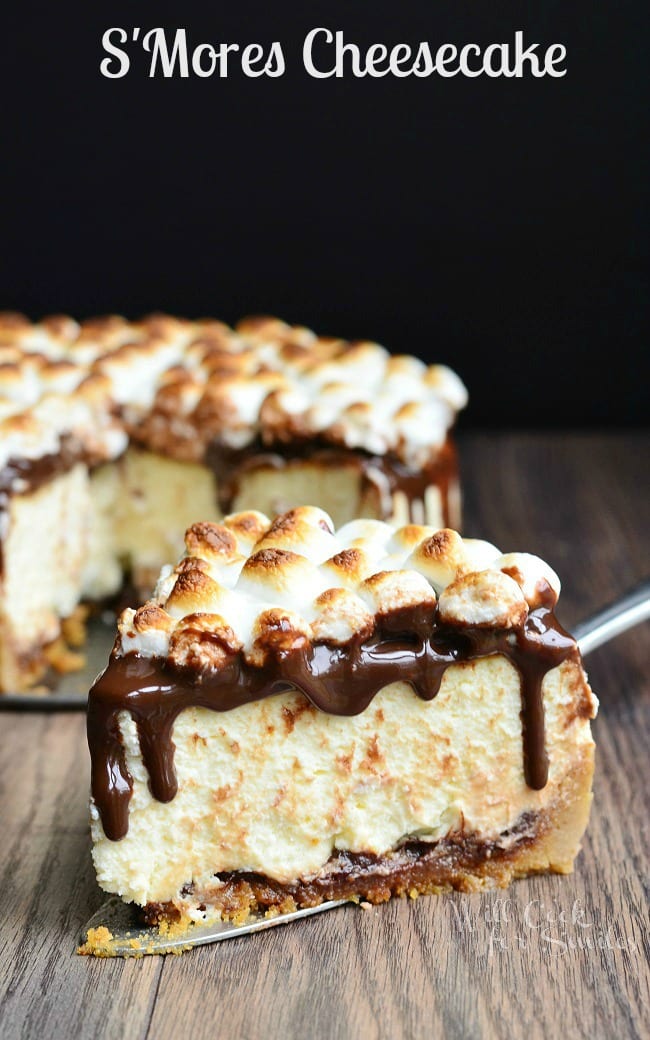
This incredible S’mores Cheesecake recipe features a buttery graham cracker crust, decadent homemade cheesecake and the best marshmallow and fudge topping! There are even mini marshmallows and chocolate morsels layered right onto the crust to really seal the deal on that classic s’mores flavor.
If you’re craving more gooey s’mores goodness, you need to try my Layered Double Chocolate S’mores Cookie Bars and S’mores Skillet Cookie!
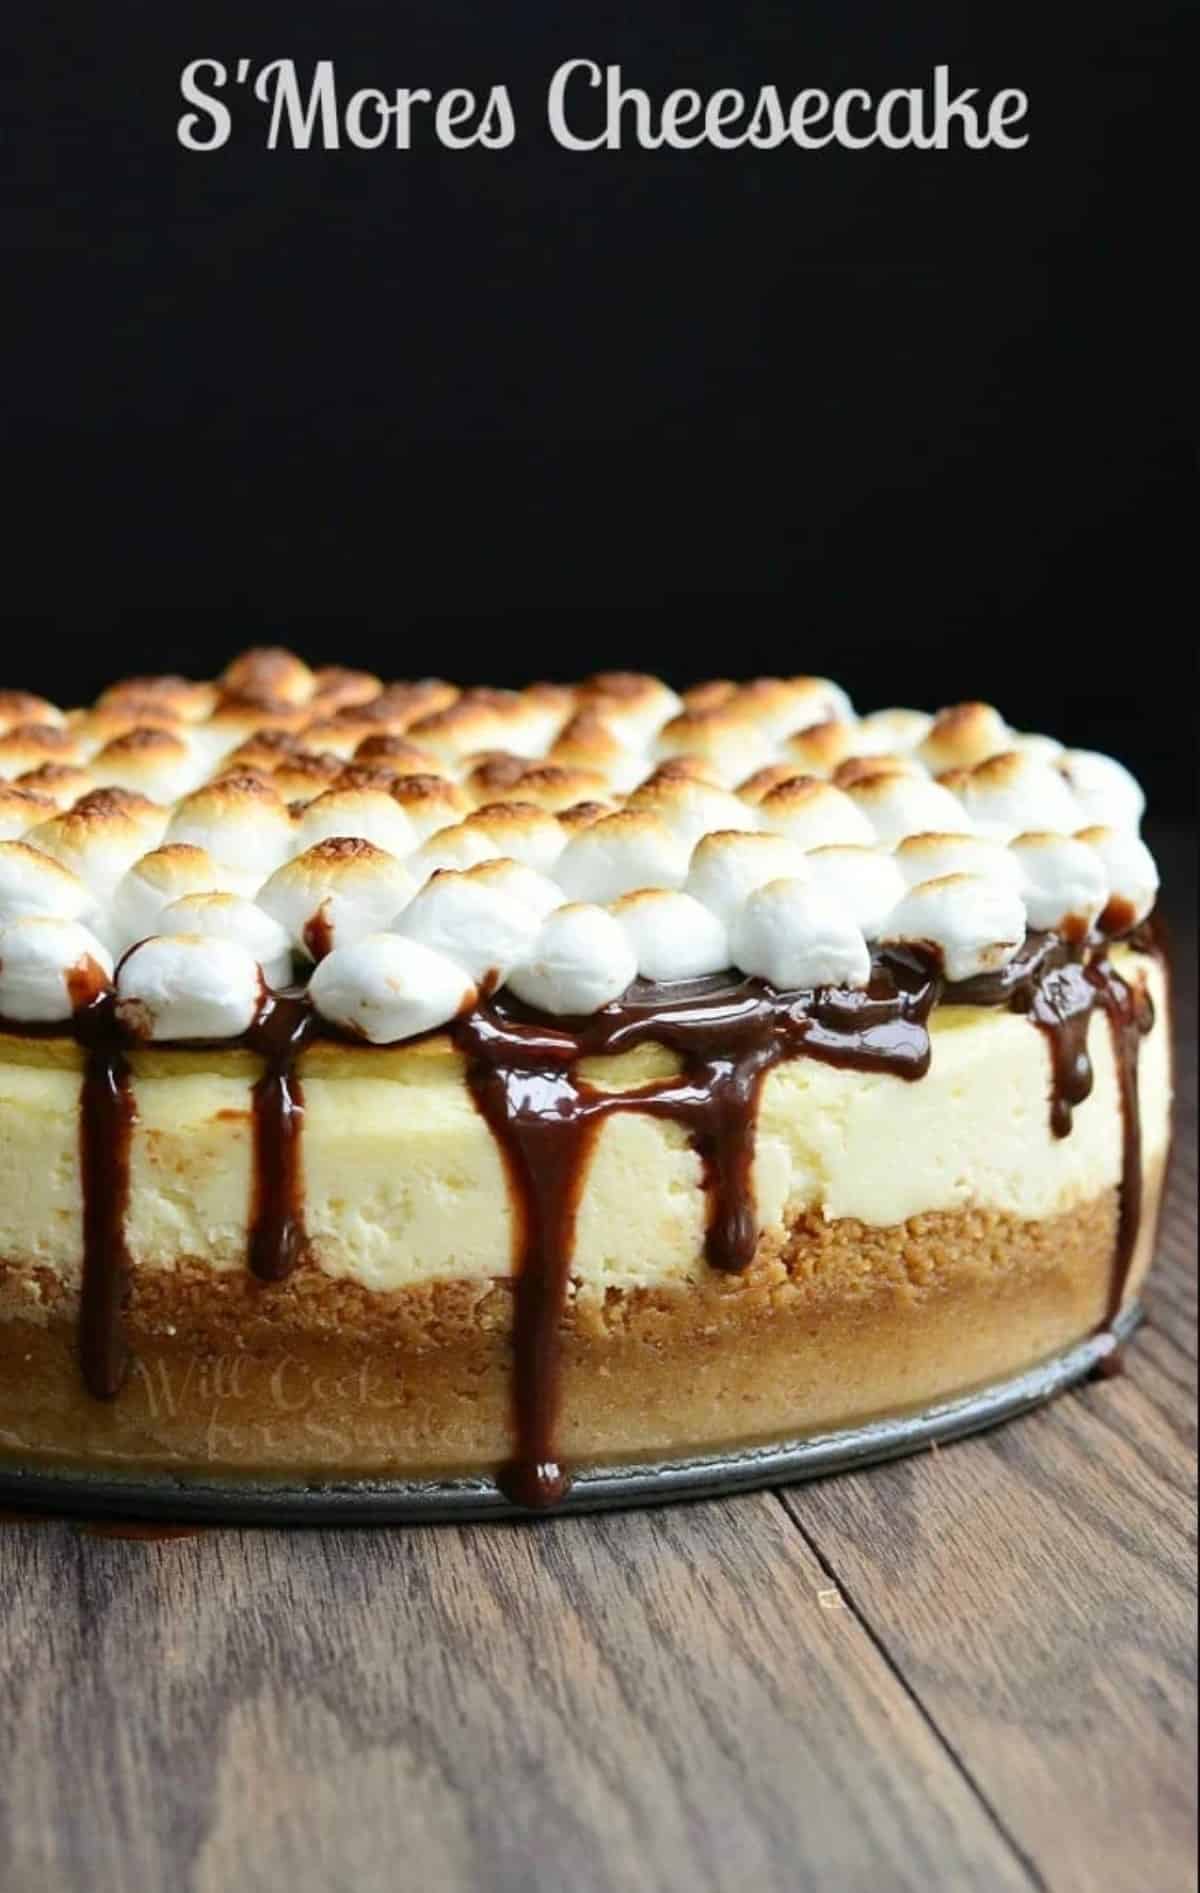
Table of Contents
I’ve found heaven on earth – and it’s this cheesecake recipe! I’m a huge fan of s’mores flavored anything, especially during the summertime when I want to feel all of the bonfire feelings. With a recipe like this, I can get my s’mores fix without having to sit by a campfire! For those of us who live in the south, we know how treacherous those hot summer nights can be.
The crust of this cheesecake is your average buttery graham cracker crust, but it’s enhanced with flavors of sweet marshmallows and chocolate morsels to really solidify that s’mores flavor. It’s layered with my signature cheesecake recipe (that honestly can’t be bested) topped with hot fudge sauce and gooey marshmallows. Are you drooling yet?
While this homemade cheesecake may be a real show-stopper, fear not! It’s a whole lot easier to make than you may think it is and always impresses at parties of all kinds. Since I consider myself something of a cheesecake expert, I’ve also included plenty of little tips and tricks to help make this process wonderfully simple for you.
Ingredient Notes
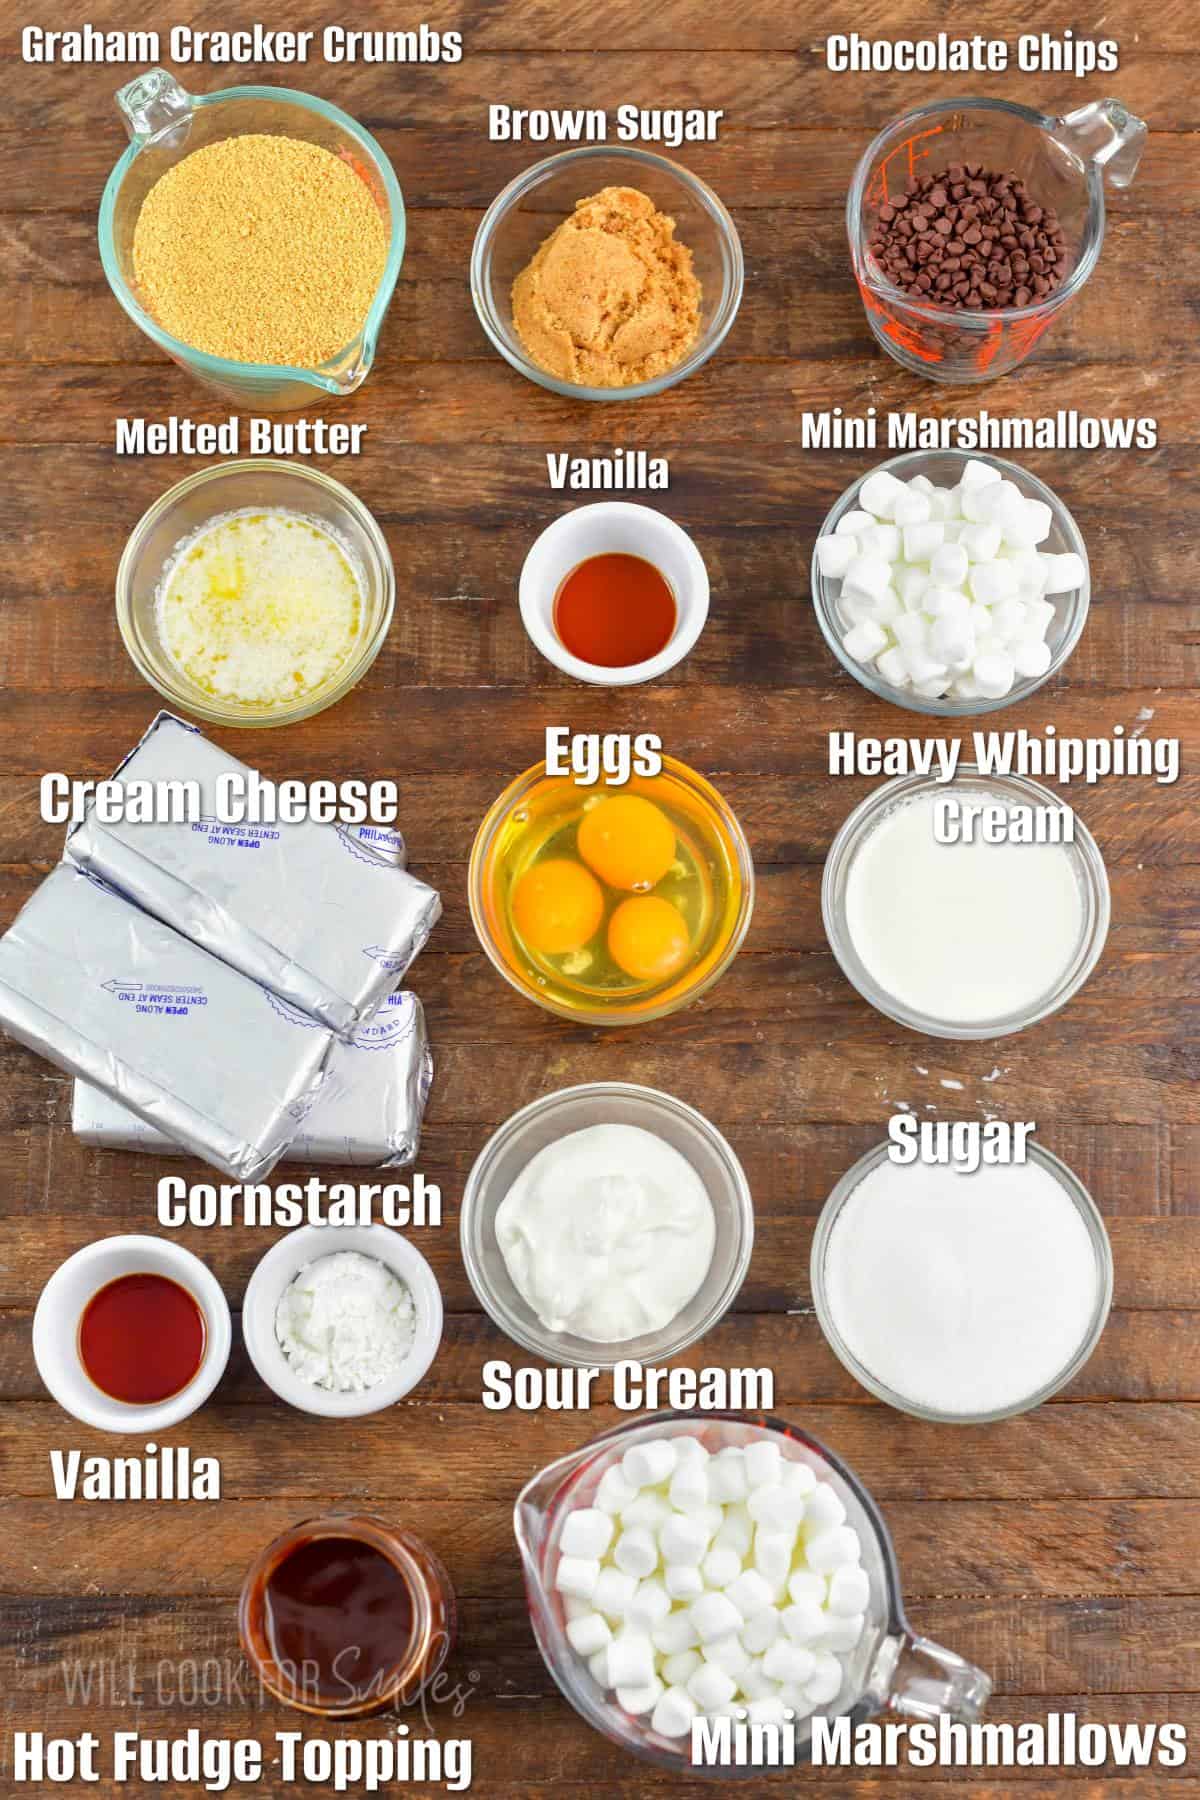
Vanilla Extract – I always recommend using pure vanilla extract. It lends a much better flavor than imitation.
Graham Cracker Crumbs – If you can’t find graham cracker crumbs at the store, you can get regular graham crackers and pulse them in a food processor until they blend into crumbs.
Heavy Cream – While it’s best to use heavy whipping cream, you can use half and half but do not go any less fat than that. Note that half and half is thinner than heavy whipping cream so use about a tablespoon less.
Cream Cheese – Don’t try to make the cheesecake “lighter” by using low fat cream cheese. It will change the texture. Use full fat, original cream cheese and make sure to take it out of the refrigerator 30-45 minutes before using it.
Hot Fudge Topping – If you’re a fan of the way the hot fudge compliments this cheesecake, be sure to make my Oreo Mint Chocolate Chip Cheesecake! It’s got a very similar vibe.
See recipe card for complete information on ingredients and quantities.
How to Make S’mores Cheesecake
Prepare – Preheat the oven to 325°F and grease a 9 inch spring form pan. You’ll also need a large roasting pan to create the water bath.
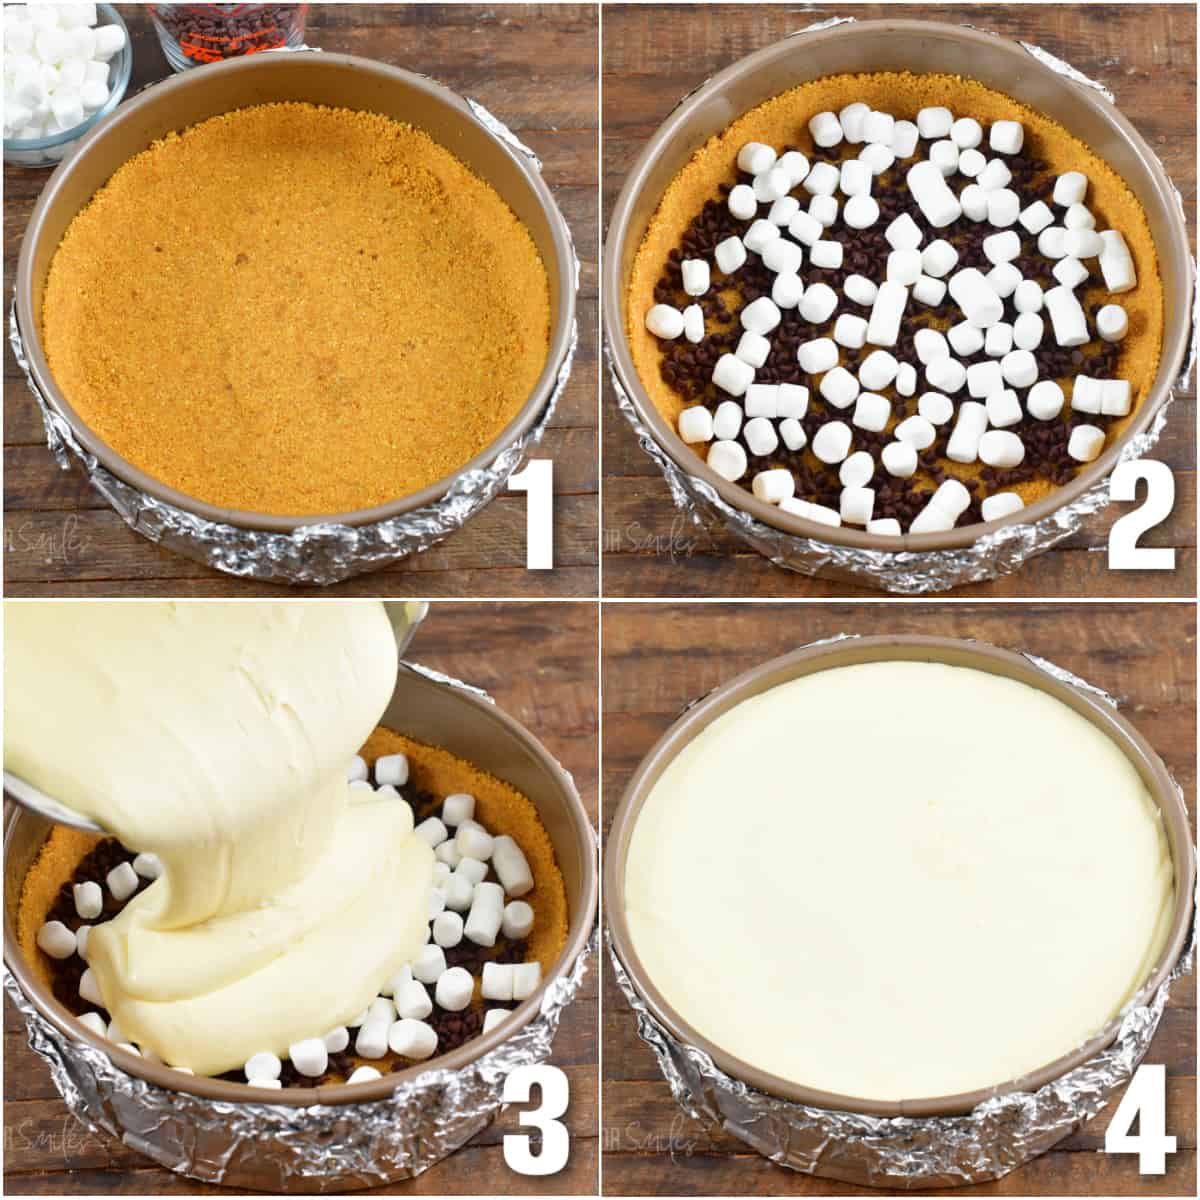
Make the crust – Combine the graham cracker crumbs, melted butter, vanilla extract and brown sugar. Mix well and evenly spread the crumb mixture in the bottom of the spring form pan, pressing it over the bottom and half way up the sides (1).
Create the base s’mores layer – Spread mini chocolate morsels and marshmallows over the crust (2).
Make the cheesecake mixture – In the bowl of an electric mixer, beat the cream cheese on medium-high speed until smooth and fluffy. Scrape the sides and bottom of the bowl and beat for another minute. Mix in the cornstarch and sugar until combined. Beat in the eggs until incorporated. Mix in the sour cream, vanilla, and heavy cream until also incorporated.
Pour the batter – Carefully pour the cheesecake batter into the springform pan (3, 4).
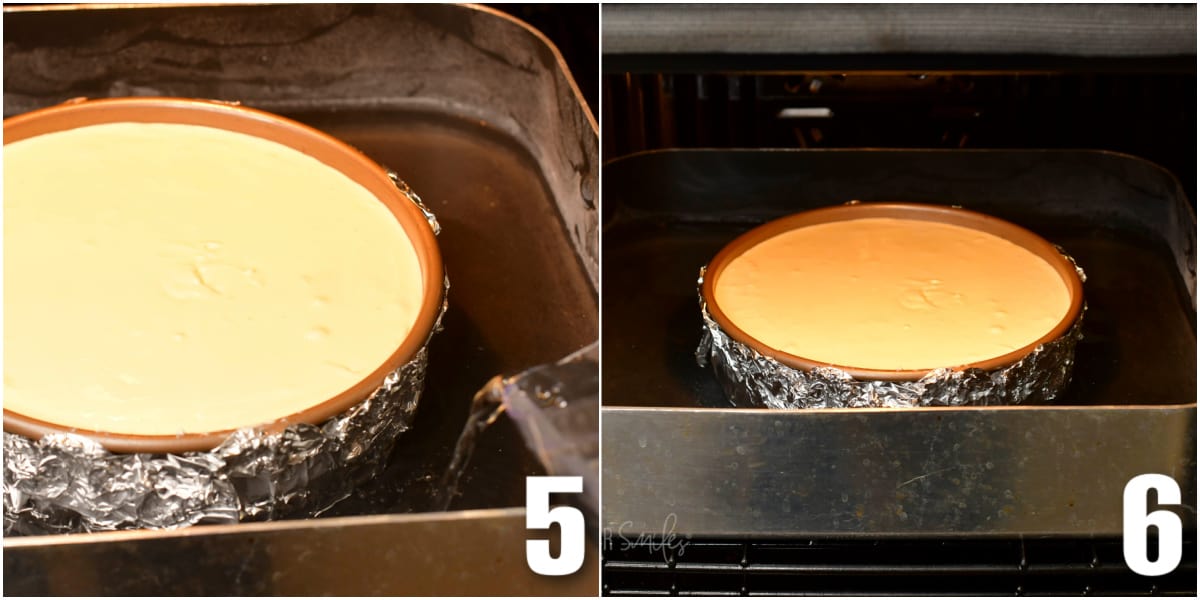
Create the water bath – Place the roasting pan into the oven. Place the cheesecake spring form pan inside of the roasting pan. Carefully add water to the roasting pan, going about halfway up the side of the spring form (5).
Bake and rest – Bake for 90-95 minutes. Turn off the oven and open the oven door halfway. Let the cheesecake rest for 10 minutes before you take it out of the oven (6).
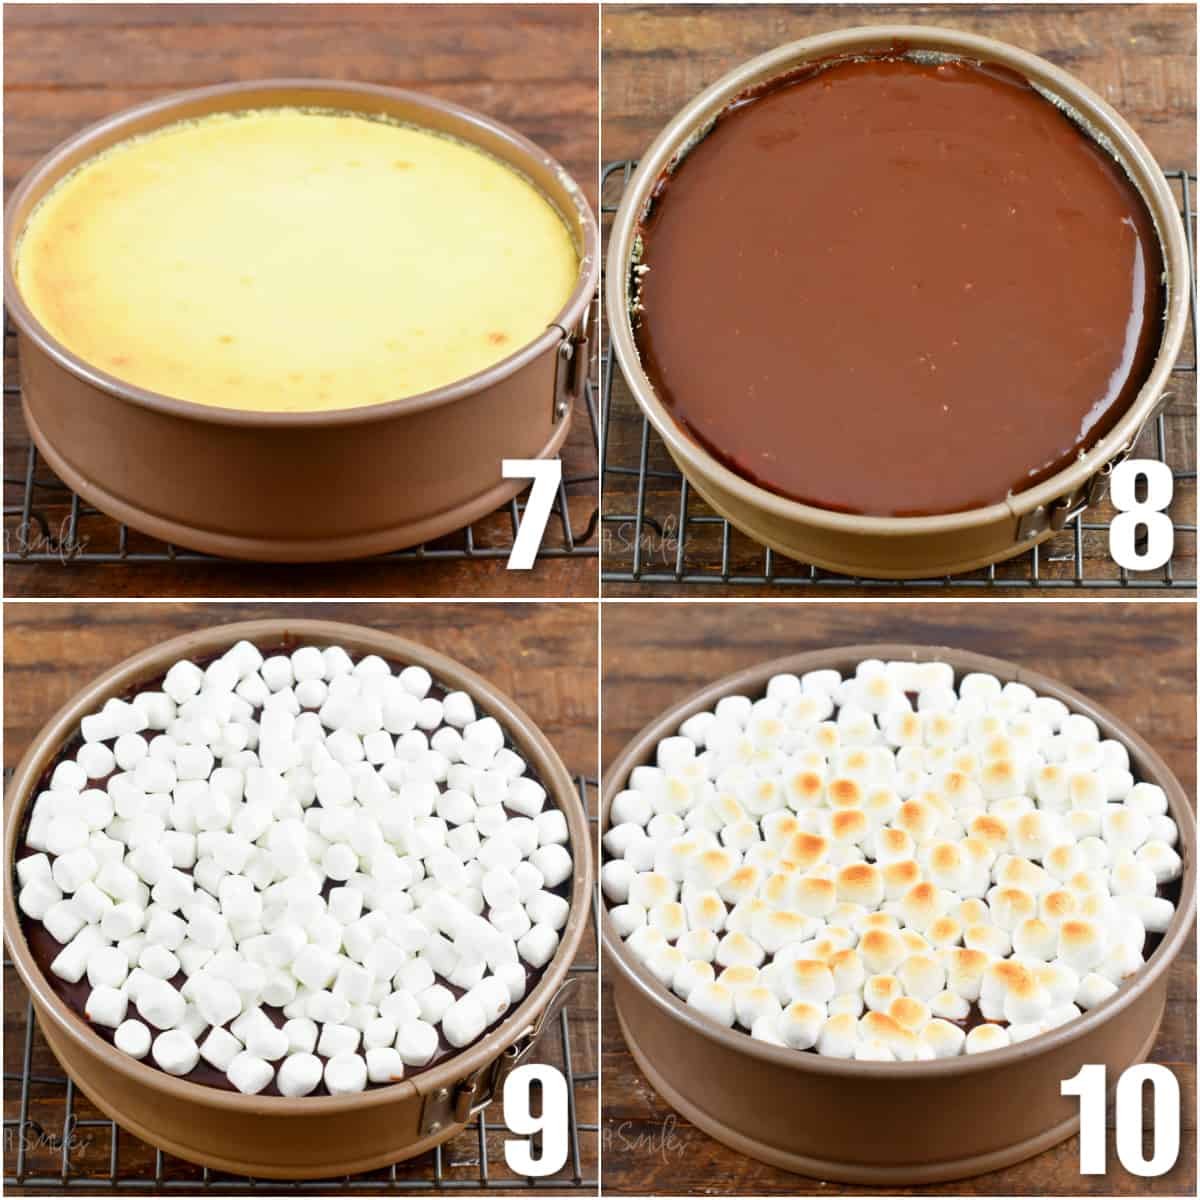
Let it rest again – Let the cheesecake rest for 10 minutes on the counter. Then, gently run a butter knife between the sides of the cheesecakes and the springform to carefully separate it.
Chill – Cool cheesecake for an hour in the refrigerator.
Add the toppings – Turn on the broiler in the oven. Evenly spread the warmed hot fudge sauce across the top of the cheesecake (8). Sprinkle marshmallows on top of the fudge (9).
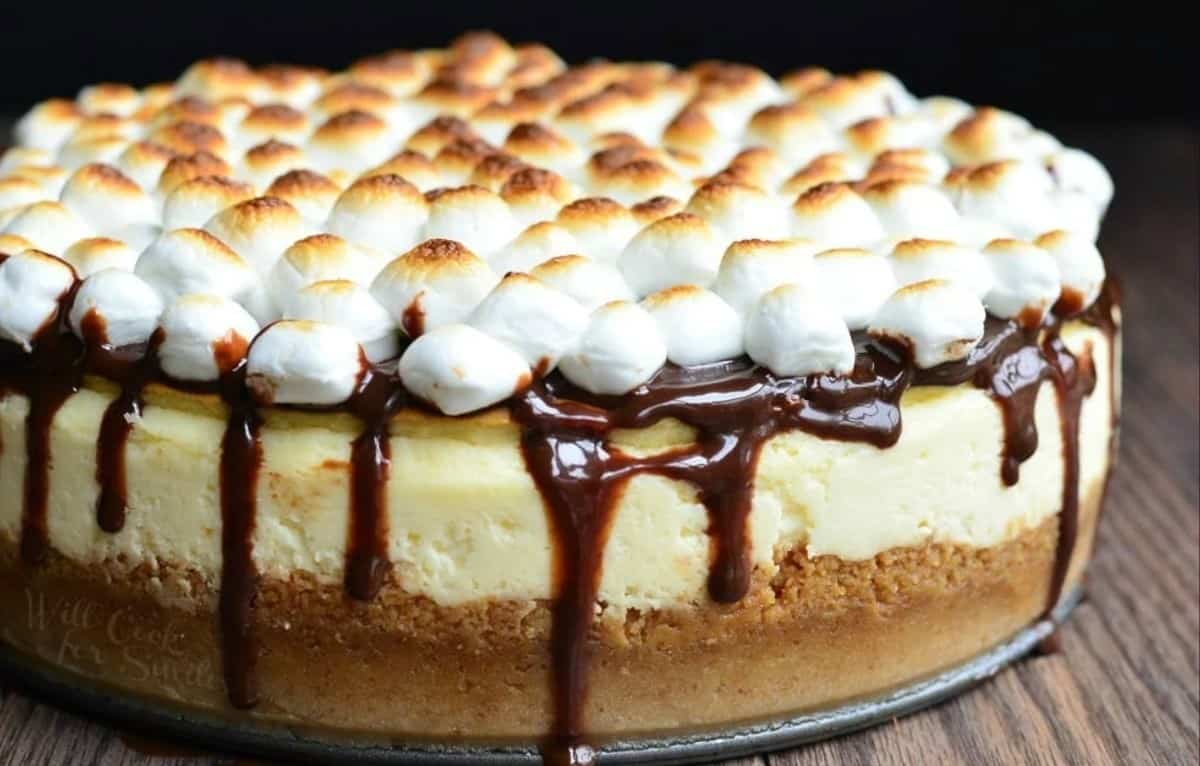
Toast the marshmallows – Place the cheesecake back in the center of the oven under the broiler. Let the marshmallows toast for just 30-35 seconds. Remove the cheesecake from the oven once marshmallows are lightly browned (10).
Chill again – To cool the cheesecake completely, cover it loosely with foil and refrigerate for a minimum of 4 hours.
Recipe FAQs
YES! The reason for baking a cheesecake in a water bath is to keep direct heat away from the baking dish.
Cheesecakes are heavy on both cream and eggs. If not baked evenly and slowly but exposed to direct heat, it would not be baked uniformly. The outside will be overdone and inside will still be gooey. Creating a water bath ensures even baking throughout the whole dish by keeping layer of protection between the baking dish and oven heat.
Without the water bath, cheesecake will be sagging in the middle, is likely to crack, and most importantly, it would be over-cooked on the outside and under-cooked on the inside.
It’s not gluten-free, but it can be made that way with one simple swap!
The only part of this cheesecake that contains gluten is the graham cracker crust. Use gluten–free graham crackers and pulse them into crumbs to create a gluten-free crust. Everything else listed here should already be naturally gluten-free, but always check your labels just in case.
Before baking: Separate the springform side and bottom part. Then, take the bottom part of the pan and lay it down on a sheet of parchment paper. Use a pencil to trace around the bottom of the pan. Keep in mind that the circle will need to be just a little bigger than the bottom of the pan.
Cut out the circle you traced. Put the spring form back together. Spray the springform with cooking spray and fit the parchment paper circle on the bottom.
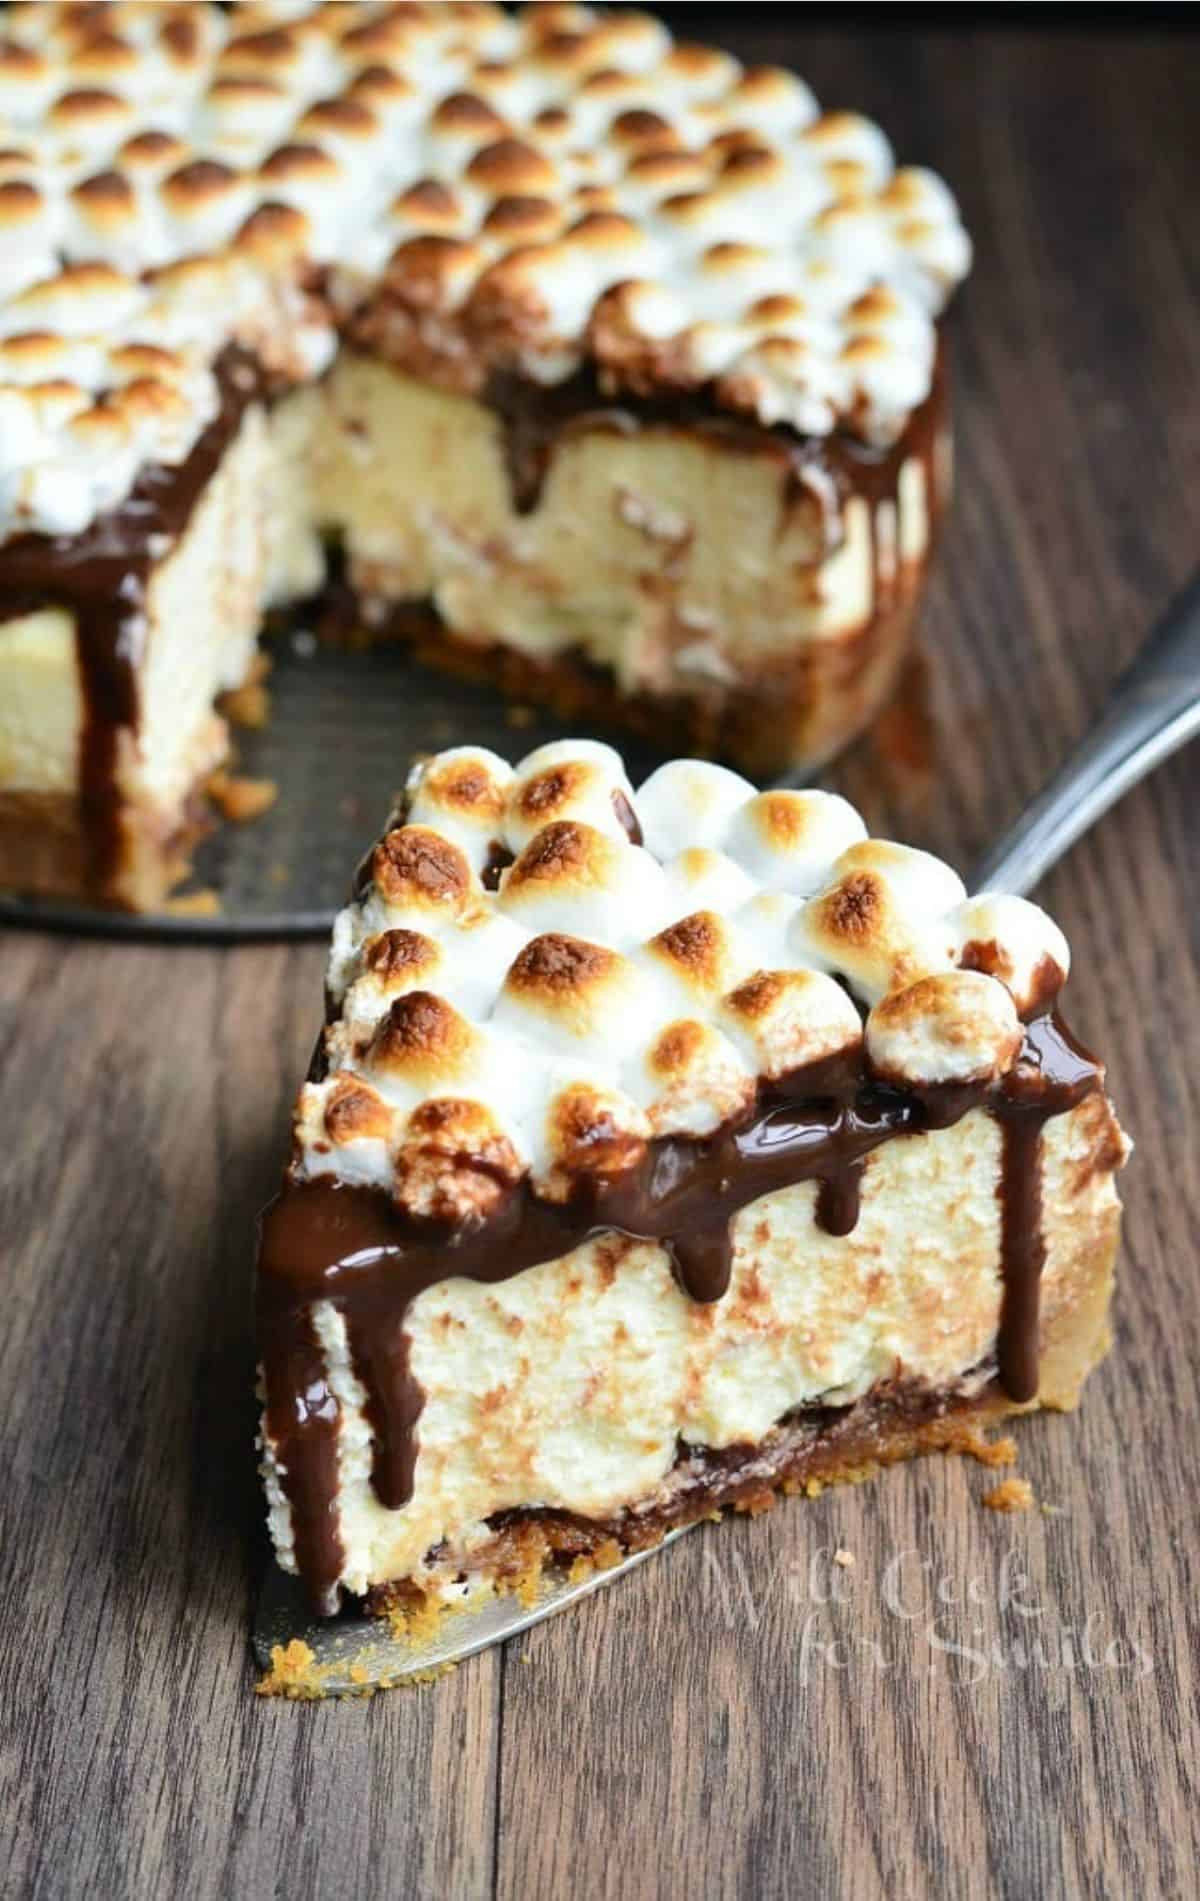
After baking: When you are ready to take the cheesecake out, make sure to use large, hard spatula. Have the serving dish or the cardboard cake circle ready.
Carefully slide the spatula in between the parchment paper and the bottom of the springform pan. Gently pull the cheesecake off of the springform and right onto the serving dish. Keep them side by side, and make sure you don’t tilt the cheesecake pan!
How to Store S’mores Cheesecake
Make sure to store the cheesecake in the refrigerator and keep it covered tightly with plastic wrap. Properly stored, s’mores cheesecake will stay fresh for up to 5 days.
I recommend simply storing it in the same pan it was baked in.
How to Freeze S’mores Cheesecake
If you plan on freezing s’mores cheesecake, you must do so without the toppings.
Once cheesecake has been cooled to room temperature, run a butter knife along the inside of the spring form pan to separate the cheesecake from the pan. Place the pan with cheesecake in the freezer and freeze for about an hour.
Carefully take off the side portion of the spring form. At this point, you can either keep the bottom of the spring form with the cheesecake or transfer it onto a piece of thick cardboard cake holder covered with aluminum foil.
Wrap the cheesecake and the bottom of the pan with plastic wrap in 2-3 layers. Then, wrap the whole thing with aluminum foil. As an added protection from air, you can place the whole things in a large, zip-lock freezer bag, but that’s not necessary.
Make sure to date and label before placing cheesecake back in the freezer. This cheesecake will stay fresh in the freezer for 2-3 months.
To thaw frozen cheesecake, make sure to do so slowly. Place cheesecake from freezer into the refrigerator and let it thaw overnight.
More Cheesecake Recipes To Try
If you’ve made this recipe and found a lot of good information here, PLEASE leave a 🌟 star rating! Let me know how you liked it by leaving the 📝 comment below as well. Don’t forget to subscribe to my newsletter!
S’Mores Cheesecake Recipe
Ingredients
Crust:
- 1 ½ cups graham cracker crumbs
- ½ cup brown sugar
- 1 tsp vanilla extract
- 5 Tbsp melted unsalted butter
- ¾ cup mini chocolate morsels
- 1 cup marshmallows
Cheesecake:
- 32 oz cream cheese softened
- ½ cup sour cream
- 2 eggs
- ¾ cup heavy cream
- ¾ cup white granulated sugar
- 2 Tbsp corn starch
- 2 tsp vanilla extract
Topping:
- 10 oz hot fudge topping warmed
- 2 cups marshmallows
Instructions
- Preheat the oven to 325 and grease a 9 inch spring form. You will need a large roasting pan (one that’s bigger and longer than the spring form. I use the aluminum foil disposable ones.)
- In a small bowl, combine graham cracker crumbs, melted butter, vanilla extract and brown sugar. Mix very well.
- Spread crumb mixture in the bottom on the spring form, evenly, pressing it over the bottom and half way up the sides.
- Spread mini chocolate morsels and marshmallows over the bottom, evenly.
- In a bowl of an electric mixer, beat cream cheese on medium-high speed until smooth and fluffy. Scrape sides and bottom on the bowl and beat for another minute.
- Add corn starch and sugar and mix until combined.
- Beat in eggs until well incorporated.
- Add sour cream, vanilla extract, and heavy cream and beat until all mixed very well.
- Transfer batter into the spring form and spread in evenly. (If you are not sure about your springform holding up in water, you can wrap the springform in heavy duty aluminum foil from bottom up to the sides.)
- Place roasting pan into the oven and place cheesecake spring form inside the roasting pan. Carefully add water to the roasting pan, about half way up the side of the spring form.
- Bake for 90-95 minutes. Turn off the oven and open the oven door half way. Let cheesecake rest for 10 minutes and take it out of the oven.
- Let it rest for 10 minutes on the counter and then gently run a butter knife between sides of the cheesecakes and the springform to carefully separate it. (You don’t actually have to take the cheesecake out of the pan until ready to serve.)
- Cool cheesecake for an hour.
- Turn on the broiler in the oven.
- Spread warm hot fudge over the top of the cheesecake and spread marshmallows evenly on top.
- Place cheesecake back in the center of the oven, under the broiler. Let marshmallow toast for only 30-35 seconds. Watch it because they toast very quickly. Take out the cheesecake once marshmallows are lightly browned.
- Cool cheesecake completely, cover gently and refrigerate for at least 4 hours.
Video
Notes
- Water Bath: remember, DO use the water bath technique, it does strongly affect the texture of the cheesecake for the better.
- How To Tell If Cheesecake If Done: You can tell the cheesecake is baked when the edges are set and the center is slightly soft and jiggly. As it cools in the oven and on the counter, the center will continue to set more and become more firm. DO NOT insert a knife or toothpick into the center since that may cause the dessert to crack.
- Cooling: DO cool the cheesecake is three steps: 10 minutes in the turned off oven, on the counter, and chill in the refrigerator.
Nutrition
All images and text ©Lyubov Brooke for ©Will Cook For Smiles. Please do not use my images without prior permission. If using my posts in collections and features, please link back to this post for the recipe.
Disclaimer: Nutrition information shown is not guaranteed to be 100% accurate as most ingredients and brands have variations.


I’ve got mine now in the fridge cooling for 4 hours. I had to make some educated guesses, as certain things weren’t very clear in the directions. Perhaps you could clarify these things in case I make this again
1. At what point do you remove the cheesecake from the roasting pan?
2. At what point do you remove the spring form?
3. When I poured the fudge topping over the top of the cheesecake, it ran down the inside of the spring form and covered my countertop. This leads me to believe that when I remove the spring form, which I don’t plan on doing until after the 4 hour cooling period, the crust will not be visible as it is in your photos. Is this normal?
Thank you for your time.
Hi Josh,
I’m so sorry for the late response!
I hope that all went well with the cheesecake and that you liked it 🙂
I usually don’t remove the cheesecake until I am ready to serve it. Mainly because it makes such a convenient dish to hold it in until serving. It’s easy to saran wrap if you are not serving until the next day and if you are just taking a slice at a time, the form is great to keep it in.
Although, run a butter knife along the side edge of the cheesecake (between cheesecake and springform) to gently separate it from the pan about 10 minutes after it’s taken out of the oven.
If you are serving the cheesecake for a dinner part or something nice, you can remove it after it’s been refrigerated because it will make it much easier to take off of the bottom part of the spring form. Use a large, wide spatula.
Every cheesecake is different and it’s really up to you if you want crust and sides to be visible. Some people like the look of fudge or chocolate oozing down the side of the cake because it looks appetizing. Some people like clear sides. It’s up to you. Some cheesecakes, I even cover in whipped cream or sides and top and in those cases, you can’t see the crust. But when preparing the crust, you can even make it a little thinner and go up higher on the sides, that way it’s half way up or even more. That’s really a personal preference.
I hope I answered your questions but let me know if I didn’t’ clarify something.
Thank you!!
When you take it out to cool for an hour do you take it out of the water?
Or not until you out in fridge for 4hrs?
Hi Micah,
Sorry for the late response! Yes, take it out of the water to cool down.
Thank you!
Hello! this looks wonderful and am planning on making soon! it doesnt state size of marshmallows but i see mini in pic is this sized used for inside also?
Hi Sandi,
So sorry for the late response. Yes, it’s better to use mini marshmallows for top and bottom.
Thank you so much and I hope you enjoy it 🙂
This cheesecake looks amazing! I couldn’t stop with just one slice 😉
Oh trust me, I didn’t 🙂
Thank you!
Your s”mores cheesecake looks so good but it has to many calories for me.Do you make fruit pies like apple bluberry etc.Thank you I will be following you facebook
Hi Donna!
You can find some fruit desserts on here but unfortunately, I don’t have fruit pies specifically.
Thank you so much for following me!
This looks totally yummy! so much that I am actually contemplating making it; but I have a couple questions: 1) how will I know the cheesecake is done (still jiggly? not jiggly? cracked on top? not cracked?) and 2) can I make it ahead of time? (or should I wait to put the hot fudge & marshmallows on before serving?)
Hi Ann! Thank you and I hope you will get to make it 🙂
This cheesecake shouldn’t crack because you will be making it in bain-marie and letting it rest in the open oven, but if it does, it’s not a big deal. The cheesecake will be golden brown and still jiggly at the center but set at the sides. You can definitely make it ahead of time. As stated in the directions, let the cheesecake rest for an hour and then add hot fudge and marshmallows. Toast marshmallows for a few seconds. Then let cheesecake cool completely then cover and refrigerate.
I hope you’ll let me know how you like it!
Can you put the marshmallows & chocolate on after you take it out the fridge for 4 hours ? Or is it better to Refrigerate it with the marshmallows & chocolate
Hi April! You can definitely do that after refrigerating. You will be putting it back in the oven under broiler, just to toast the marshmallows. It would only take a minute or so. (Just don’t walk away.)
This looks incredible. I’m already craving for it just by looking. I need a slice now. I will definitely make this. Cheesecake and S’mores combination is definitely heavenly!
Thank you so much, Maureen! I hope you will get a chance to make it and try it 🙂
do you have any sugar-free type recipes?
Hi Bert,
I’m so sorry but I don’t have sugar-free recipes. I have some that are “skinny” or “lightened” but not sugar free.
I use a basic cheesecake recipe that is 3 8oz bars of cream cheese, 3 eggs, 1 tablespoon of pure vanilla extract (may be omitted is you want) and 1 14oz can of condensed milk. No sugar added to the mix at all.
I just made this. It is absolutely delicious. Thank you for the recipe. This is definitely going in my favorites list! Wonderful!
Yay! I’m SO happy you liked it, Russell! Thank you 🙂
I wish I had a big slice right now! Looks fabulous!!!
And I wish I could share it with you! Thank you, Sheila 🙂
Holy cow that looks incredible! I would love a slice of this 🙂 It looks so gooey and delicious, mmm
Thank you so much, June! I hope you’ll get a chance to make it 🙂
WOWWWWW
Lyuba – this is an amazing cake!!
Really mouth-watering!
Definitely pinning
Awe, thank you so much, Winnie!! 😀
do you have to use the roasting pan or can you just bake it in the oven without it?
Hi Melanie!
You can use an aluminum roasting pan if you don’t have a permanent one. The pan is used for the bein marie technique, which is a water bath, where the cheesecake is cooked in a literal water bath. It helps keep the direct heat from the cake and results in a soft, silky texture of the cheesecake. The texture difference is the main reason for doing the water bath.
Yes, you can make the chesecake without the water bath and the cheesecake will just have a somewhat difference texture, a little more firm. If you will not use the water bath, then adjust your bake time. I believe it will take 45-55 minutes.
Holy smokes I’m glad you put an alternate cooking time and I’m glad I looked at the comments before putting this in the oven or I would have cooked it without the water bath for 90 minutes!