
Oven Baked Ribs
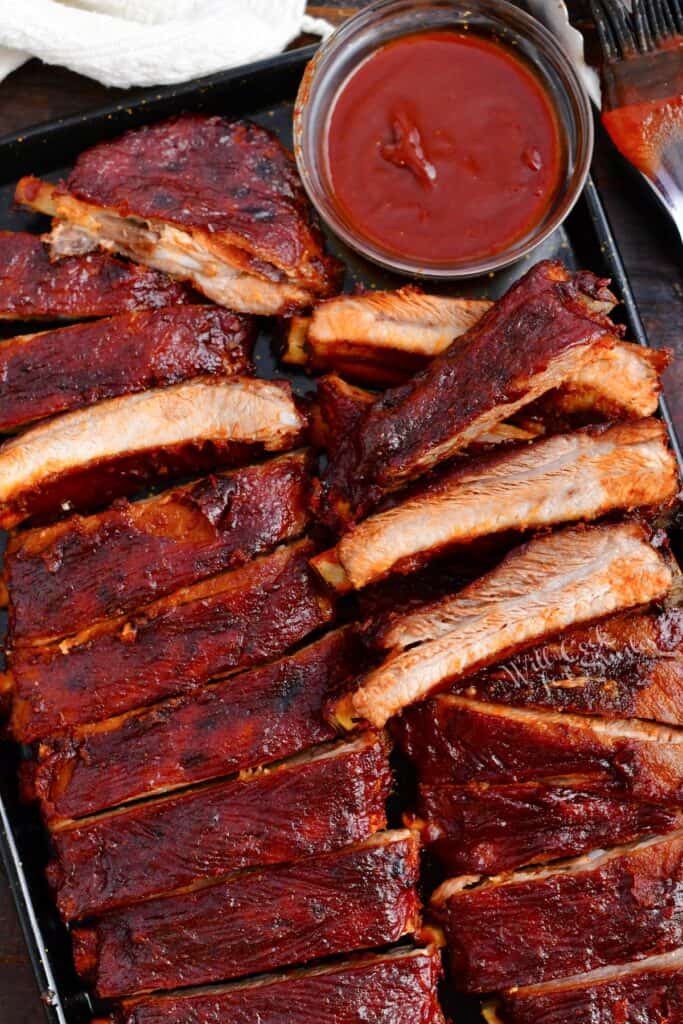
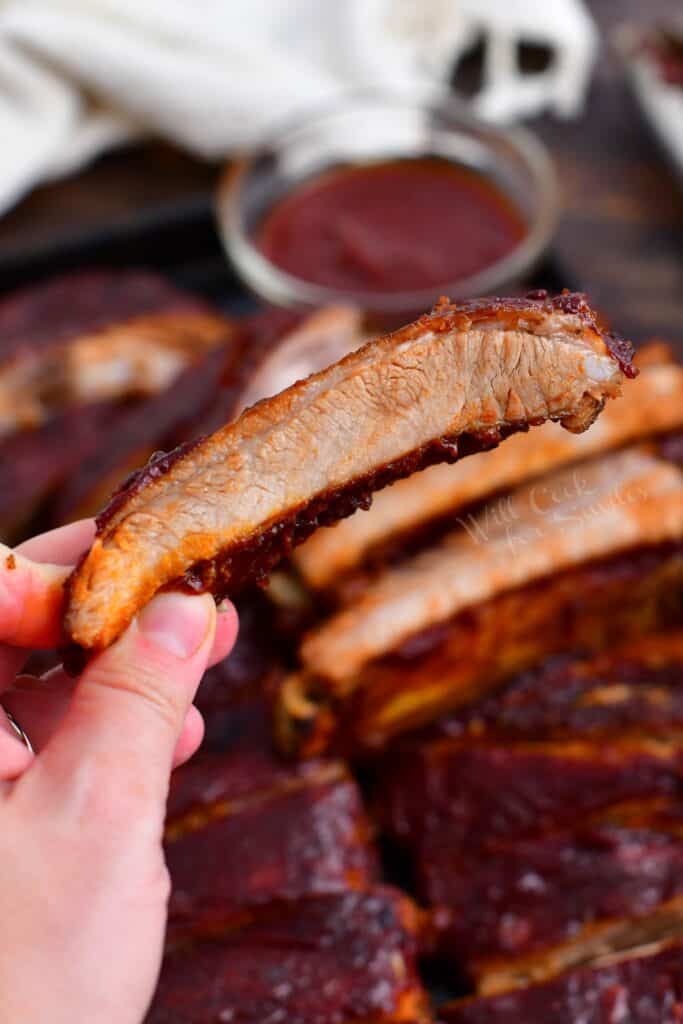
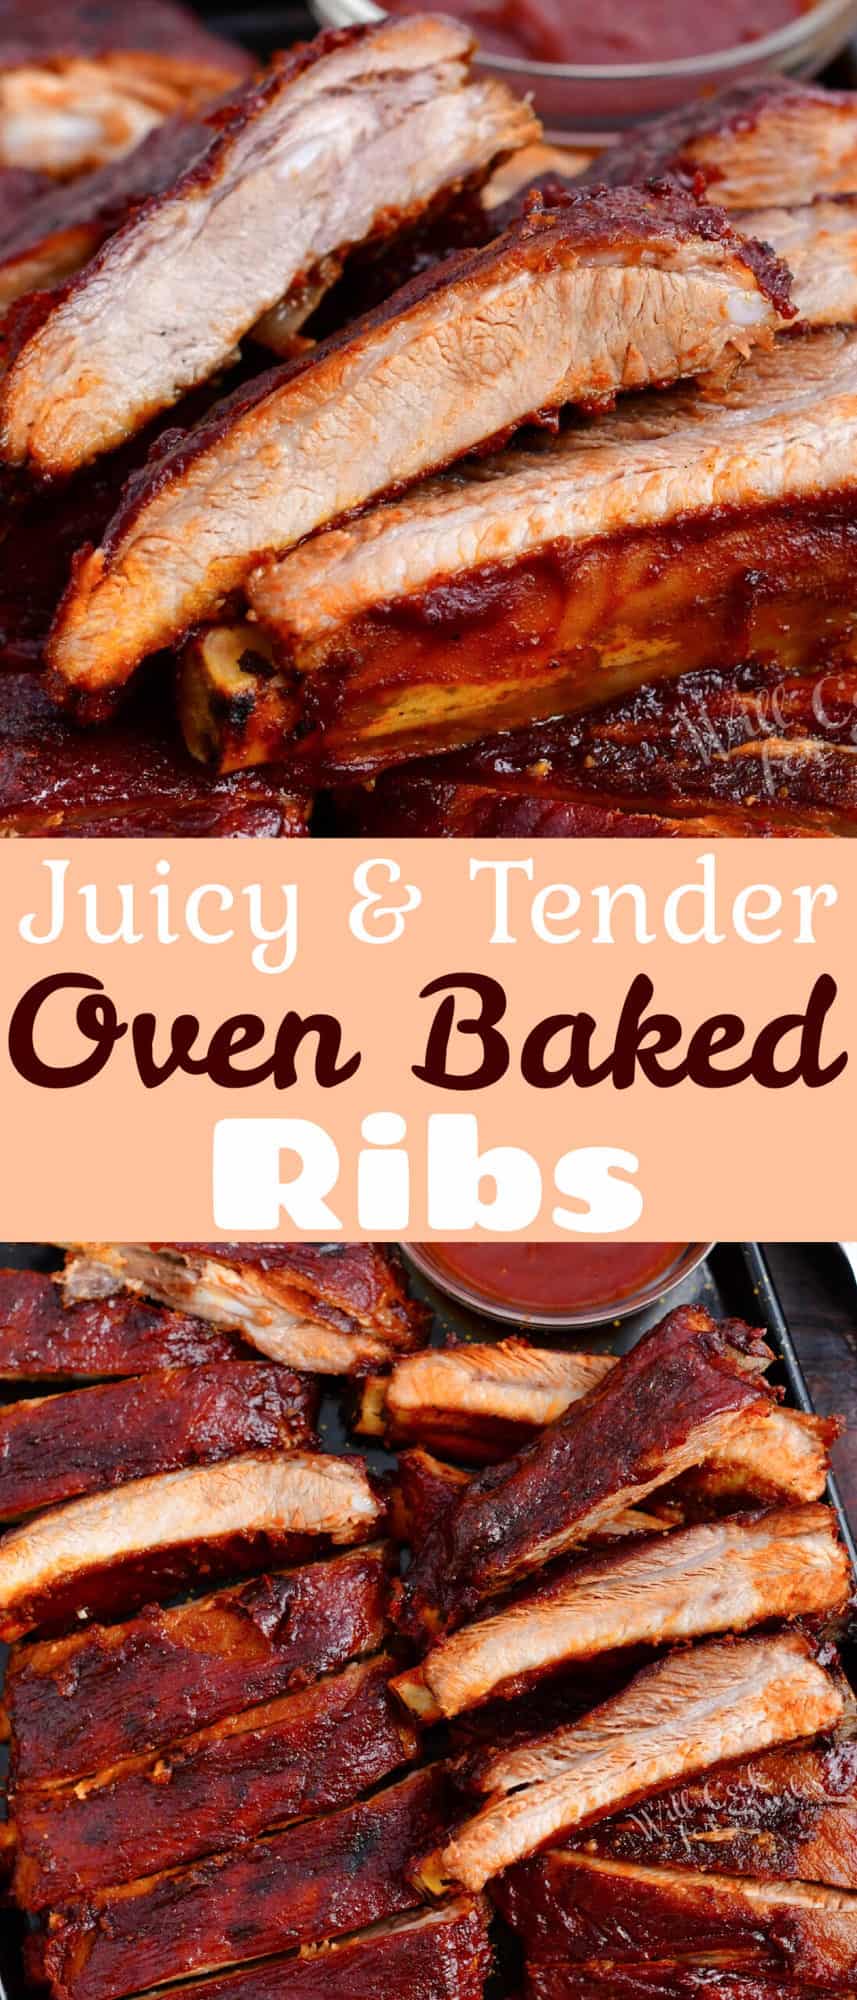
Oven baked ribs are tender, flavorful, and perfectly cooked in just a few hours. No smoker, no problem! These ribs come out just as tender and juicy as from a smoker but you can make them right in the oven. Spiced with my signature pork rib rub and slathered in an easy homemade BBQ sauce, it makes for one tasty bite.
Juicy Oven Ribs
Oven baked ribs are the epitome of comfort food and you can enjoy them throughout the year. While you may not want bake ribs in the oven in the summer months, it is a great option when it’s chilly outside. It’s also a perfect option when you simply don’t have a smoker.
In the winter, no one wants to stand out in the cold to check the smoker. It can also be hard for a smoker to maintain the temperature in the winter. It’s much more pleasant inside the house, and having the oven on for several hours will make things extra toasty as well!
Oven also provides steady and consistent heat. Some smokers are not as reliable and can be finicky. Of course, nothing much can beat smoked ribs but if you need another option, oven is the closest substitute! Plus, you can add some smokiness by adding liquid smoke to the BBQ sauce.
Oven Baked Ribs – Ingredient Notes
All you need for this pork ribs recipe is the ribs (of course) and something to flavor it! I’ve included recipes below for a homemade BBQ sauce and a special dry rub for pork ribs.
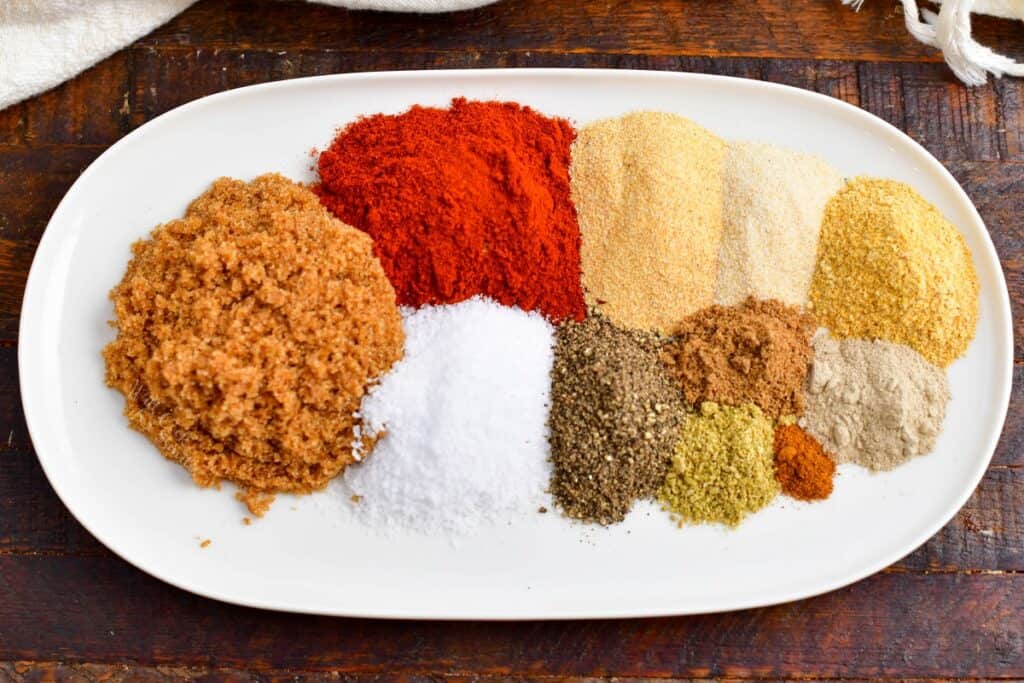
The flavors are smoky and sweet, with just a hint of heat from the pepper and cayenne. Coriander and fennel in the rub also add an earthy tartness for an extra dimension.
I also have an ultimate dry rub that works on chicken and beef as well, and it can be used for baking, grilling, or smoking.
What Kind Of Ribs To Use
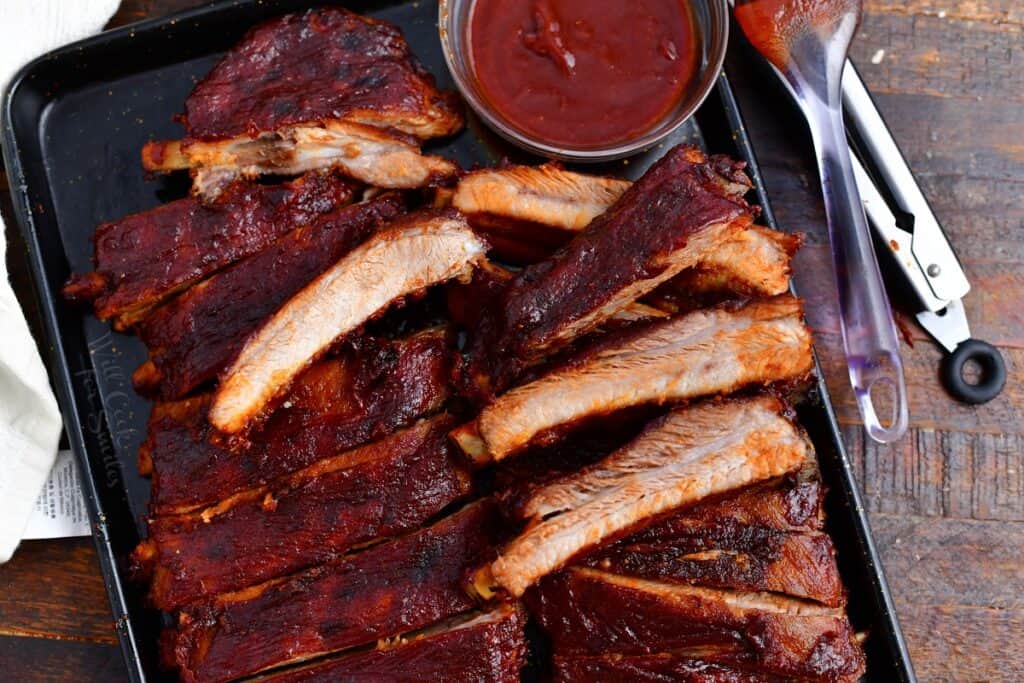
Pictured are the St. Louis variety, but we use baby back ribs and St. Louis based on availability. Cooking time will depend on the overall size and thickness more than the kind you use. If you want to read a detailed comparison between the kinds of ribs, you can read my post on pork ribs on our sister site.
- St. Louis – Although these often take longer to cook, they tend to be more flavorful because of the higher percentage of fat. The bones are also wider and thinner, creating a more uniform shape and size.
- Baby back – These are the smaller in size because they come from the section closest to the spine. The bones are more curved and contain more meat than other cuts. The meat is also leaner and more tender which is why they tend to be more expensive.
How To Cook Ribs In The Oven
Give yourself plenty of time to make this pork ribs recipe. For the best flavor, you’ll want to marinate the meat in the dry rub for up to a day in advance. Then, it will need another 4 hours or so to bake.
Preparing Ribs:
Remove the membrane.
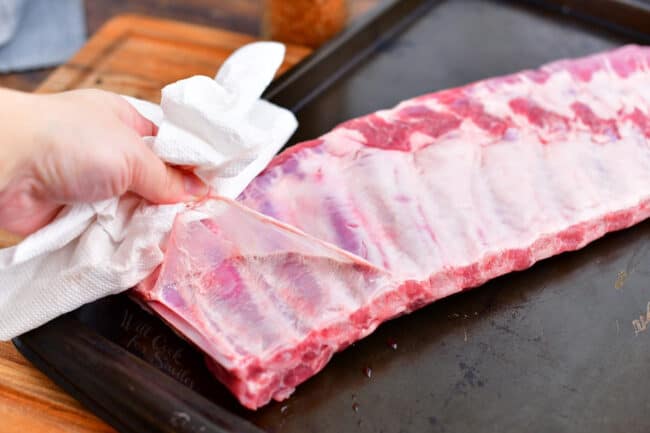
There is often a thin white covering, called silverskin, running along the underside of the rack where the bones are more prominent. Slide a small knife underneath an edge to separate it from the bone, then grip it with a paper towel and pull.
It should come off in one large sheet, but sometimes it can tear. If that happens, just repeat the process with the knife until it has been removed from both racks.
Season and marinate.
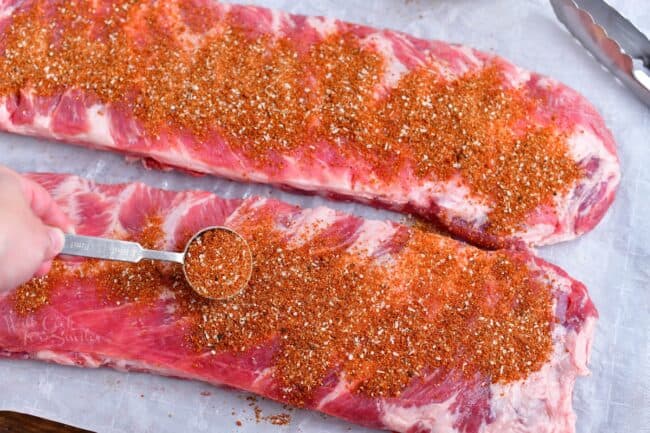
Pat dry both sides of the pork and combine all of the dry rub ingredients in a bowl. Sprinkle and pat evenly they dry rub over both sides of both racks.
Even it out with your fingers, tapping and pressing lightly so it sticks to the meat, but don’t use a side to side motion or it will come back off.
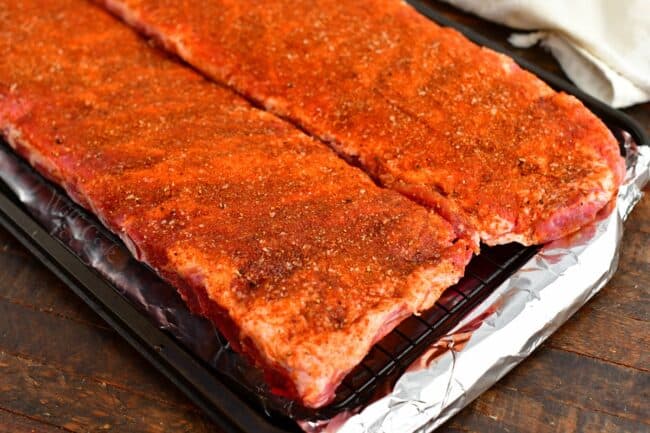
Transfer the racks to a lined baking sheet fitted with a wire rack. Cover tightly with foil or plastic wrap and place in the refrigerator for up to 24 hours.
Baking the Ribs:
Pull the racks out of the refrigerator to warm on the counter. Plan to let them rest on the counter for about 30 minutes. If they go in too cold, the meat won’t be as tender or juicy.
Preheat the oven and take off any plastic wrap if used. Do cover the pan and ribs air-tight with aluminum foil. Bake for about 3 hours depending on the size and thickness.
While ribs are baking, make the BBQ sauce. Whisk together all of the ingredients in a saucepan on the stove, then simmer over medium-low heat until thickened and slightly reduced.
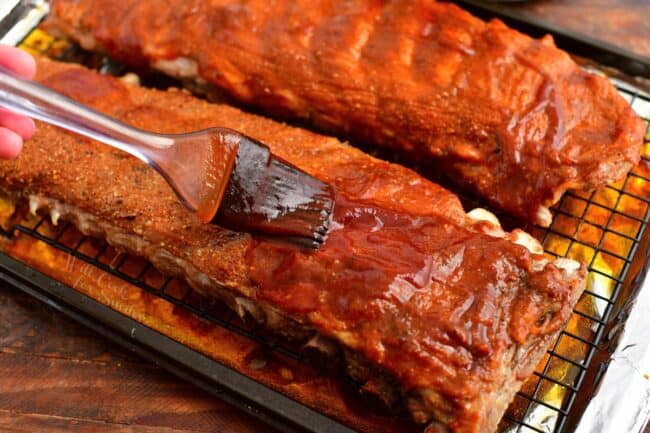
Once the timer for the meat goes off, remove the foil and brush both sides with the sauce. Return them to the oven, uncovered, and cook a little while longer. While the pork finishes cooking, the heat will turn the sauce into a deliciously sticky glaze.
Finish and serve.
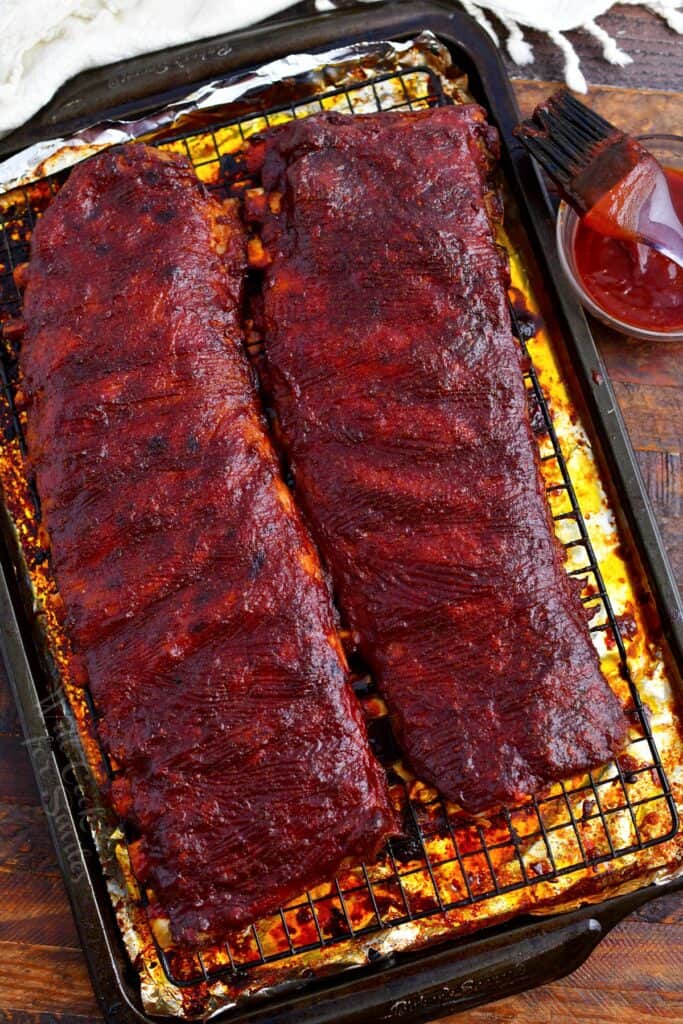
Check to make sure the ribs are cooked all the way through, then brush with more sauce and let them rest. This allows the juices to redistribute through the meat so each bite is perfectly tender and juicy.
How To Tell If Ribs Are Done
There are a variety of methods for checking the ribs, and I have detailed descriptions in the recipe card below. These are my two go-to methods though:
Bounce test: Use long metal tongs and slide it to about the middle of the rack. Pick up the rib rack and give it a gentle bounce. If the rack feels a little rubbery and the meat on top does not crack, the ribs are not ready. They will probably need 1-2 more hours. If the ribs can bend easily to almost 90 degrees and start to crack at the top pretty easy, they are done.
Meat pulling away from the bone: use gloves and try to pull two bones apart. If the meat releases off the bone easily, they are done.
Serving Suggestions
Pair this recipe with any of your favorite side dishes, going as simple or over the top as you would like! Here are a few of my favorites:
Storage and Reheating
Keep leftovers in an airtight container in the refrigerator. Use within 3 to 4 days for best results, and enjoy them cold or reheated.
Heat low and slow to keep them tender and moist, and apply another layer of BBQ sauce as needed. I prefer to wrap cold ribs in a butcher paper (or in a pocket of aluminum foil) and reheat them in the oven at 350°. Reheat them just until hot so they don’t dry out.


Oven Baked Ribs
Ingredients
- 2 full racks of St. Louis ribs
Rib Rub:
- 1/2 cup brown sugar
- 1/4 cup paprika
- 3 tbsp coarse kosher salt
- 1 tbsp black pepper
- 2 tbsp garlic powder
- 1 tbsp onion powder
- 1 1/2 tbsp ground mustard
- 2 tsp white pepper
- 1 1/2 tsp ground coriander
- 1 tsp ground fennel seeds
- 1/4 tsp cayenne pepper
BBQ Sauce:
- 1 cup ketchup
- 1/2 cup chicken broth
- 1/3 cup dark brown sugar
- 1/4 cup apple cider vinegar
- 2 tbsp molasses
- 2 tbsp maple syrup
- 2 tbsp bourbon
- 2 tbsp tomato paste
- 1 tbsp Worcestershire sauce
- 1 tsp chipotle chili powder
- 1 tsp paprika
- 1/2-1 tsp liquid smoke
Instructions
Taking the membrane off the ribs:
- Turn the ribs over onto its back and you will see a thin white covering on the bones all along the rack.
- Starting at one end, use a small knife to slide right under the membrane and gently pull up, but don’t cut it. The easiest spot to get under the membrane is right on the bone and not on the meat.
- Grab the membrane with a paper towel. (Paper towel will give you a nice grip so you can hold onto it as you pull.) Gently but firmly pull the membrane off the entire rib.
Seasoning ribs:
- I recommend giving the ribs some time to marinate in the dry rub seasoning before cooking. You can give them as little as 2 hours or as long as 24 hours. Make to sure to cover the ribs air-tight and keep them in the refrigerator until ready to cook.
- Mix all ingredients for the rib rub together in a bowl. Pat ribs on all sides with a paper towel.
- Generously sprinkle the rub in an even layer over the bottom of each rib rack, so the meat is not showing. Gently pat and even out the seasoning with your hands. Turn the racks over and do the same on the top.
- Cover the large rimmed baking sheet with aluminum foil for easy clean up and fit a wire rack inside the baking sheet. Place the ribs on the wire rack.
- Cover the ribs and pan air-tight and refrigerate for at least 2 hours. You can also prepare them as long as 24 hours ahead (but no longer).
Cooking the ribs:
- Take the ribs out of the refrigerator and let them warm up on the counter for about 30 minutes. Preheat the oven to 275°.
- Take the cover off the ribs if you used plastic wrap.
- Cover the ribs and the pan with aluminum foil air-tight. Bake ribs for about 3 hours (2 1/2 hours for smaller or thinner racks).
- While ribs are cooking, prepare the sauce. Combine all ingredients for the sauce in a sauce pot and whisk together. Bring it to simmer of medium heat, lower the heat to medium-low, and let it simmer for about 10 minutes. Make sure to stir from time to time. Set the sauce aside until ready to use.
- Take off the foil and brush rib racks with BBQ sauce on the top and bottom. Make sure to reserve some sauce to brush the ribs or dip them into the sauce later.
- After you brush the sauce with BBQ sauce, place them back into the oven, uncovered, and cook for additional 45 minutes to 1 hour. Take the ribs out and check to make sure they are done. Brush some more sauce over the top when they are done and let them rest for about 15 minutes before cutting and serving.
How to tell if ribs are done:
- Bounce test: Use long metal tongs and slide it to about the middle of the rack. Pick up the rib rack and give it a gentle bounce. If the rack feels a little rubbery and the meat on top does not crack, the ribs are not ready. They will probably need 1-2 more hours. If the ribs can bend easily to almost 90 degrees and start to crack at the top pretty easy, they are done. Meat pulling away from the bone: use gloves and try to pull two bones apart. If the meat releases off the bone easily, they are done.Toothpick test: if you are familiar with baking, you know the toothpick test. Poke a toothpick in between the rib bones all over the rib rack to feel how easily it slides in and out. If there is little to no resistance, the ribs are done.Temperature: even though it’s hard to test the temperature accurately, you can still test several larger meat areas of the rib rack (between the bones) and make sure that it’s at least 145° but these won’t be pulling away or falling off the bone. To take them to that kind of tenderness, get the ribs to 190°-203°.
Nutrition
All images and text ©Lyubov Brooke for ©Will Cook For Smiles. Please do not use my images without prior permission. If using my posts in collections and features, please link back to this post for the recipe.
Disclaimer: Nutrition information shown is not guaranteed to be 100% accurate as most ingredients and brands have variations.


Have you cooked ribs in the air fryer? Would you recommend it?
Sorry, I have not tried cooking them in the air fryer so I am not sure how they would turn out.
These ribs were a big hit with my husband and daughter (I don’t eat meat), and are not at all difficult to make. They do take a fair amount of time, but the majority of it is hands off. I discovered that I was out of apple cider vinegar when I went to make the sauce, so I use sherry vinegar instead. Served with baked beans and coleslaw, for a summery type meal. Thanks for a great recipe!
Glad your husband liked it, Vivian!
You talked about best dry rub for brisket. You showed all the spices but not amounts. I’d love to make it
Thanks Nonie
Hi Judi, I believe you are talking about my ultimate dry rub recipe (which you would use on brisket) you can click the highlighted “Ultimate Dry Rub” in the post and it will take you to the recipe and I will include the link at the bottom of this comment for the dry rub as well as my post on how to cook a brisket in the oven if you don’t have a smoker. Let me know if you have any other questions and I hope you enjoy the recipe.
https://www.willcookforsmiles.com/the-ultimate-dry-rub/
https://www.willcookforsmiles.com/brisket-recipe/