Lemon Pancakes
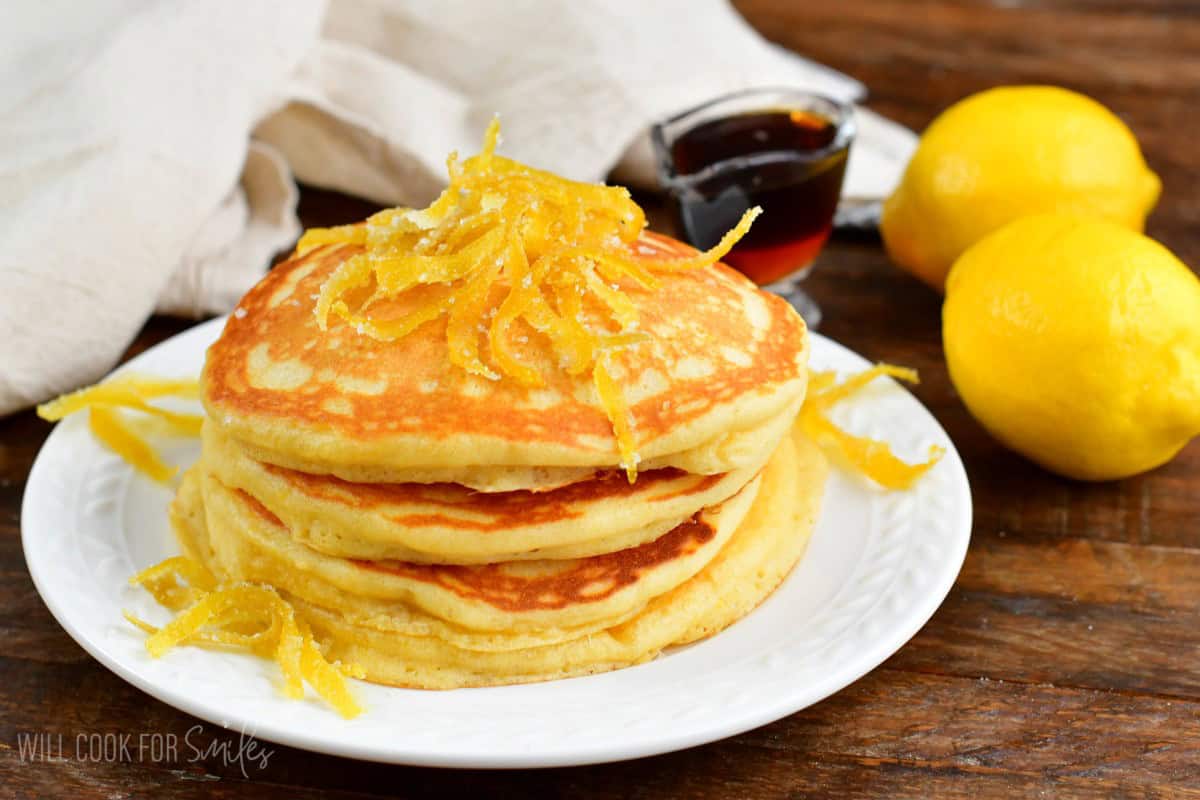
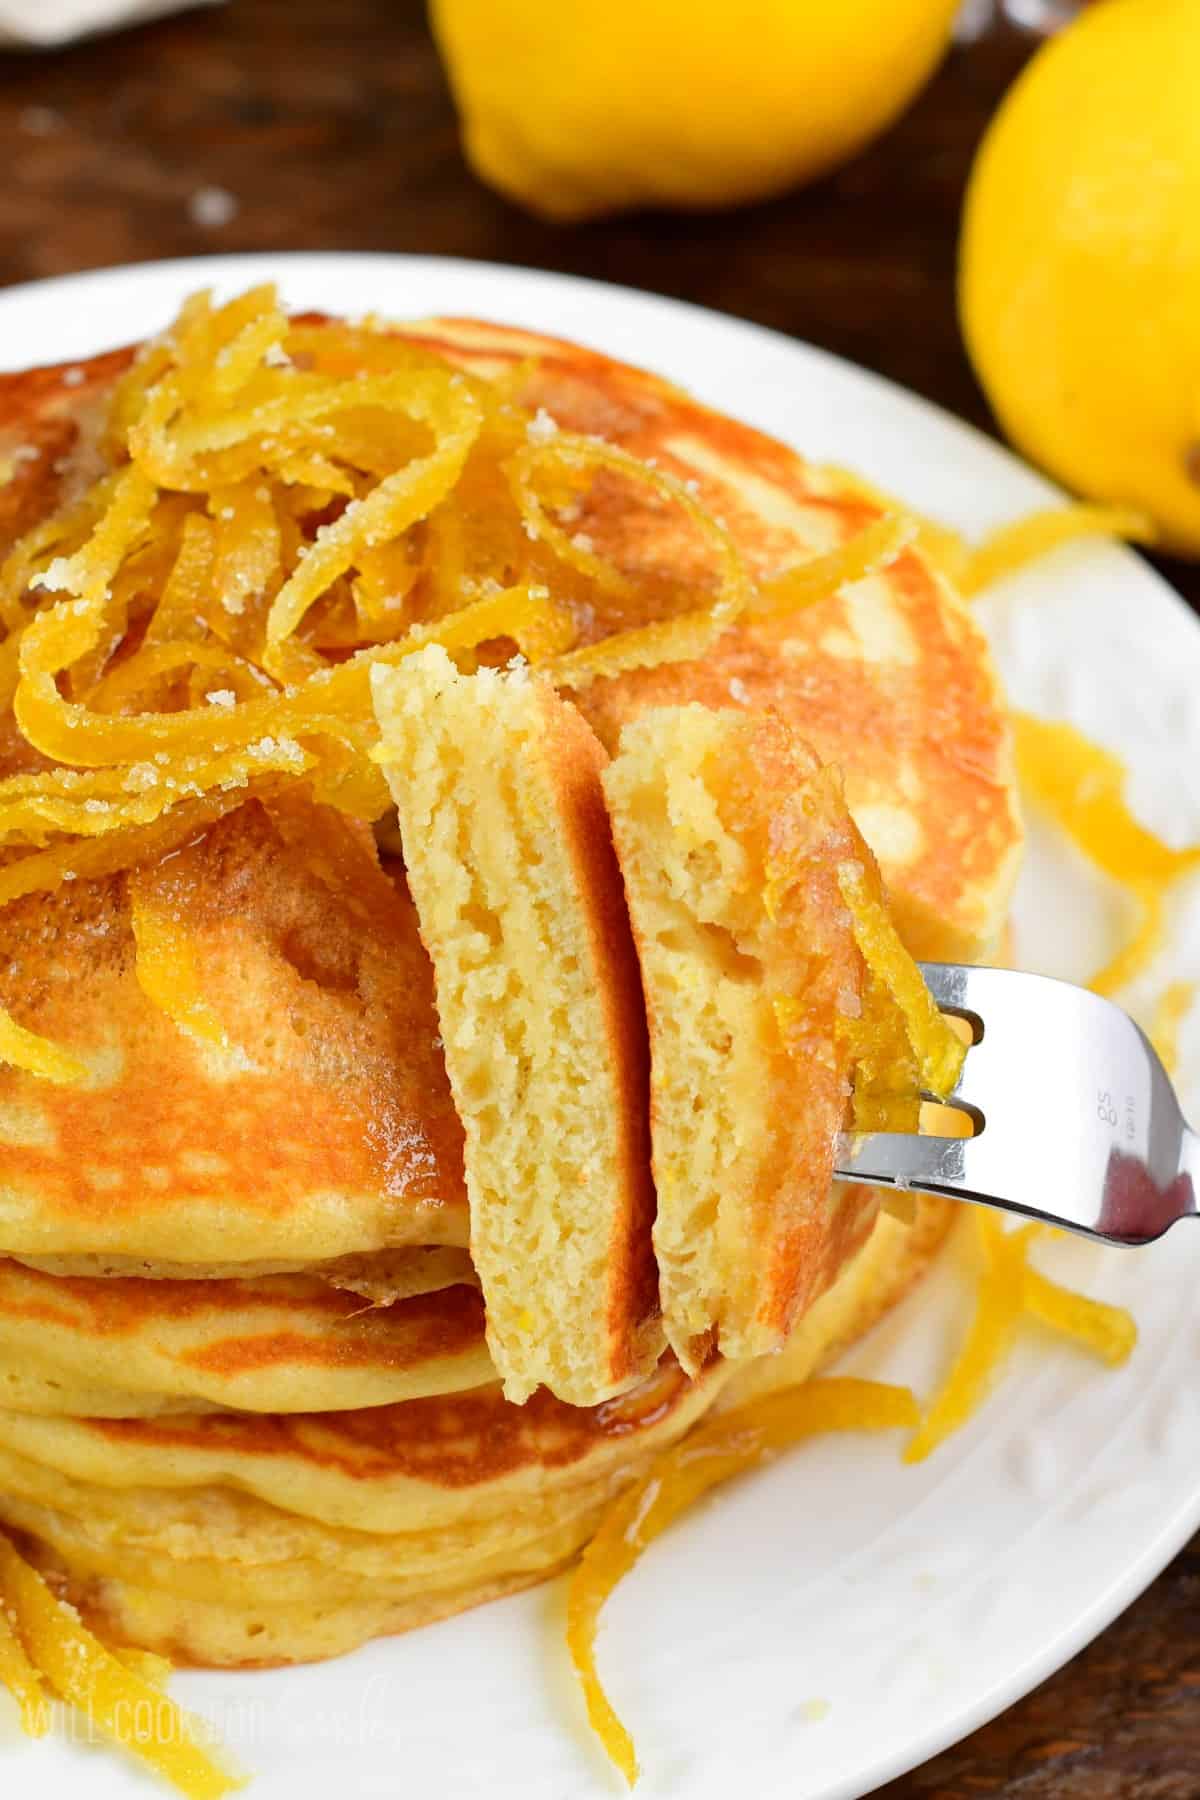
Lemon Pancakes are fluffy and soft buttermilk pancakes loaded with lemon flavor! You only need a handful of pantry staples ingredients to make this easy breakfast recipe. I love making a big stack of these homemade pancakes on weekends!
Enjoy more sweet lemon recipes like lemon cheesecake hand pies and lemon cheesecake cookie bars.
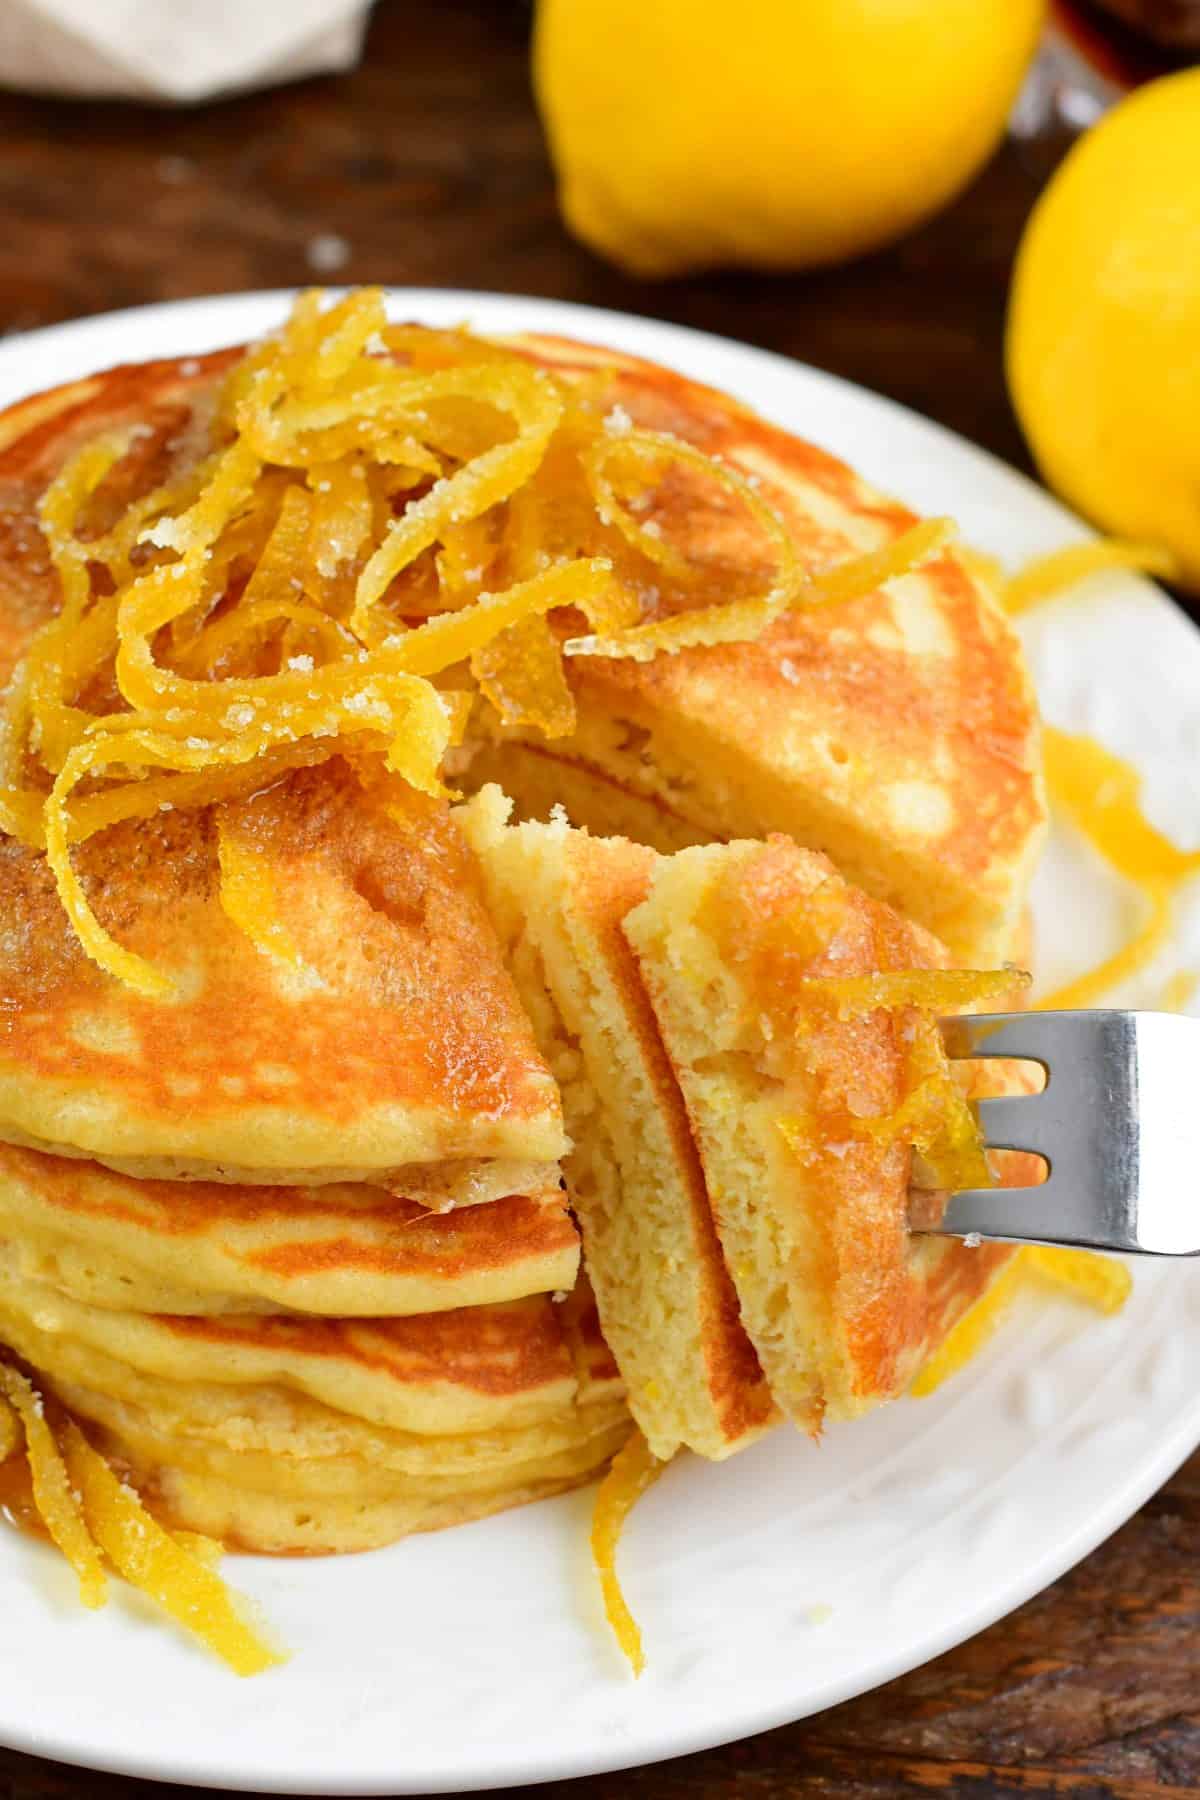
Table of Contents
I don’t know if I love any pancakes quite as much as these lemon pancakes – and that’s really saying something! I consider myself somewhat of a pancake connoisseur. And when it comes to summer recipes, nothing quite encapsulates that sunny flavor like lemon recipes.
And don’t worry, homemade doesn’t necessarily translate to hassle! In fact, these pancakes take just a few minutes to whip up and cook to absolute perfection. The only step that takes a little extra elbow grease is actually zesting the lemons, but it’s well worth the minimal effort. The flavor is so vibrant and amazing!
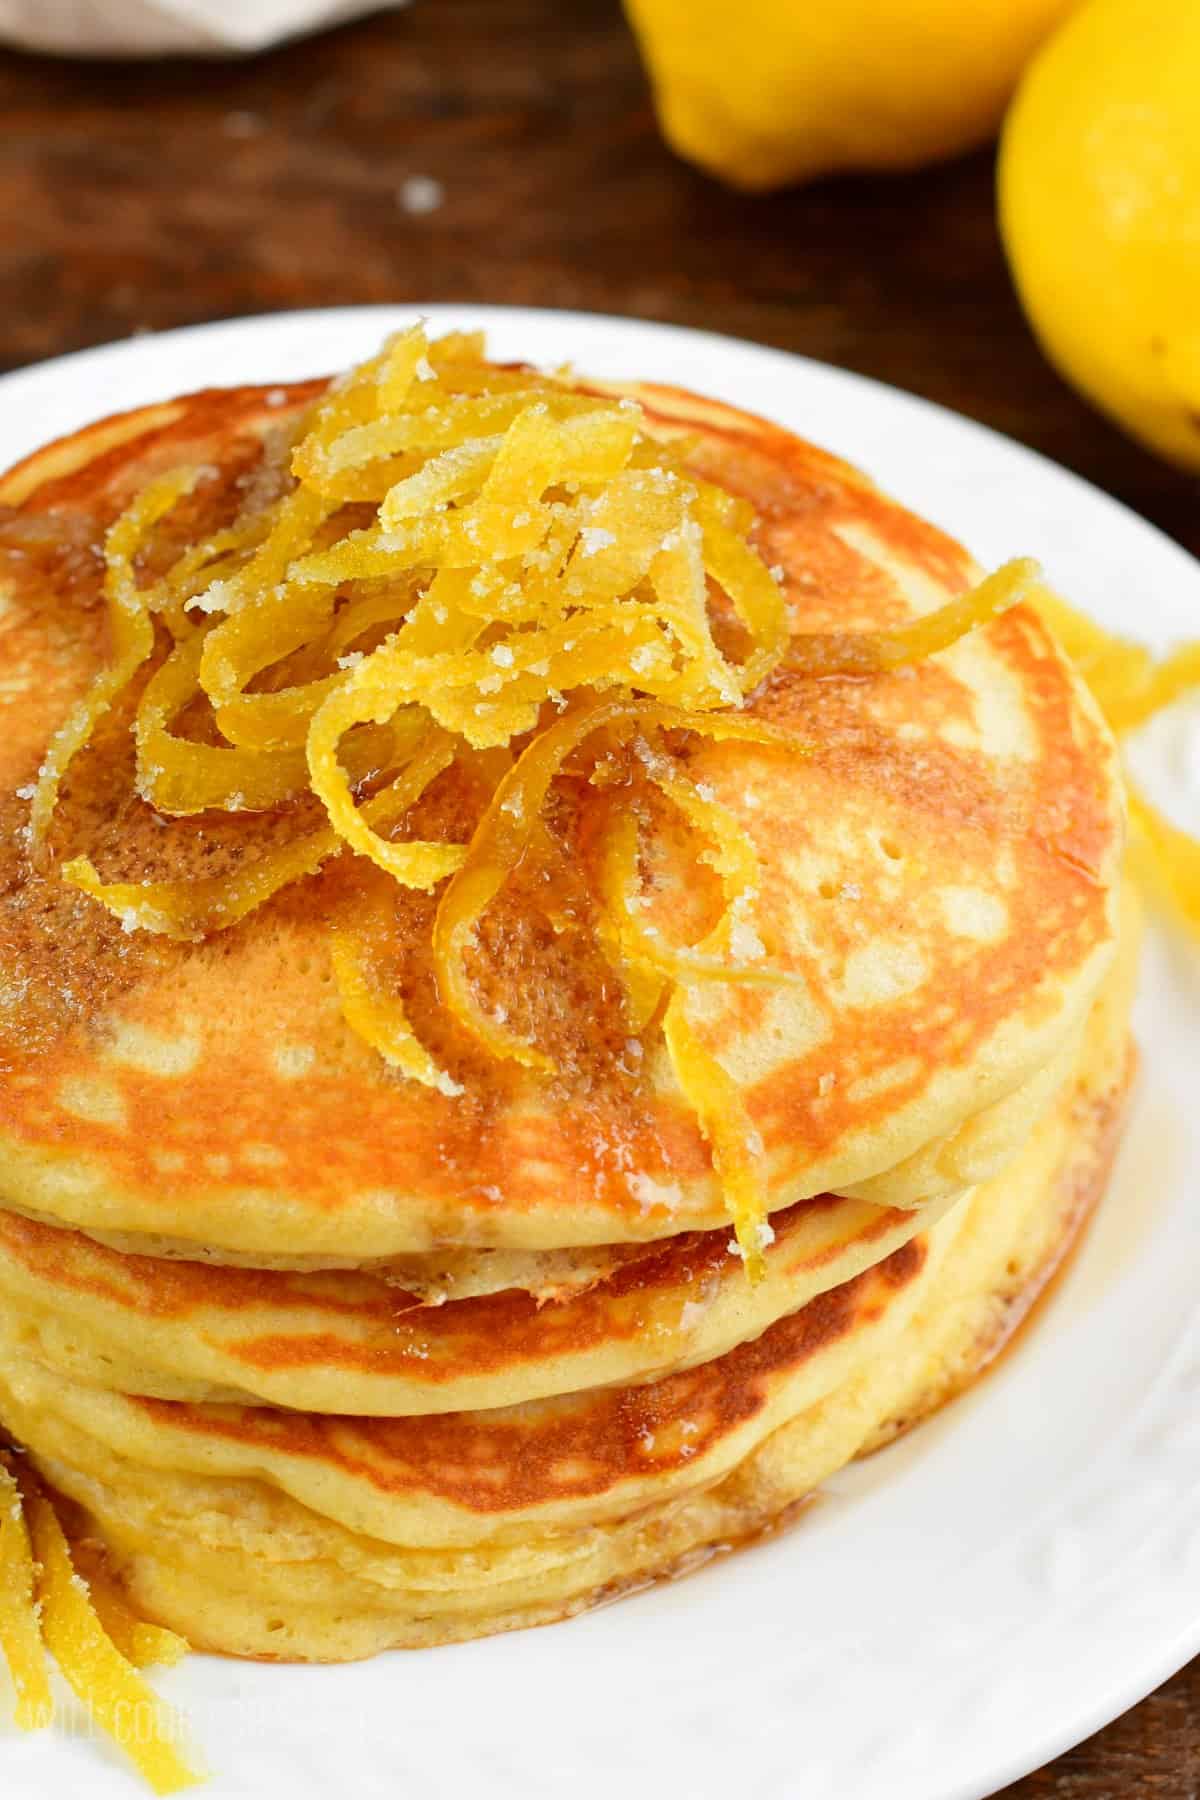
If you’re an avid baker, there’s a pretty big chance you may already have everything you need to make these pancakes in your kitchen right now. All of your basic pancake batter staples are enhanced simply by fresh lemon zest and juice, and if you’re feeling fancy, a topping of candied lemon slices.
Ingredient Notes and Tips
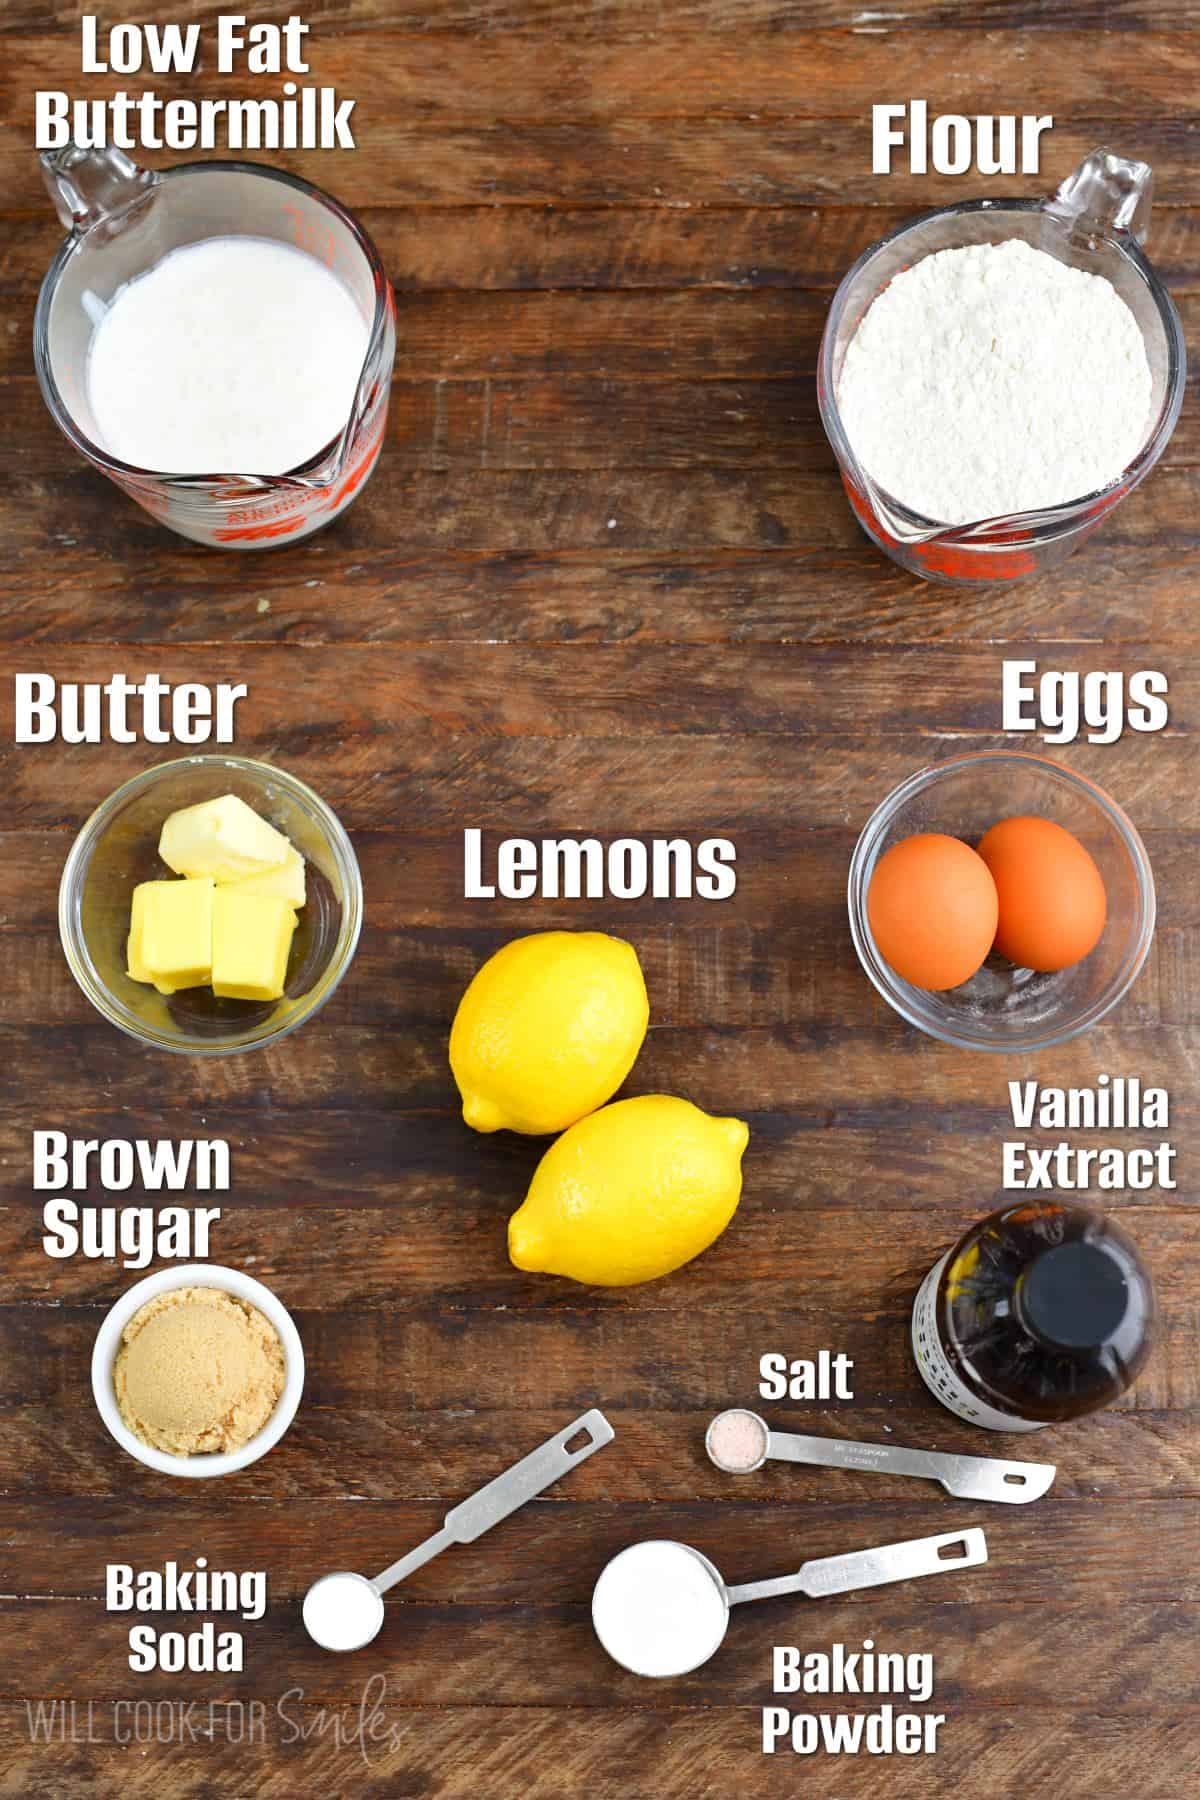
Buttermilk – low fat buttermilk is the very best option for soft and fluffy pancakes! It really does provide the best texture in so many baked goods, it’s a great ingredient to keep on hand and has a pretty long refrigerator shelf life. (Scroll down to see some other options that’ll work in a pinch if you can’t happen to find any low fat buttermilk at the store. But note, substitutes never work as well!)
Flour – use all-purpose flour for the pancakes. Make sure you spoon the flour into the measuring cup instead of dipping the cup directly into the bag! Then, cut the excess at the top with the back of a knife to level. If you dip the cup, you’ll pack the flour into the cup.
Baking Soda and Baking Powder – Make sure to use your baking powder and baking soda within 6 months of opening the container for the best results. (Tip: label opening date on the container.) Believe it or not, it does start to “expire” and loose it’s effectiveness after 6 months. If you’re wondering why your baked goods haven’t been raising properly, these could be the culprits.)
Brown Sugar – You can use light or dark brown sugar. Note that dark brown sugar does contain more molasses.
Lemons – you will need the zest and some of the juice. Save the remaining lemon juice to add to other recipes like lemon pepper chicken pasta or a lemon drop martini!
Eggs – if you can remember, try to let the eggs sit on the counter for 30 minutes before using, to warm up to room temperature.
See recipe card for complete information on ingredients and quantities.
How to Make Lemon Pancakes
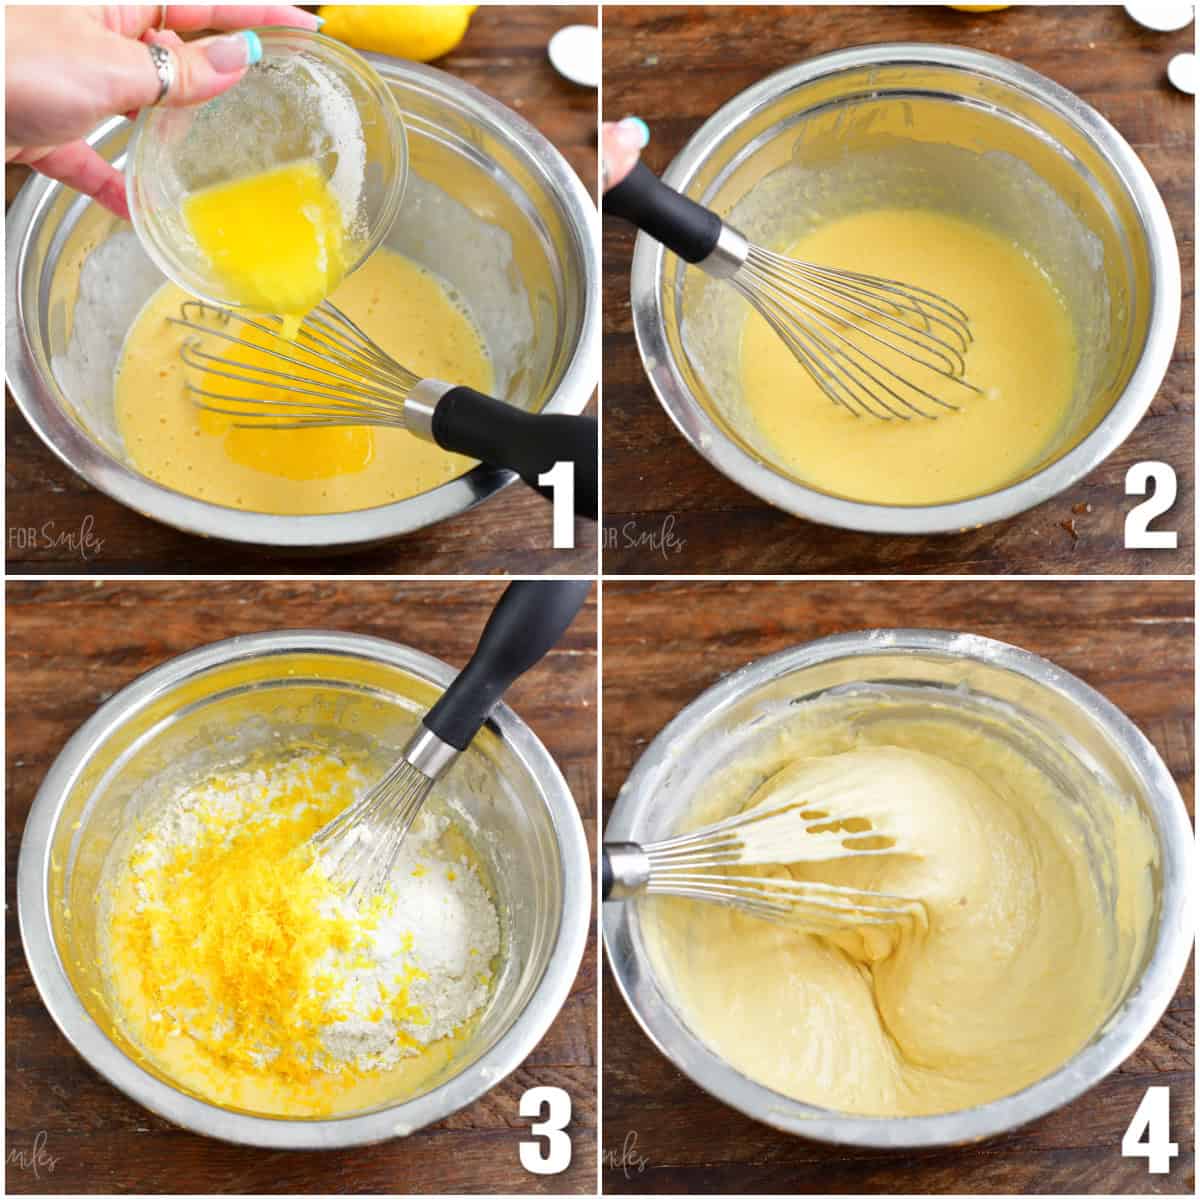
Whisk the wet ingredients. In a medium mixing bowl, combine buttermilk, eggs, vanilla extract, brown sugar, and lemon juice. Pour in melted butter (1) and whisk well (2).
Add the zest and dry ingredients. Add flour, baking powder, baking soda, salt, and lemon zest (3). Whisk just until smooth and combined. Don’t over-mix, whisk just until the ingredients are well incorporated (4).
Preheat the skillet. Let the batter sit for a few minutes as you preheat a skillet or a griddle.
PRO TIP: It’s important to preheat the pan or the griddle first, before cooking the pancakes. Preheat it over medium heat and then lower it a little bit before adding pancake batter.
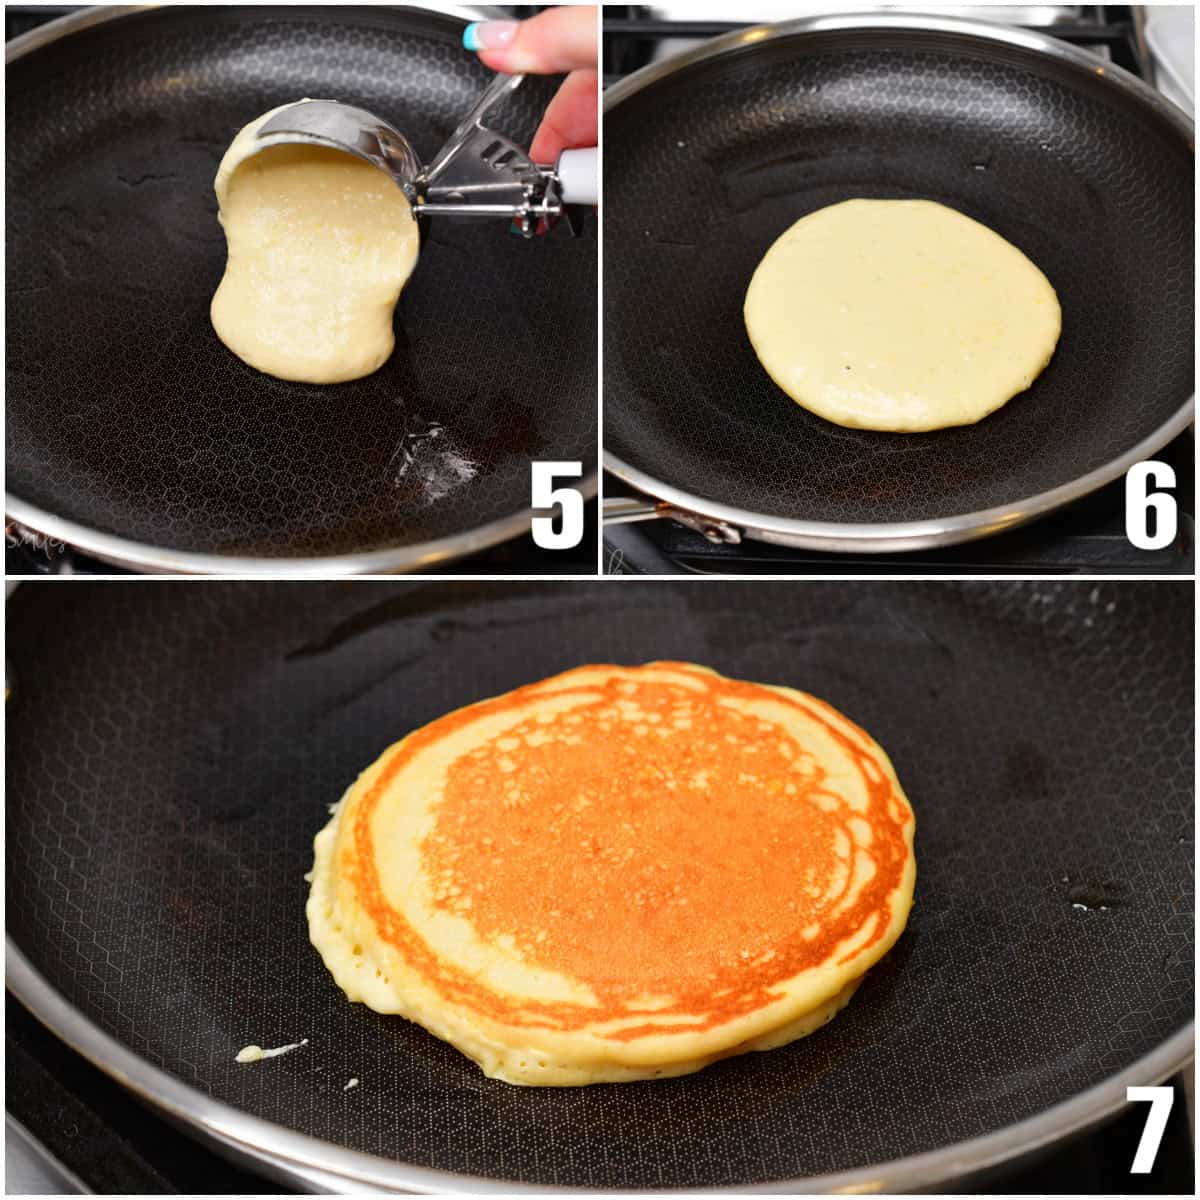
Add the batter. Add a little oil to the pan and spread it around to grease it. Use a 1/3 cup scoop or an ice cream scoop with release to get the same amount of batter for each pancake (5). Add the batter to the hot pan and let it cook without touching it (6).
Flip it. Wait for the bubbles to appear all over the top – that’s your indication that pancakes are ready to flip. Use a spatula to slide all the way under the pancake, lift it off, and use your wrist to quickly flip (7). It’ll take 4-6 minutes for each pancake to cook depending on the size.
Storing and Reheating Recommendation
It’s always best to serve lemon pancakes when they’re fresh and hot. If you have any leftover, you can store leftovers in the refrigerator or freeze them! To store them for a few days, simply keep them in an airtight container in the refrigerator. Pancakes usually keep for up to 3 days.
When you’re ready to enjoy them, reheat the lemon pancakes by giving them a few flips in a warm skillet until they’re just heated through. You can also reheat them one at a time in the microwave for a few seconds or in a toaster oven.
How to Freeze Lemon Pancakes
This is an excellent make-ahead recipe! Sometimes, I’ll make a batch of lemon pancakes at the start of the week and toss them in the freezer. That way, my family and I can enjoy them all week long!
Just make sure that the pancakes are cooled to room temperature before freezing. Then, freeze them in a single layer on a baking sheet for about an hour. (Set a timer!) Once they’re frozen, you can stack them together with a square of parchment paper between each lemon pancake. This will help keep them from sticking together.
Place them in batches in a large freezer zip-top bag and seal. Properly, these homemade lemon pancakes will freeze well for up to 3 months. When you’re ready to enjoy them again, simply reheat them in the microwave for 20-30 seconds each! If they are small enough, you could even pop them in your toaster.
Recipe FAQs
Nope! Lemon juice and lemon zest are quite different. If you add more lemon juice, you will alter the texture since you will be adding more liquid. Lemon zest is where most of the lemon flavor comes from, so that will dictate how much lemon flavor you have in the pancakes.
You have so many scrumptious options to choose from here.
Maple syrup,
butter,
whipped cream,
lemon curd,
blueberry syrup,
coconut syrup,
mango syrup,
strawberry sauce,
powdered sugar,
honey,
fresh fruit,
berry compote, and so much more!
Yes! Just use all-purpose gluten free flour instead of regular flour. Personally, I prefer the 1:1 baking all purpose gluten free flour either from Bob’s Red Mill or King Arthur. Please keep in mind that the texture will be pretty different. It will be a bit more grainy and crumbly, as many gluten free baked goods tend to be. It will still be amazing! You’ll just notice the difference in texture.
More Pancake Recipes To Try
DID YOU MAKE THIS RECIPE? PLEASE leave a 🌟 star rating! Let me know how you liked it by leaving the 📝 comment below or share and tag me on social media @willcookforsmiles. DON’T FORGET to subscribe to my newsletter!

Lemon Pancakes Recipe
Ingredients
- 2 cups low fat buttermilk
- 4 tbsp melted butter
- 2 egg
- 2 tbsp lemon juice
- 1/2 cup brown sugar
- 1 tsp vanilla extract
- 2 cups all purpose flour
- 1 tbsp baking powder
- 1/2 tsp baking soda
- 1/8 tsp salt
- 2 lemons – Zest from 2 large lemons zest only
Instructions
- In a medium mixing bowl, combine buttermilk, eggs, vanilla extract, brown sugar, and lemon juice. Pour in melted butter and whisk well.
- Add flour, baking powder, baking soda, salt, and lemon zest. Whisk just until smooth and combined. Don’t over-mix, whisk just until the ingredients are well incorporated.
- Let the batter sit for a few minutes as you preheat a skillet or a griddle.
- It’s important to preheat the pan or the griddle first, before cooking the pancakes. Preheat it over medium heat and then lower it a little bit before adding pancake batter.
- Add a little oil to the pan and spread it around to grease it.
- Use a 1/3 cup scoop or an ice cream scoop with release to get the same amount of batter for each pancake. Add the batter to the hot pan and let it cook without touching it.
- Wait for the bubbles to appear all over the top, that is your indication that pancakes are ready to flip. Use a spatula to slide all the way under the pancake, lift it off, and use your wrist to quickly flip. (It will take 4-6 minutes for each pancake to cook.)
Notes
- To Keep Pancakes Warm: Whether you’re using a pan or a griddle to cook, making several batches will give cooked pancakes time to cool. To keep them warm while cooking the rest is easy. Preheat the oven to 200° and keep cooked pancakes on a baking sheet in the oven.
- Storing: If you have any leftover, you can store leftovers in the refrigerator or freeze them! To store them for a few days, simply keep them in an airtight container in the refrigerator. Pancakes usually keep for up to 3 days.
- Reheating: reheat the pancakes in a warm, preheated skillet until they’re just heated through. You can also reheat them one at a time in the microwave for a few seconds or in a toaster oven. If the pancakes are small enough, you can even reheat them in a toaster.
- Gluten free: Just use all-purpose gluten free flour instead of regular flour. Personally, I prefer the 1:1 baking all purpose gluten free flour either from Bob’s Red Mill or King Arthur. Please keep in mind that the texture will be somewhat different. It will be a bit more grainy and crumbly, as many gluten free baked goods tend to be. It will still be amazing!
Nutrition
Originally published on Will Cook For Smiles in March 2012.
All images and text ©Lyubov Brooke for ©Will Cook For Smiles. Please do not use my images without prior permission. If using my posts in collections and features, please link back to this post for the recipe.
Disclaimer: Nutrition information shown is not guaranteed to be 100% accurate as most ingredients and brands have variations.


LEMON PANCAKES! That sounds SOOOOOO wonderful! I can’t wait to try these. I found you on Pinterest at a Board created by Finding Joy In My Kitchen! Your blog is beautiful!
This is one of those recipes that makes me wish I owned a restaurant. I beat people would line up out the door for Lemon Pancakes.
Thanks for posting this recipe! I can’t wait to try it. I have never “zested” citrus fruit (even though I grew up in Florida near all kinds of fruit trees) but I do have one of those grater things that I see in your picture so surely I can do it!
Awesome blog! Thanks again.
Wow, Gina, that is such a sweet comment! You made my day!
I did all of those things actually. My pancakes were almost too bubbly. The biggest thing was that they were a weird texture, almost gummy.
Anyways, I added flour and they normalled out. Still good breakfast.
I made these for breakfast and they looked nothing like yours. And the texture was not beautiful either. I doctored them and they were still yummy. But somewhere I went seriously wrong.
I love lemons, I love pancakes and the two together? Mmmmm I’m excited to try these. Thanks for linking up, I’m featuring these on Topsy Turvy Tuesdays this week!
these sound so delicous! Thanks so much for linking them up to Things That Make You Say Mmmmm!
Hello lover!!! Those sound amazing. I’m definitely pinning this for next weekend 🙂
Just to let you know I featured your wonderful pancakes on homework today. Come over and grab a featured button if you’d like. Have a great weekend.
Featuring YOU tomorrow from Must Try Monday!
LOVE breakfast. Love Pancakes. Can’t believe I have never made lemon pancakes before. These look amazing!
Defiantly going to be pinning these! I LOVE lemon!! 🙂 Following your delicious blog! 🙂 Come on over to my blog and if you like it I would LOVE a follow back. http://www.craftycagirl.blogspot.com
Thank you so much for sharing at Must Try Monday. I will be pinning these to my Breakfast Foods board. I love pancake recipes. Thanks again!
Yum! Pinning this!