Instant Pot Chili
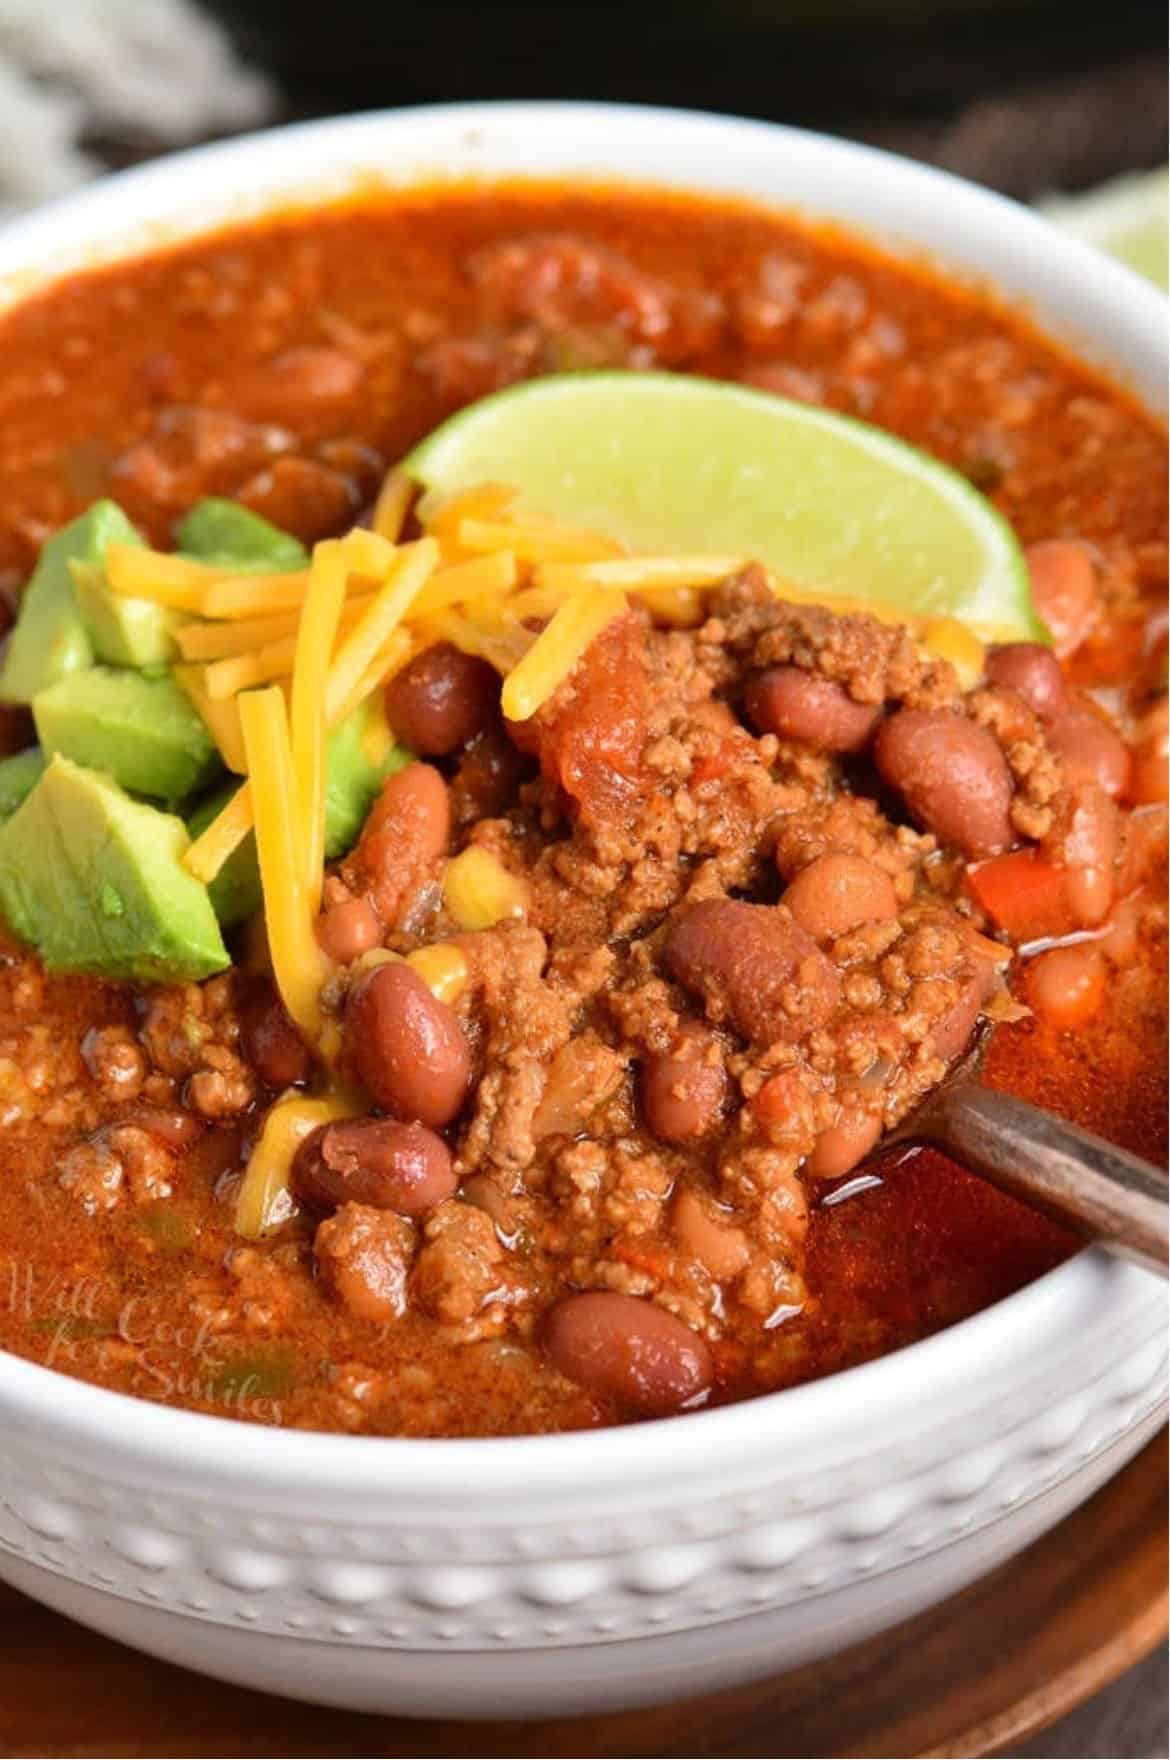
Instant Pot Chili easy to make in less than an hour! While it’s quick, it doesn’t cut any corners when it comes to flavor or heartiness. This chili is loaded with ground beef, veggies, beans, and lots of spices that really hit the spot!
When the weather drops outside, stay warm with more chili recipes like Turkey Chili and Vegetarian Chili.
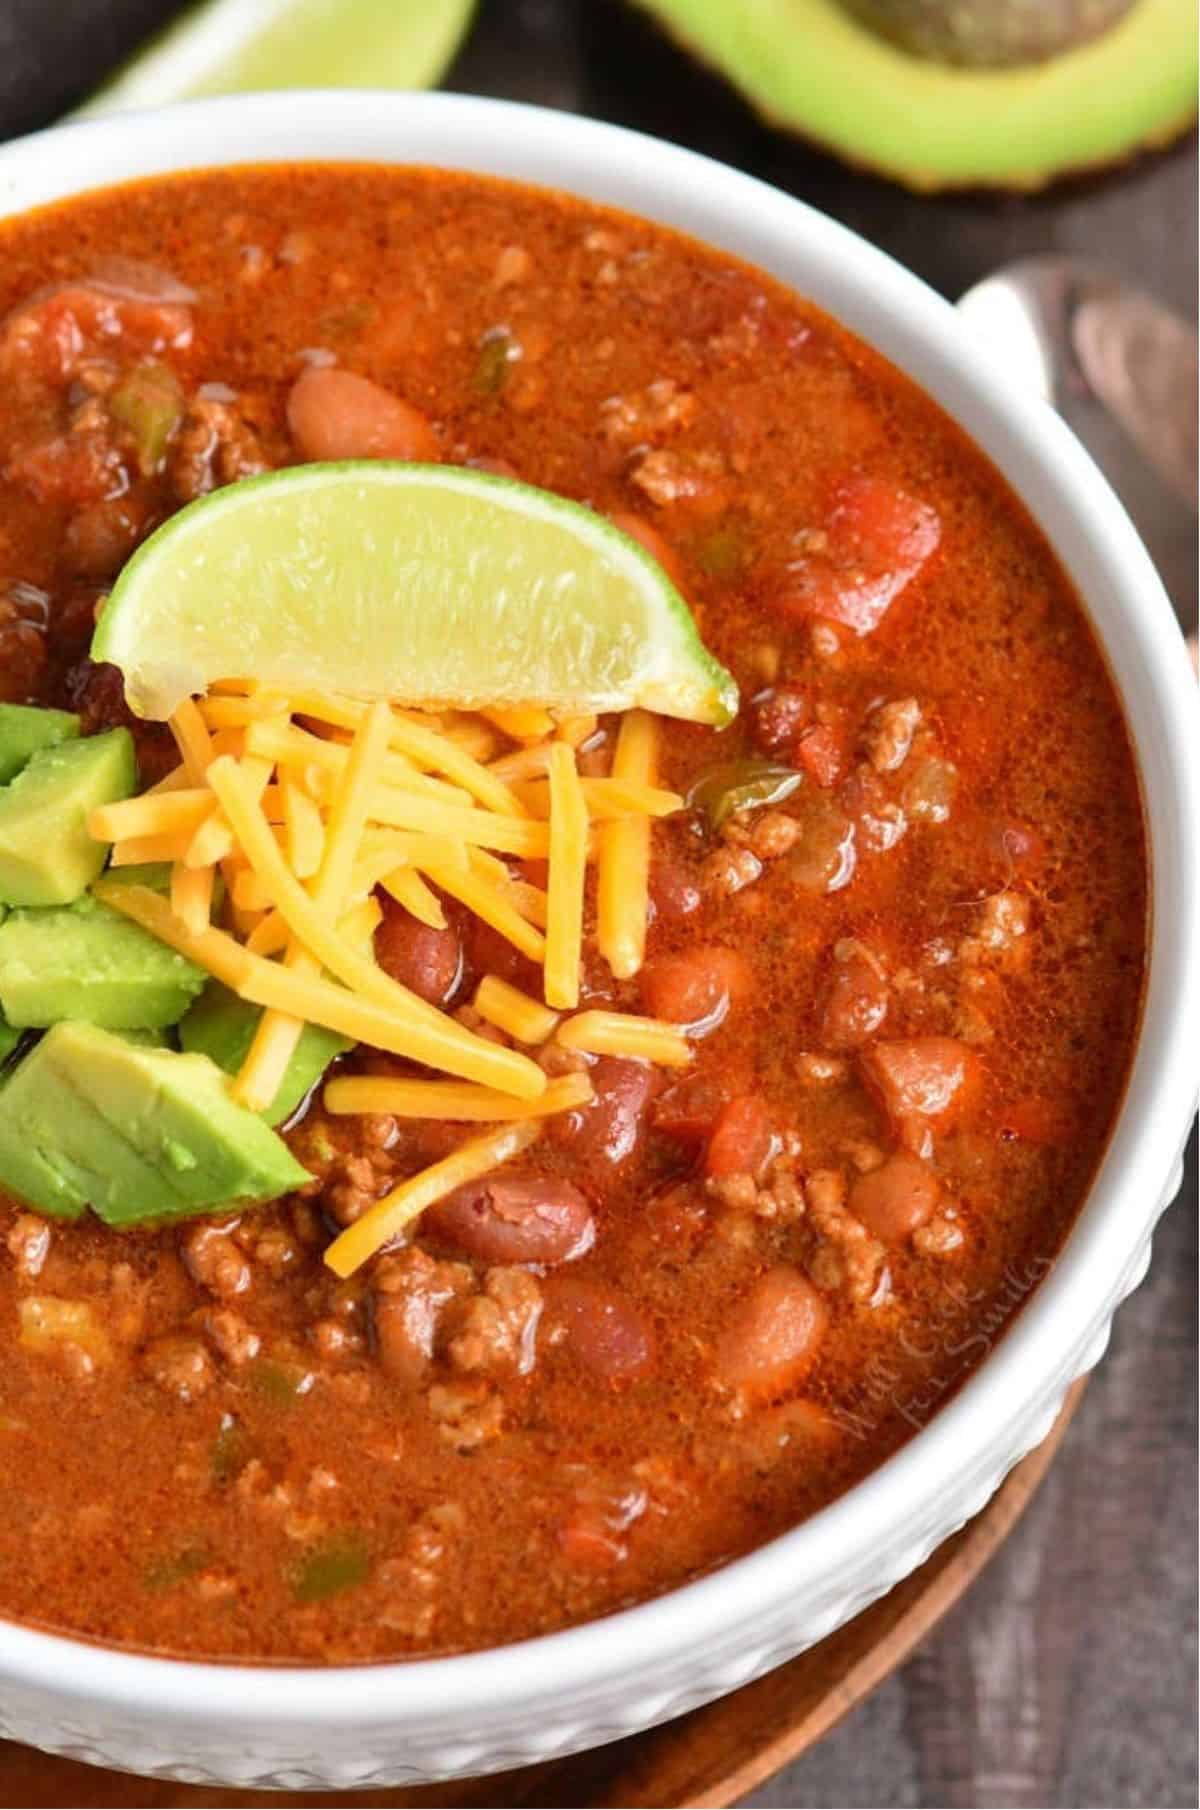
Table of Contents
Every time the temperatures outside gets a little low, it’s chili time at our house. It doesn’t even have to be a big drop in the temperature, just a few degrees is excuse enough for us.
Since my whole family loves chili, I make it pretty often. When I make chili on stove-top, it takes a good couple of hours because I like to give meat a lot of time to stew and get tender. Cooking chili in a Crockpot it takes several hours, of course. That’s why I’ve adjusted my recipe to cook it in an Instant Pot.
In less than an hour, we have flavorful, tender chili to enjoy. The biggest difference that I found between making chili on stove-top and in an Instant Pot is that chili has a little more liquid when cooked in Instant Pot.
Since liquid doesn’t cook out and evaporate in a pressure cooker like it does on stove-top, more liquid remains in the chili. I actually don’t mind our chili to be a little soupier but I do add less liquid when I make it in a pressure cooker.
Do not try to get rid of all liquids though. A pressure cooker has to have at least 1 cup of thin liquid to cook the food. So I’ve cut down beef stock to 1/2 cup. Combined with juices from sautéing meet and vegetables and juice in canned tomatoes, 1/2 cup of beef stock is enough to cook the chili in the Instant Pot.
Ingredient Notes
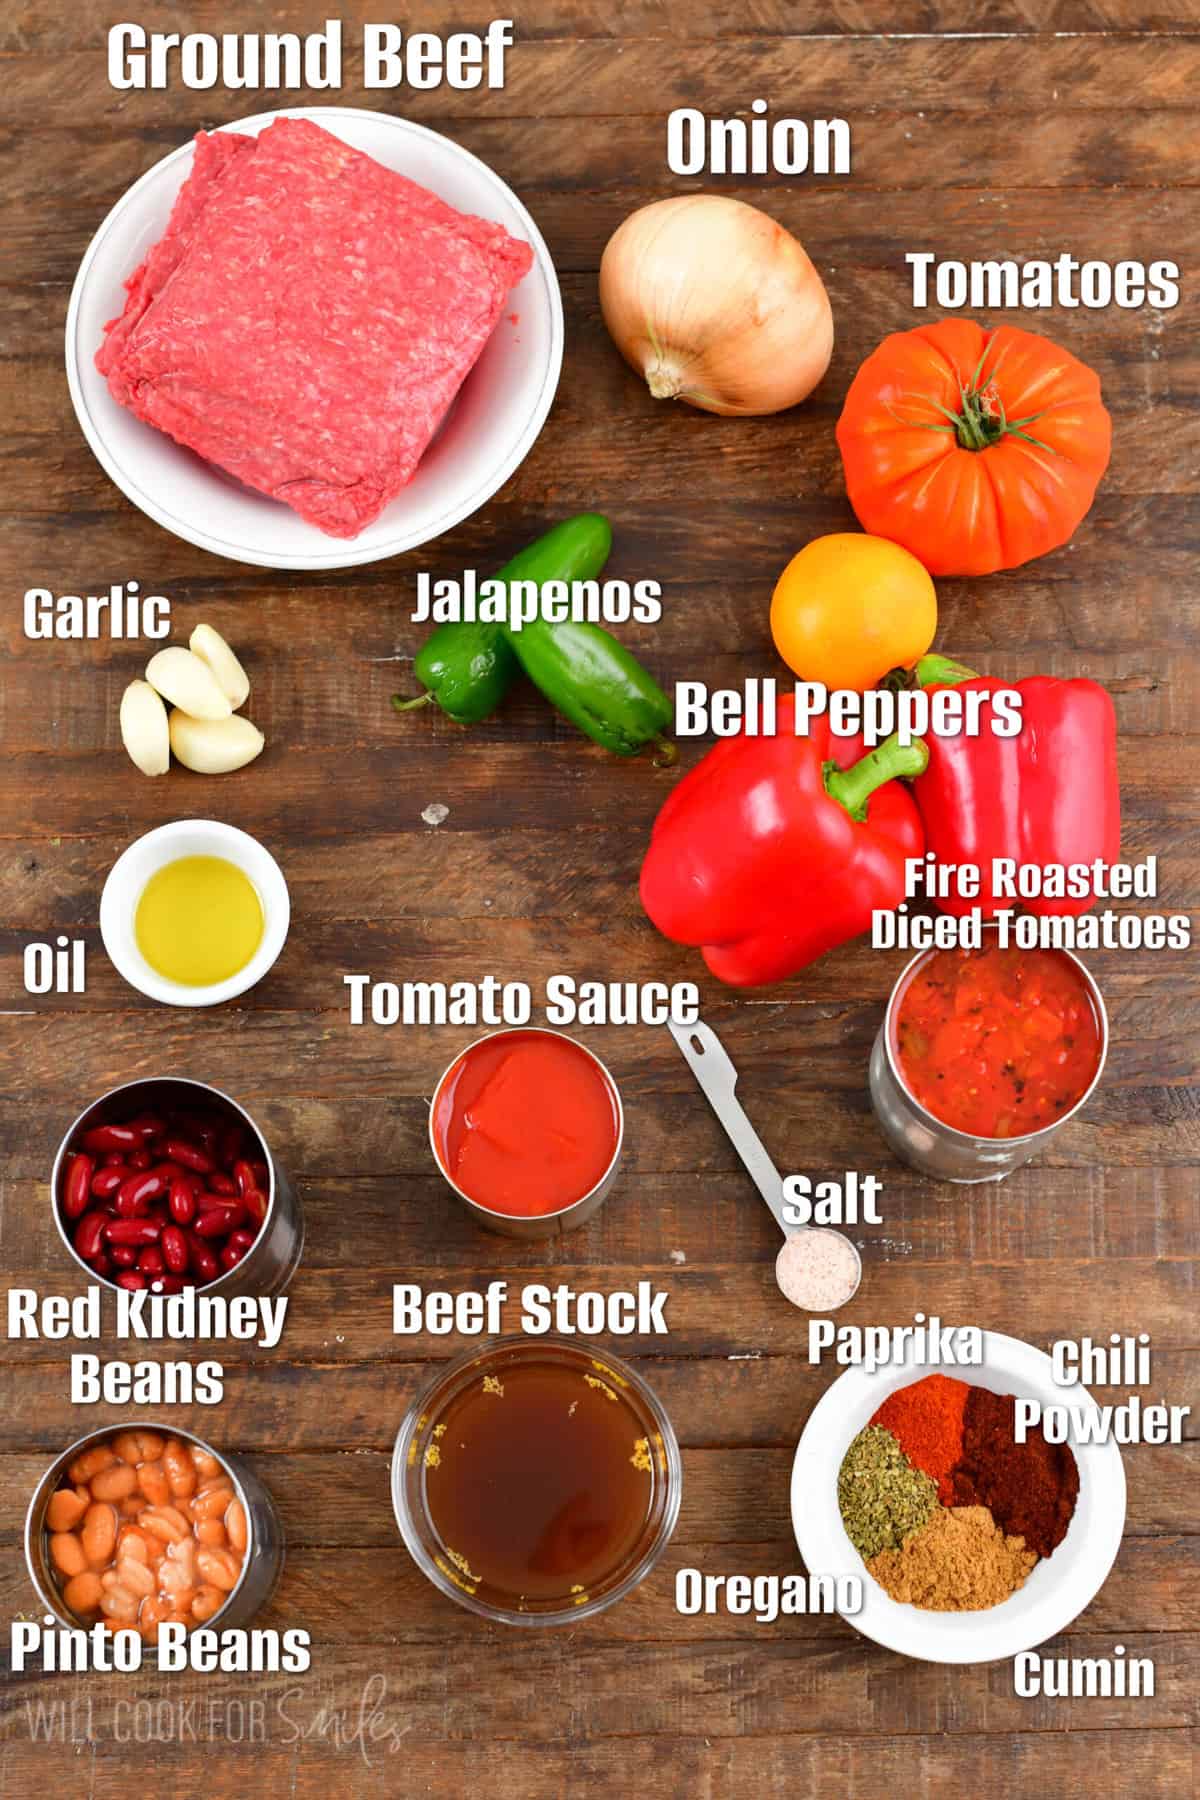
Oil – Use a neutral oil like olive or avocado.
Onion – A yellow onion is preferred for the natural touch of sweetness it has. However, a white onion also works in a pinch.
Jalapeños – If you want chili to be spicier, leave jalapeño seeds in. If you prefer to have it less spicy, choose younger jalapeño peppers with smooth green skin and discard all seeds and membrane out of jalapeño.
Ground Beef – I’ve had the best results when I use ground beef with an 85/15 meat to fat ratio.
Tomatoes – You will need fresh tomatoes on the vine, a can of fire roasted diced tomatoes, and tomato sauce. All of these contribute to both the flavor and consistency of the chili.
Beef Stock – I like to use Homemade Beef Stock when I can! Of course, store-bought stock also works, I just recommend you use “no salt added” or “low sodium'”.
Beans – You can always choose your own beans line navy, cannellini, pinto, kidney, black beans, and others. We prefer to use a combination of pinto beans and red kidney beans. Just remember to drain the beans before adding them.
Seasonings – use a combination of salt, cumin, oregano, smoked paprika and ancho chili powder.
See the recipe card below for the full list of ingredients and instructions.
How to Make Instant Pot Chili
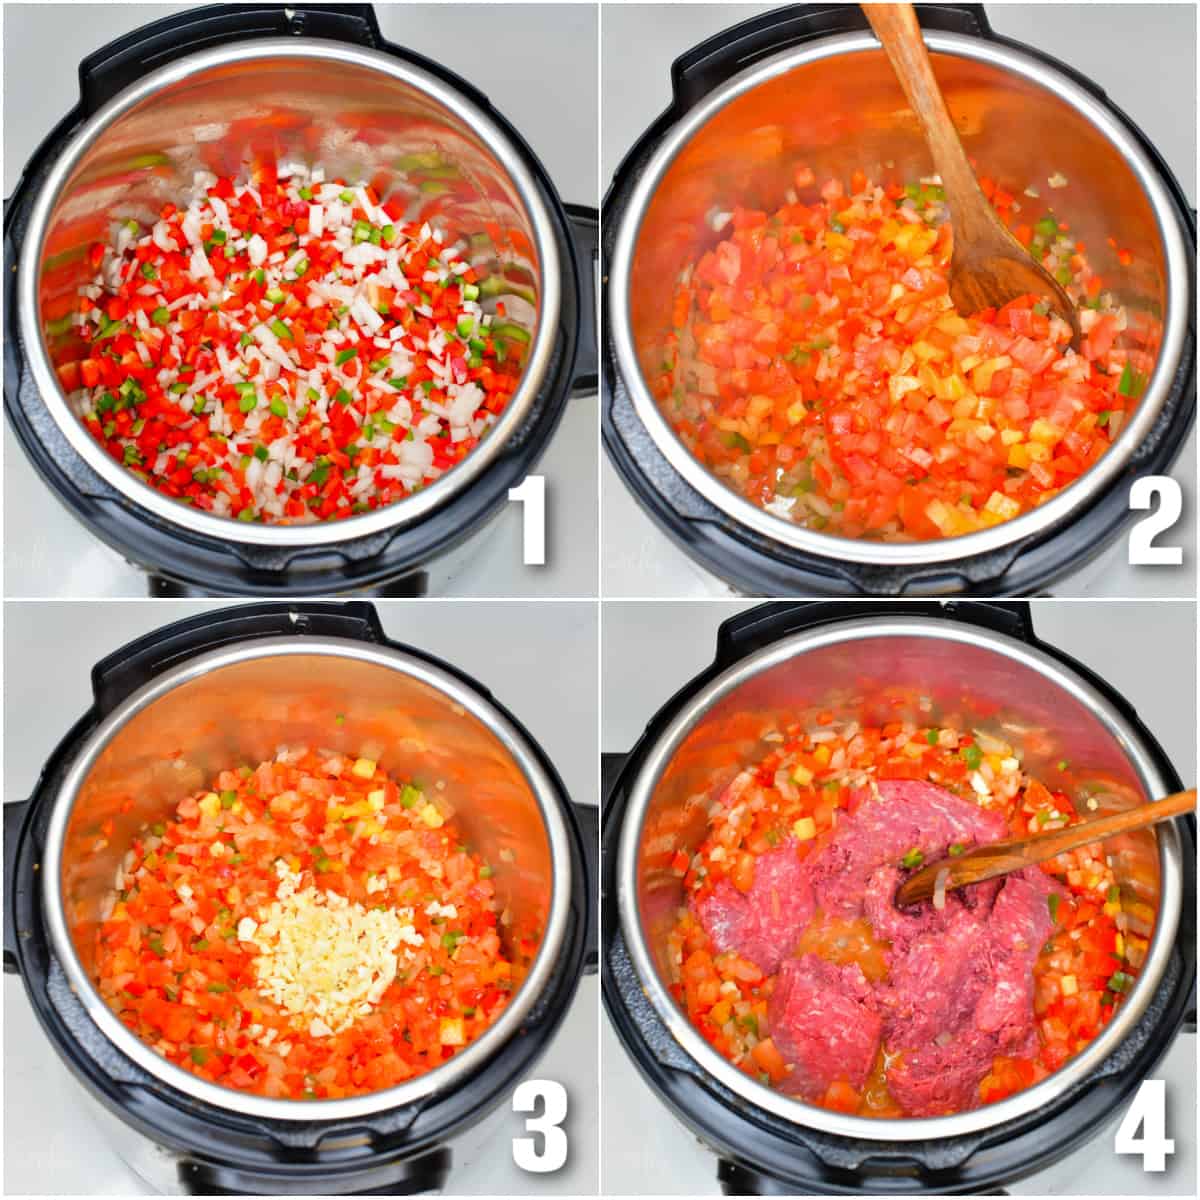
Prepare. Prep your ingredients first by dicing the onion, bell peppers, jalapeno pepper, and tomatoes. Open all the cans and drain off bean liquid. Peel the garlic.
Sauté the veggies. Set Instant Pot to “sauté” setting and give it a couple of minutes to warm up. Add some oil to the pot and sauté onions and bell peppers until softened. (1, 2)
Add garlic, tomatoes and jalapeños. Smash and mince garlic and add it to the pot as well. Let it sauté until fragrant and add tomatoes and jalapeno. Stir everything and let it sauté for a few minutes. (3)
Add the beef. Add ground beef to the pot, break it apart and let it cook for a couple of minutes. Stir well and try to break up all the lumps at it’s sautéing. (4)
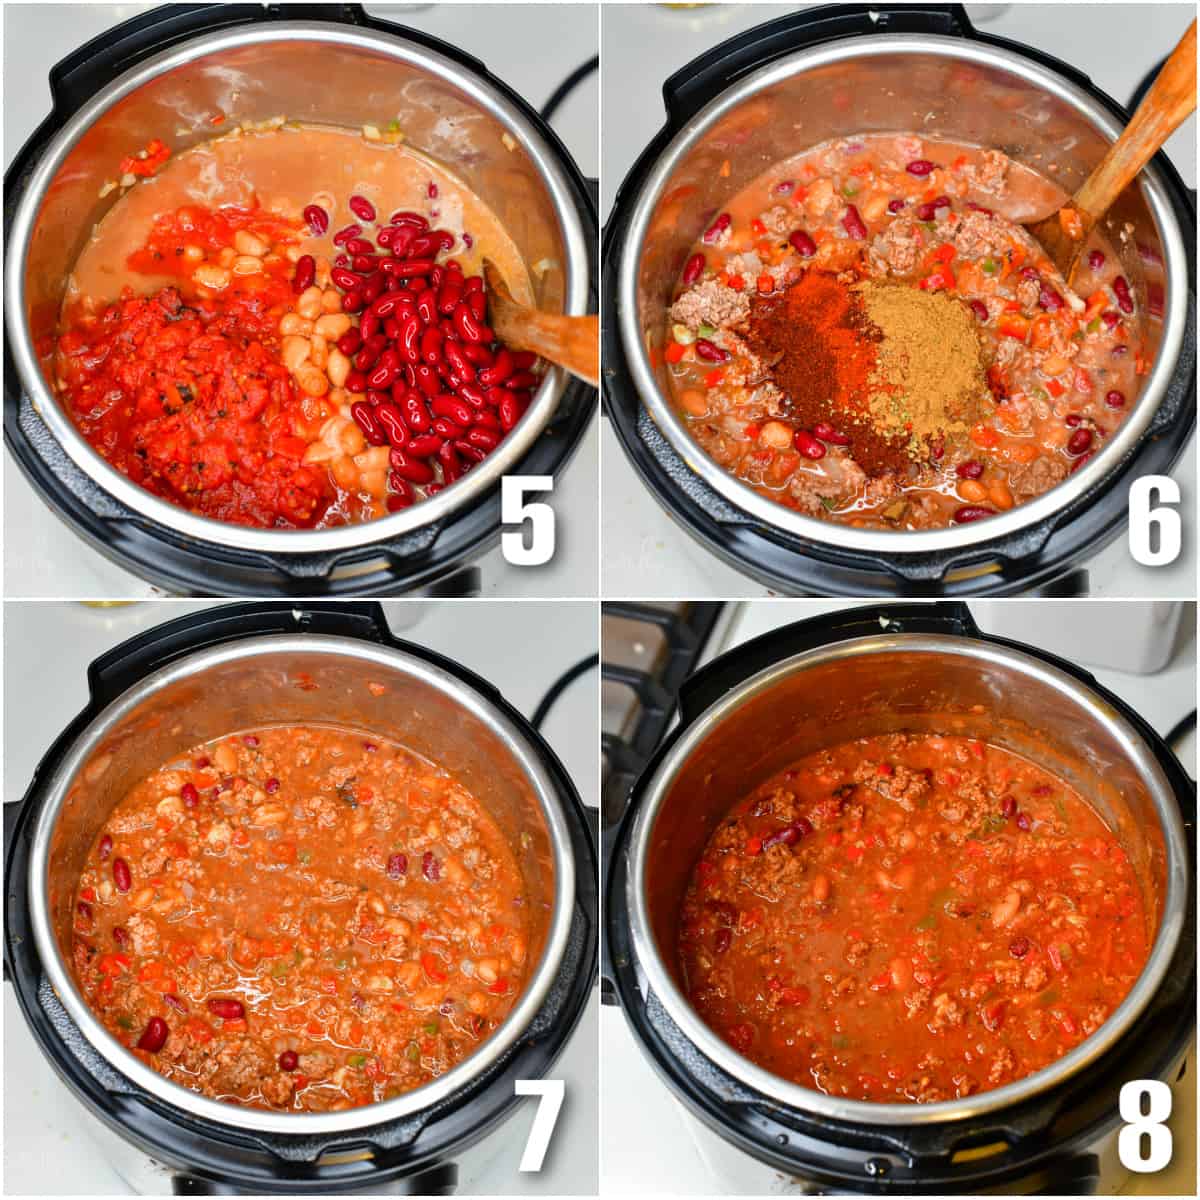
Add the remaining ingredients. Once ground beef is mostly browned, add beans, canned tomatoes, tomato sauce, beef stock, and all of the seasonings. Stir everything very well. (5, 6)
Pressure cook the chili. Close the lid and latch it. Make sure to turn the valve to “seal” and set pressure cooker to “beans/chili.” If your pressure cooker does not have that setting, set it to cook on high pressure for 30 minutes.
Release the pressure. Let the pressure cooker do a natural release for about 10 minutes and then carefully do a quick release.

Recipe FAQs
Some pressure cookers have many preset cook time settings. Those may include buttons like “soup/broth,” “meat/stew,” “bean/chili,” and many others. These settings are recommended times and level of pressure for cooking different types of food.
Bean/Chili setting is set to cook for 30 minutes on high pressure. If your pressure cooker does not have this preset setting, you can set that manually by selecting “pressure cook” on high for 30 minutes.
In my opinion, you just can’t have chili without cornbread! I love Classic Cornbread and Jalapeño Cornbread a lot. Of course, Buttermilk Biscuits always hit the spot as well! If you’re not a bread fan but still want something hearty, a potato side like Potato Pancakes or Scalloped Potatoes also pair very well with chili. Oh, and a Gruyere and Caramelized Onion Grilled Cheese with chili is worth drooling over.
Want to balance your hearty chili with lighter fare? Toss together one of my favorite salads like Apple Salad or Brussels Sprouts Salad.
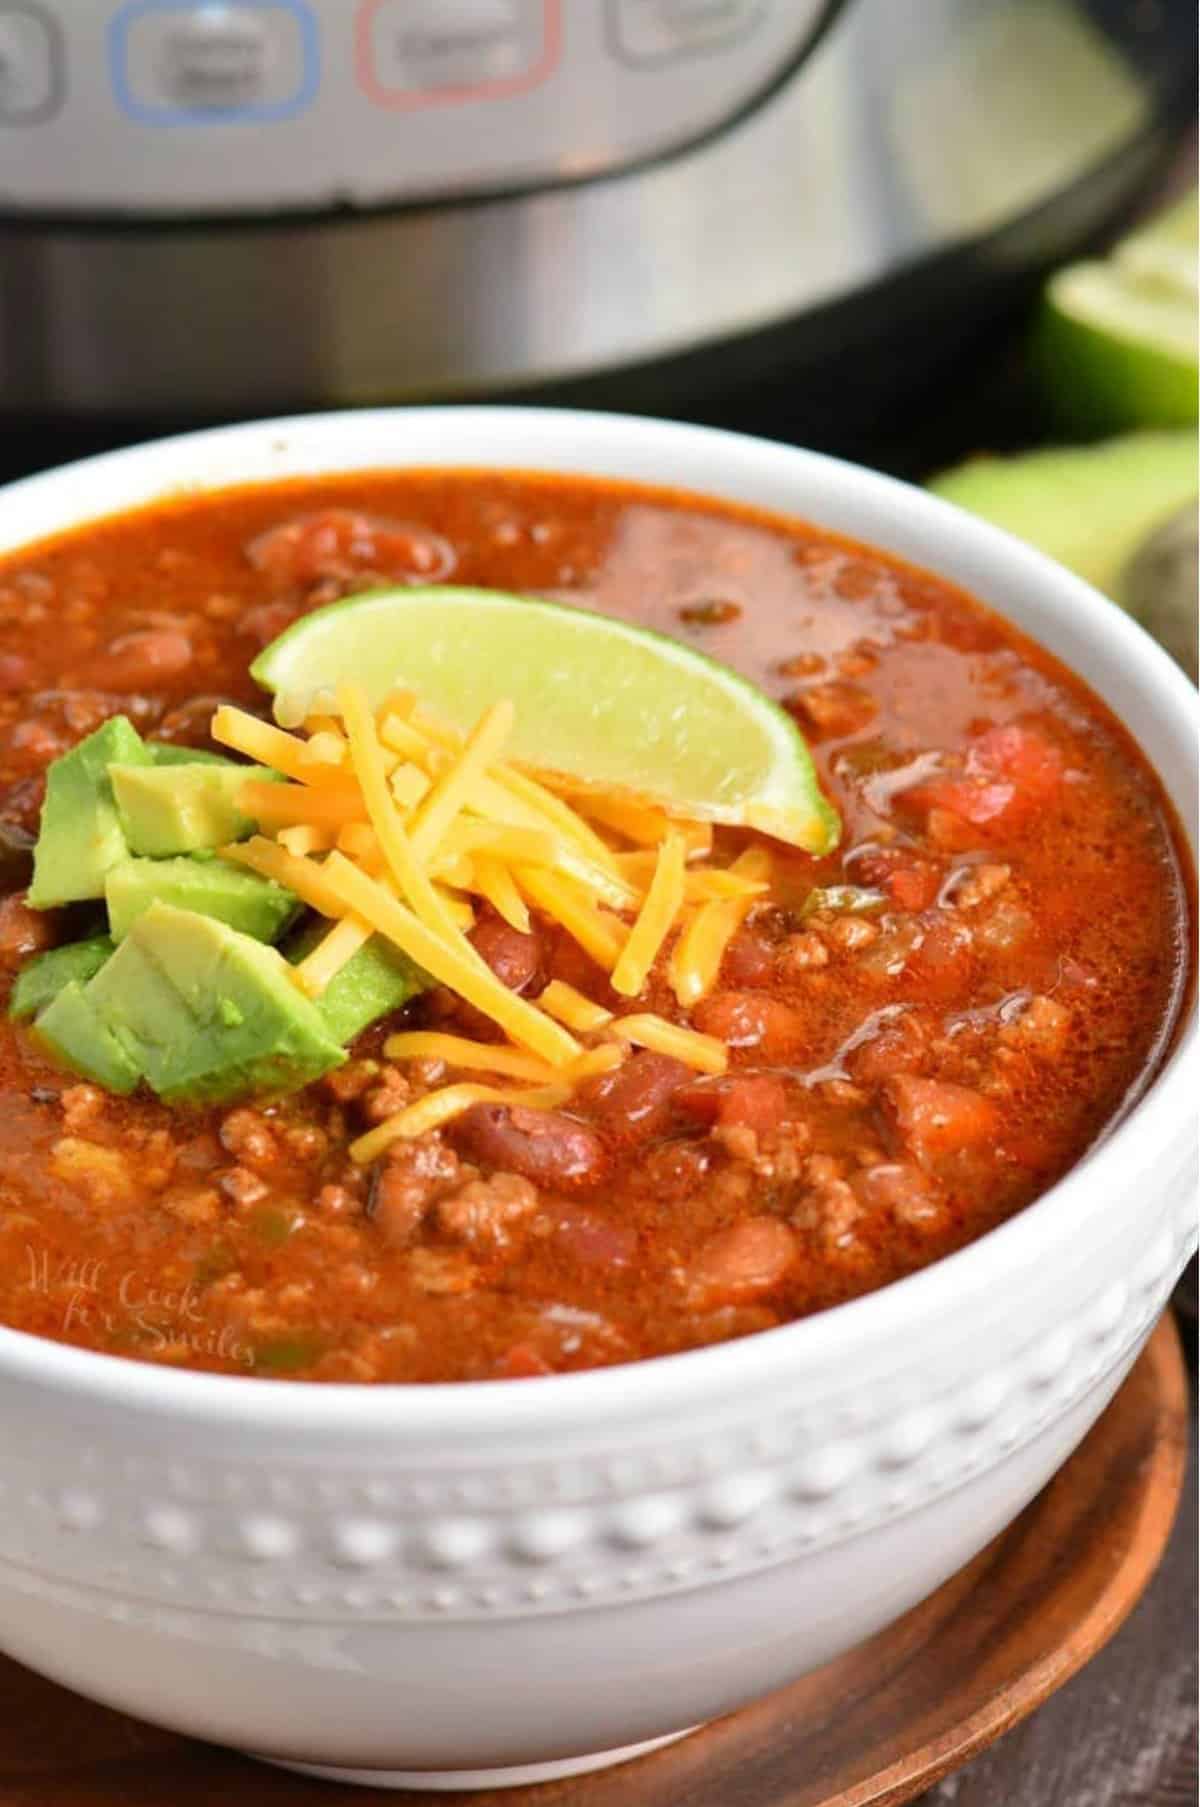
Did somebody say chili bar? When the weather is cold and I have company over, nothing satisfies quite like a toppings bar for chili! That way, everyone can dress up their Instant Pot chili exactly how they want to.
Some popular toppings to offer at your chili bar include cheese, green onions, sour cream, jalapeños, cilantro, avocado, and onions. You could get more adventurous with tortilla strips or dried chickpeas!
What Is Burn Notice on the Instant Pot
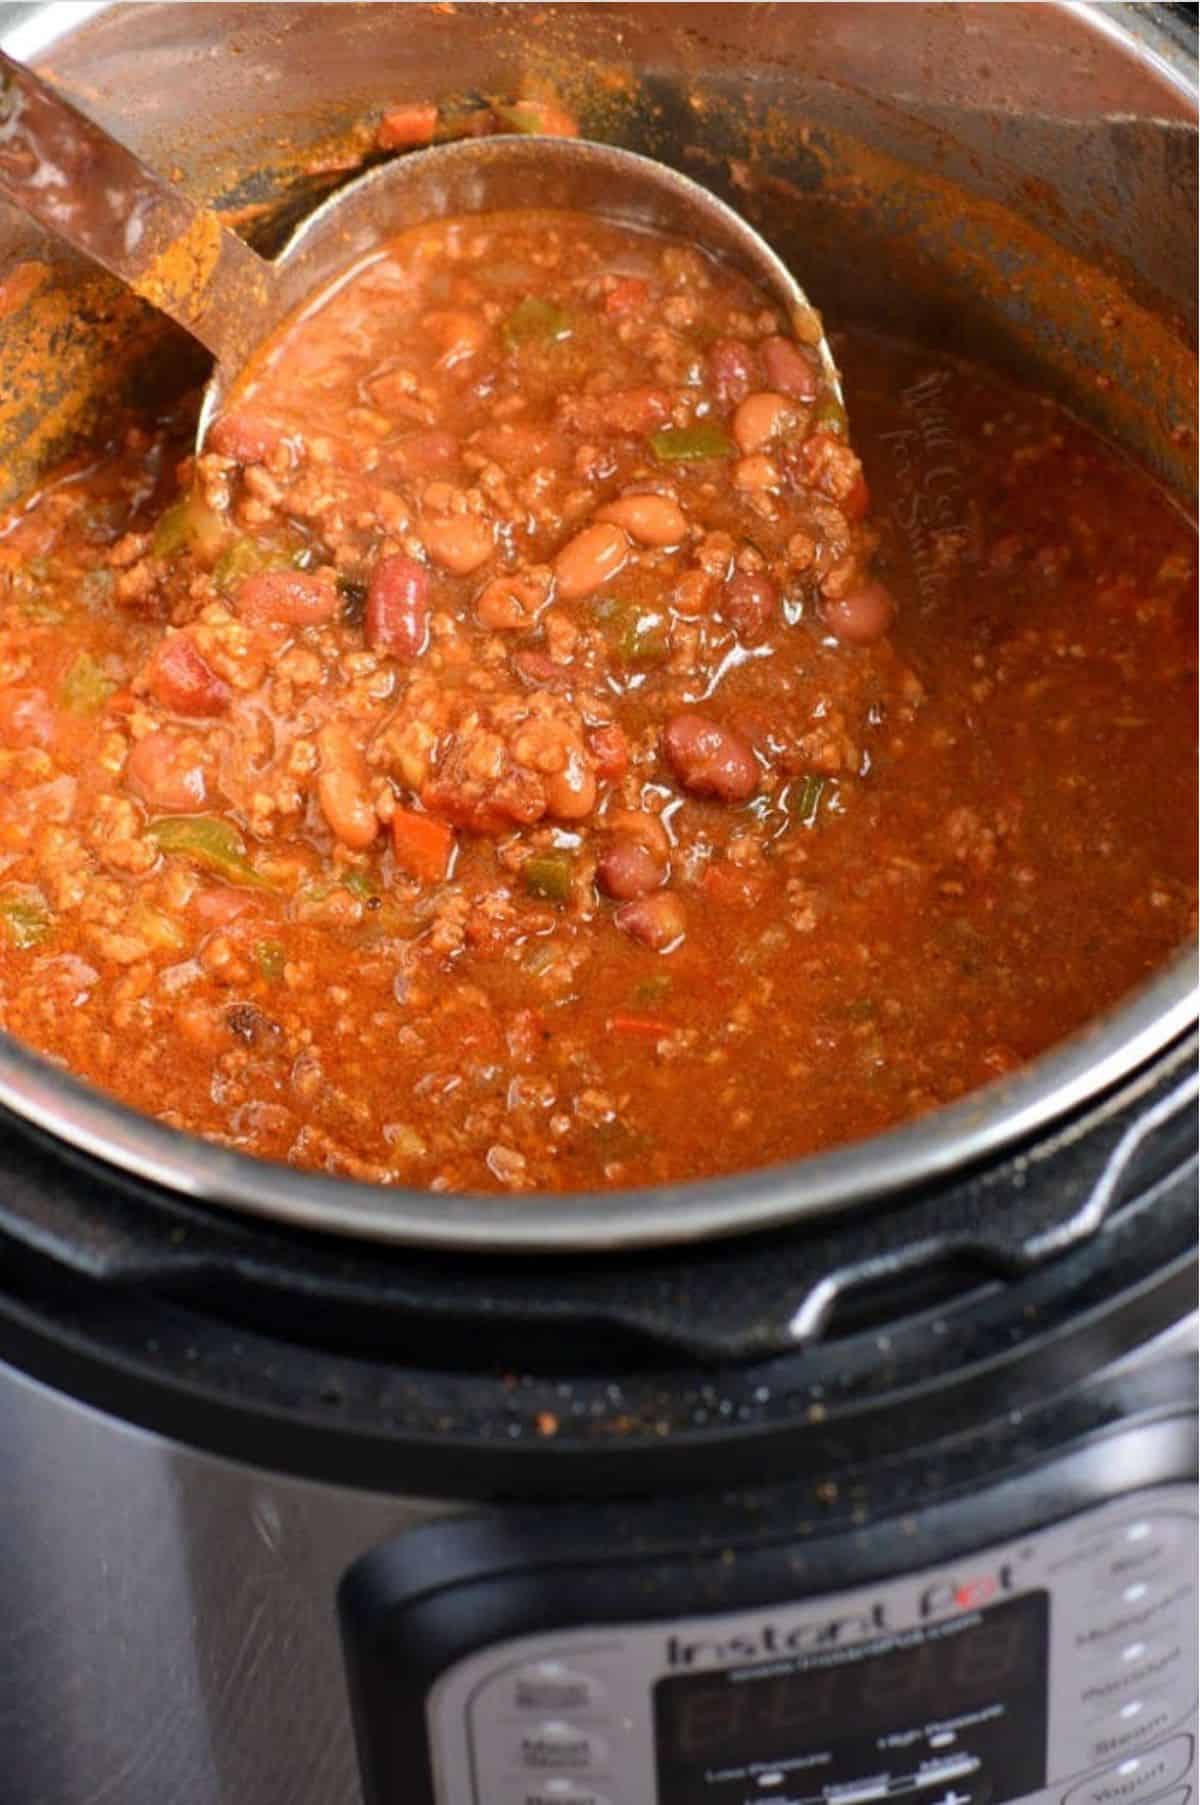
Burn notice is a message that your Instant Pot may display before starting the cooking, usually after it has already started to build up pressure. This message means that the internal pot has gotten too hot or it is sensing that there is some stuck-on or slightly burned food. This usually happens after searing something in the Instant Pot and more rarely that there’s something on the outside of the inner pot. There’s no way to clear the message and go on without checking the inner pot, unfortunately. It’s best to try and prevent the message rather than clear it.
To try and prevent the message, always use a clean inner pot to begin cooking and make sure it’s completely clean on the outside and inside. Make sure there is no burnt-on food. When searing something first, make sure that you use a wooden spatula to completely scrape the bottom. Deglazing the bottom of the pot after searing will ensure that you can get all those bits of food off the bottom.
If you do get the burned message, first, make sure that the pot in able to build the pressure and there isn’t anything caught around the lid, the silicone ring, the seal valve, or the floating valve. When something is preventing the Instant Pot from building pressure and closing the seal completely, it will just keep heating and cause the burn notice. If everything looks good with the pot, you’ll need to check the inner pot and food.
You’ll need to release the pressure from the pot and carefully open the pot. Use a wooden spoon to carefully scrape the bottom of the pot all around to make sure there isn’t any burned bits stuck. Also, always remember that there should be enough liquid when cooking in the Instant Pot.
PRO TIP: The usual recommended amount is at least a cup of liquid but consult your manual for your specific machine recommendation!
How to Store and Freeze Chili
To store: Make sure to cool the cooked chili completely to room temperature before storing. Store in an airtight food storage container in the refrigerator. Properly stored, it will last up to 4-5 days.
To freeze: After chili is cooked, you will want to cool it as quickly as possible if you plan to freeze it. This will give bacteria less chance to build and extend the shelf life of food. The best way to cool chili quickly is to place the pot of chili into a larger container filled with ice and make sure to stir it from time to time as it cools. Once it cools, portion it into smaller freezer bags, let all the air out, and close it well. Remember to label and date.
To thaw: Pull the frozen bag of chili from the freezer into the refrigerator and let it slow-thaw overnight. Reheat it in the microwave or on stove-top over medium heat.
Enjoy More Chili Recipes
DID YOU MAKE THIS RECIPE? PLEASE leave a 🌟 star rating! Let me know how you liked it by leaving the 📝 comment below or share and tag me on social media @willcookforsmiles. DON’T FORGET to subscribe to my newsletter!

Instant Pot Chili Recipe
Ingredients
- 2 tbsp canola oil
- 1 yellow onion
- 2 red bell peppers
- 4 garlic cloves
- 2 jalapeno peppers
- 2 tomatoes on a vine
- 2 lbs ground beef 85/15 meat to fat ration
- 14 oz can diced tomatoes
- 8 oz tomato sauce
- 1/2 cup beef stock
- 16 oz can pinto beans drained
- 16 oz can red kidney beans drained
- 2 1/2 tsp cumin
- 2 tsp oregano
- 2 tsp smoked paprika
- 2 tbsp ancho chili powder or other chili powder of choice
- salt
Instructions
- Prep your ingredients first by dicing onion, bell peppers, jalapeno peppers, and tomatoes. Open all the cans and drain off bean liquid. Peel garlic.
- TIP: if you want chili to be spicier, leave jalapeno seeds in. If you do not want it to be too spicy, choose younger jalapeno peppers without any lines on the skin and take out all seeds and membrane out of jalapeno.
- Set Instant Pot to “Saute” setting and give it a couple of minutes to warm up. Add some oil to the pot and saute onions and bell peppers until softened.
- Smash and mince garlic and add it to the pot as well. Let it saute until fragrant and then, add tomatoes and jalapeno. Stir everything and let it saute for a few minutes.
- Add ground beef to the pot, break it apart and let it cook for a couple of minutes. Stir well and try to break up all the lumps at it’s sauteing.
- Once ground beef is mostly browned, add beans, canned tomatoes, tomato sauce, beef stock, and all the seasoning. Stir everything very well.
- Close the lid and latch it. Make sure to turn the valve to “seal” and set pressure cooker to “Beans/Chili.” If your pressure cooker does not have that setting, set it to cook on high pressure for 30 minutes.
- Let the pressure cooker do a natural release for about 10 minutes and then carefully do a quick release.
Video
Notes
- To store: Make sure to cool the cooked chili completely to room temperature before storing. Store in an airtight food storage container in the refrigerator. Properly stored, it will last up to 4-5 days.
- To freeze: After chili is cooked, you will want to cool it as quickly as possible if you plan to freeze it. This will give bacteria less chance to build and extend the shelf life of food. The best way to cool chili quickly is to place the pot of chili into a larger container filled with ice and make sure to stir it from time to time as it cools. Once it cools, portion it into smaller freezer bags, let all the air out, and close it well. Remember to label and date.
- To thaw: Pull the frozen bag of chili from the freezer into the refrigerator and let it slow-thaw overnight. Reheat it in the microwave or on stove-top over medium heat.
Nutrition
Originally published on Will Cook For Smiles in March, 2019.
Would you like to save this recipe?
Categories:
Beef Recipes, Chili Recipes, Dinner Recipes, Fall Recipes, Gluten Free Recipes, Instant Pot Main Dishes, Most Popular Recipes, Super Bowl Recipes,All images and text ©Lyubov Brooke for ©Will Cook For Smiles. Please do not use my images without prior permission. If using my posts in collections and features, please link back to this post for the recipe.
Disclaimer: Nutrition information shown is not guaranteed to be 100% accurate as most ingredients and brands have variations.






Delicious! Be sure to salt to taste.
Glad you liked it!
We’ve made this two times. Both times it burnt heavily on the bottom of the pot. Any ideas what we are doing wrong?
Hey there!
This looks like a calorie bomb. Can I exclude beans and then make it? Will it change the taste or take out the essence of the recipe?
Girl, this is so much fiber and protein! lol
But yes, you can go down to only 1 can of beans of skip it all together and just double the veggies. You can also add some bell peppers to pack it more with veggies.