Chicken Kiev
Chicken Kiev is a classic Eastern European dish of tender, juicy, chicken rolled with flavorful herb butter and wrapped in a crispy coat of breading. Learn how to make this amazing, restaurant-quality dinner with a demo video and step-by-step instructions and photos. It will be an impressive and comforting dinner when your guests cut into this crispy chicken and see flavorful warm butter burst out!
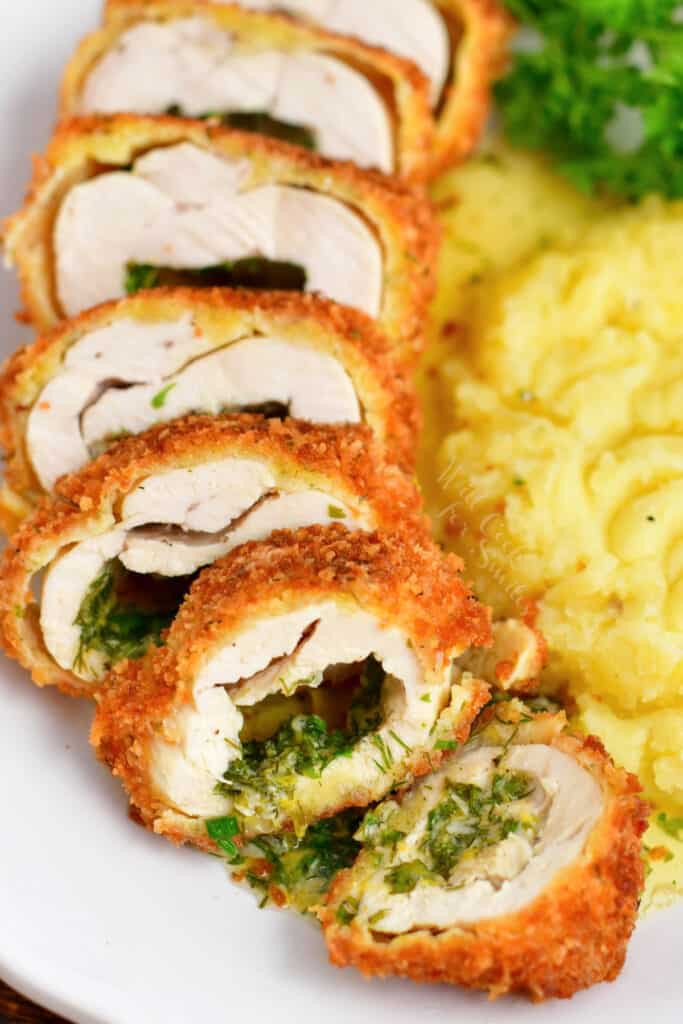
Chicken Kiev is a very special dinner that I often reserve for special occasions. This chicken in unbelievably tender, juicy, and so flavorful. The combination of garlic in herb flavors rolled inside the chicken breasts infuses the whole chicken. And, there is nothing like the crunch of crispy breading and buttery, tender chicken in one bite.
The best part about this dish, besides the ones I’ve already mentioned, is that everyone loves it! Kids and adults love this special “fried chicken” because there is so much more to it than just chicken.
Of course, the first thing you will see is the amount of steps it takes to make it. Don’t get scared! First of all, you CAN make it ahead of time. I always make this recipe into a two day process to make it much easier. Second, there might be a few steps here, but they are all very easy.
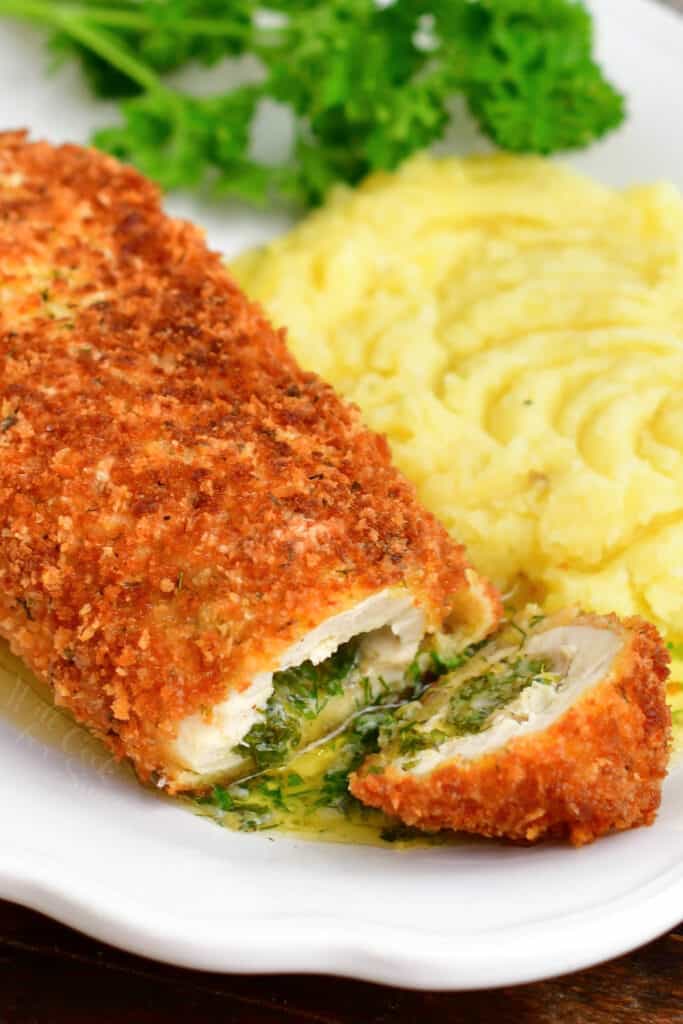
The KEY to Chicken Kiev is to keep all that butter inside, and I share all my secrets for doing that below.
What Is Chicken Kiev?
This popular Ukrainian and Russian dish that has been popular since the late 1800s. This delicious chicken fish features a thin fillets of chicken stuffed with butter, breaded, and fried until crispy and golden. Original recipe was a little more simple without the addition of garlic but just using simple butter.
There origins of this dish are still not completely known but it definitely originated in Eastern Europe. The two most popular origin stories go to the famous hotel in Kiev that had this recipe as a signature dish and the influence of a famous French chef in St. Petersburg. Russian cuisine is heavily influenced by the French and this dish does have a lot of French elements.
Recipe Tips
Like I said, the key to this stuffed chicken recipe is being able to keep all of the compound butter inside the chicken. It’s as much about the taste as the experience of slicing open the crunchy coquette and having the beautiful, aromatic butter pour out. I still get chills every time it happens!
- Make the meat as thin as possible. Butterfly the breast, then pound it to slightly less than ¼-inch thick. Make sure it’s not thinner than 1/8th of an inch. Any thinner and it will tear. Use the flat side of a meat tenderizer (NOT the side with spikes).
- Roll it tight! Tuck in the sides as you roll to create a leak-proof pocket. Then, wrap each of those tightly with plastic wrap to help compress and shape the pocket.
- Chill thoroughly. Be sure to let these sit in the refrigerator for at least 2 hours. In fact, you can even prep them the night before and cook them the next day! Just don’t leave them in the refrigerator for more than 24 hours.
- Bread them twice. This will not only make them extra crispy on the outside, but it will also create a seal and prevent the butter from leaking out.
How To Make Baked Chicken Kiev
- Form the compound butter.
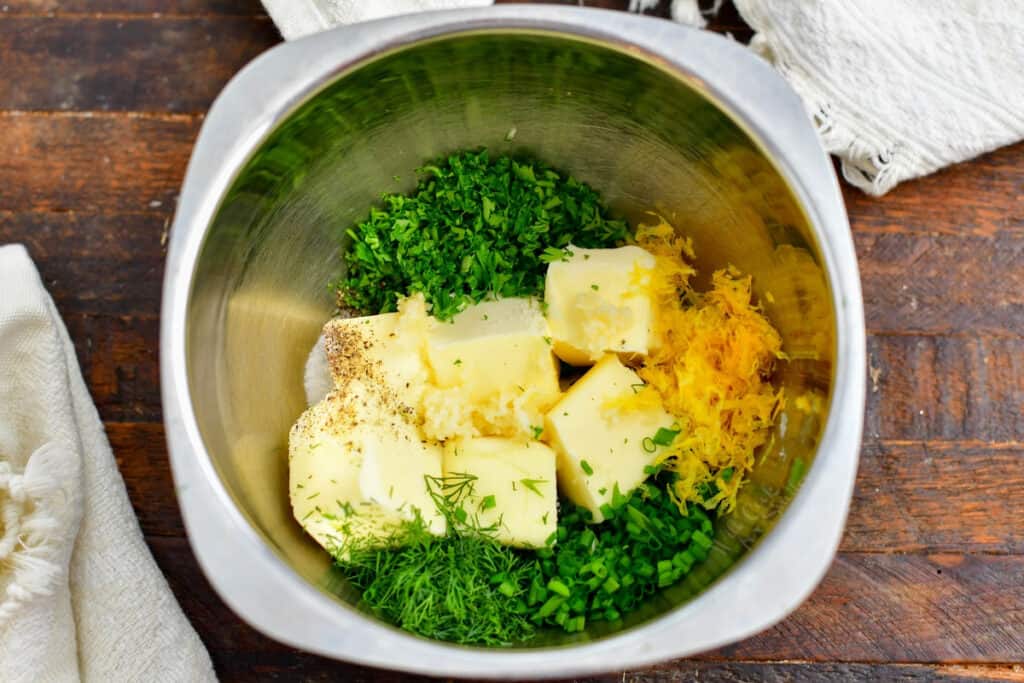
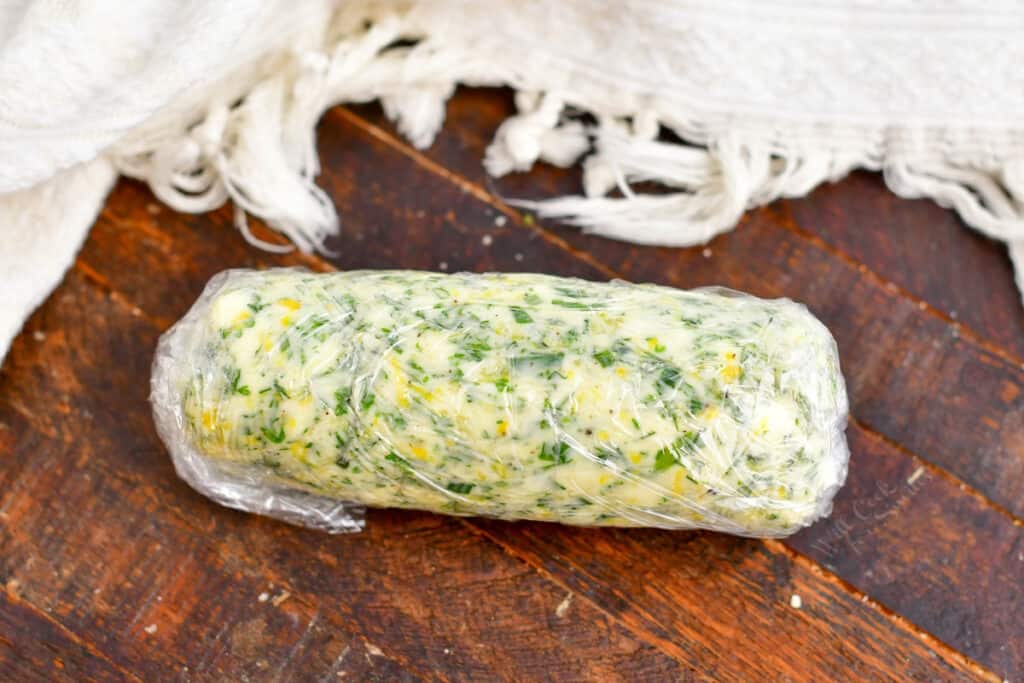
Combine softened butter with the herbs and seasoning. Be sure to incorporate them well. Then, transfer onto plastic wrap and roll into a log.
Place the butter into the freezer for about 15-20 minutes, while you prep the remaining ingredients.
- How to butterfly chicken breast:
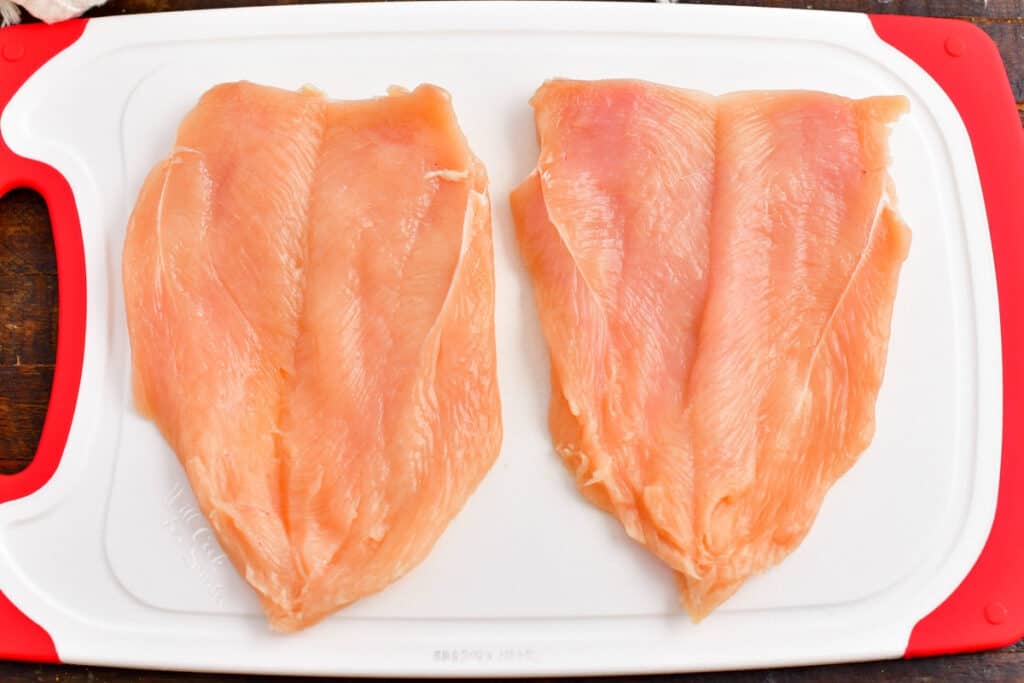
Place the palm of your hand gently on the top of the breast to hold it in place.
Then, use a knife to slice the thickness in half, stopping just before you cut all the way through. Separate and open each piece so that it resembles butterfly wings.
- Pound them thin.
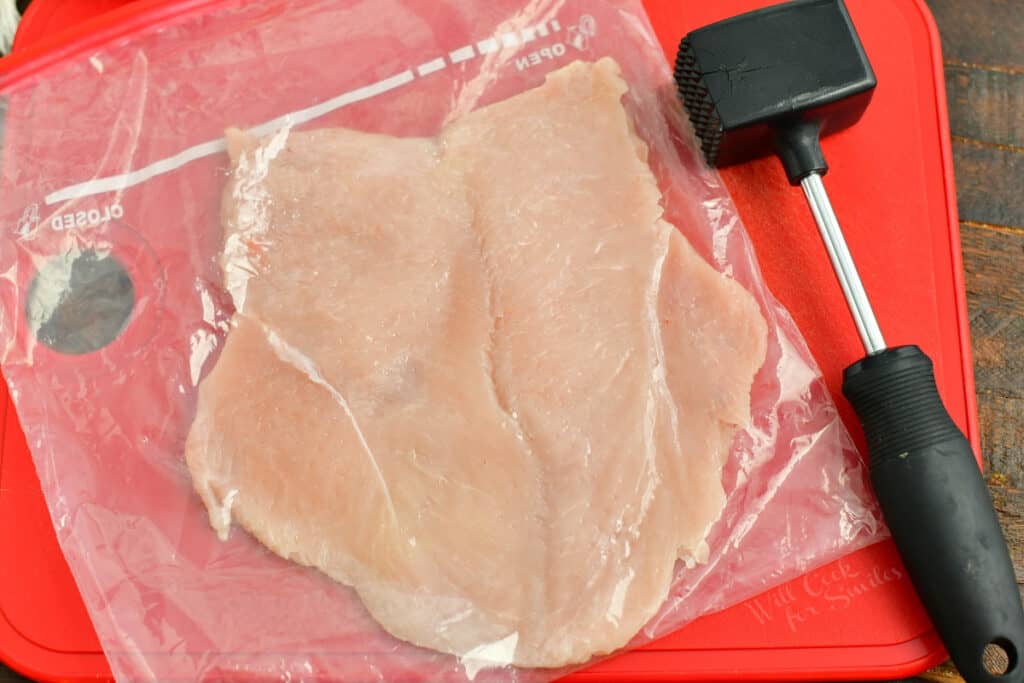
Slide each fillet into a zip-top bag so the raw juices don’t splatter everywhere. Use the flat side of a meat tenderizer to pound and thin each piece, working from the center outward.
Repeat until all of the breasts are flattened, then place each onto its own square of plastic wrap.
- Stuff with butter.
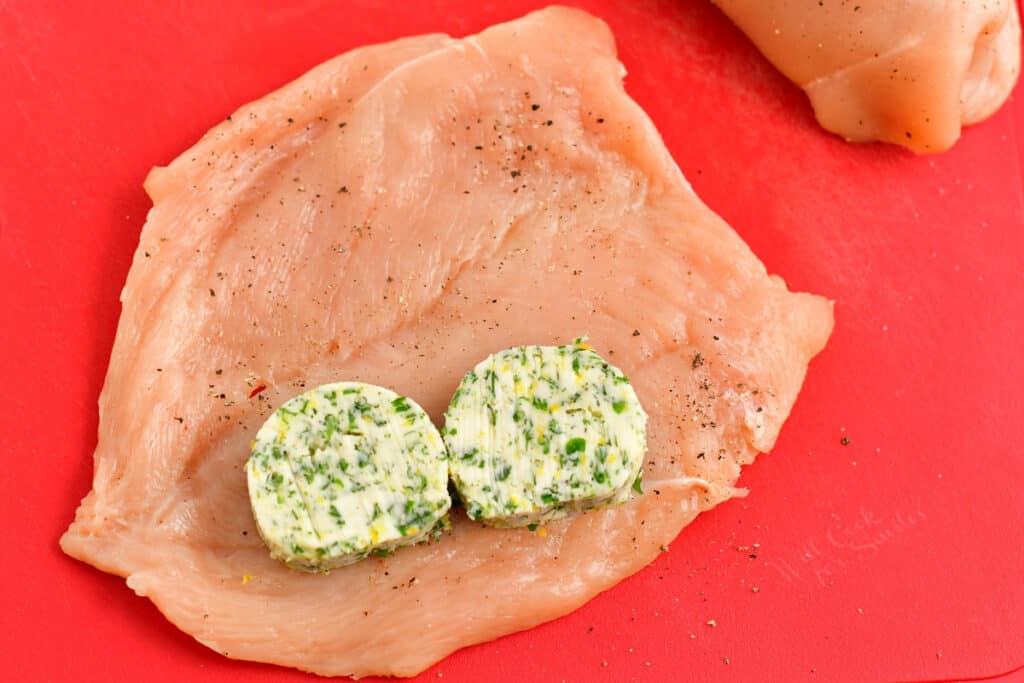
Make sure to season the chicken breasts on both sides first.
Next, slice the compound butter into 8 evenly sized rounds. Divide them across the pieces of poultry, placing them near one of the longer edges.
- Roll into pockets.
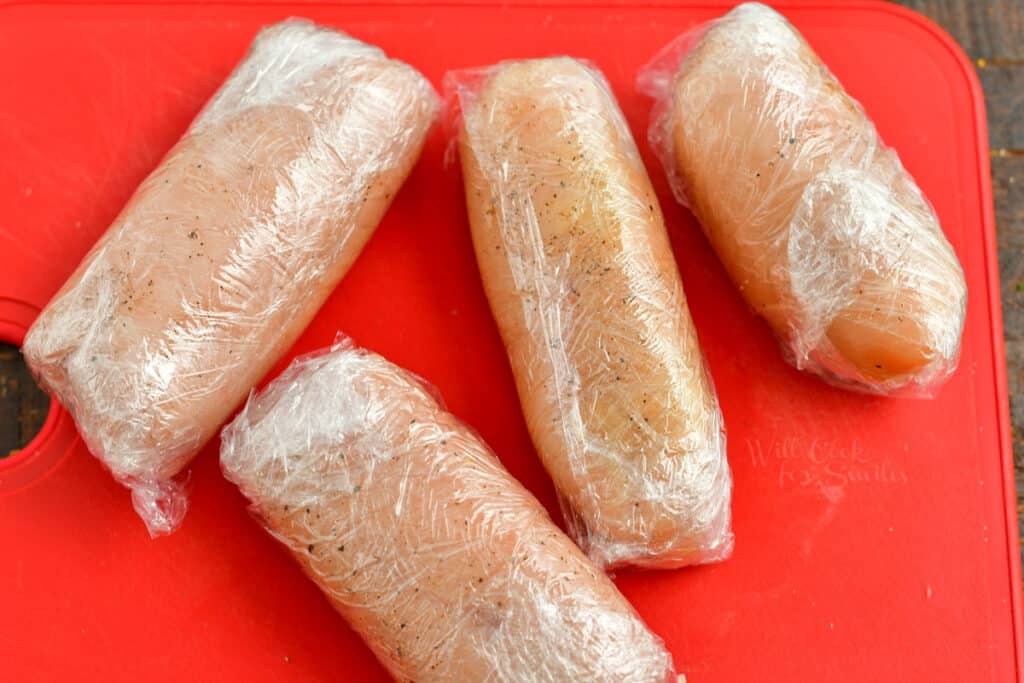
Tuck the nearest edge over the butter and roll it up, using light pressure so it holds together. Try not to tear the chicken!
Wrap tightly in the plastic and repeat until each one is done before chilling for at least 2 hours or overnight.
- Prep the breading.
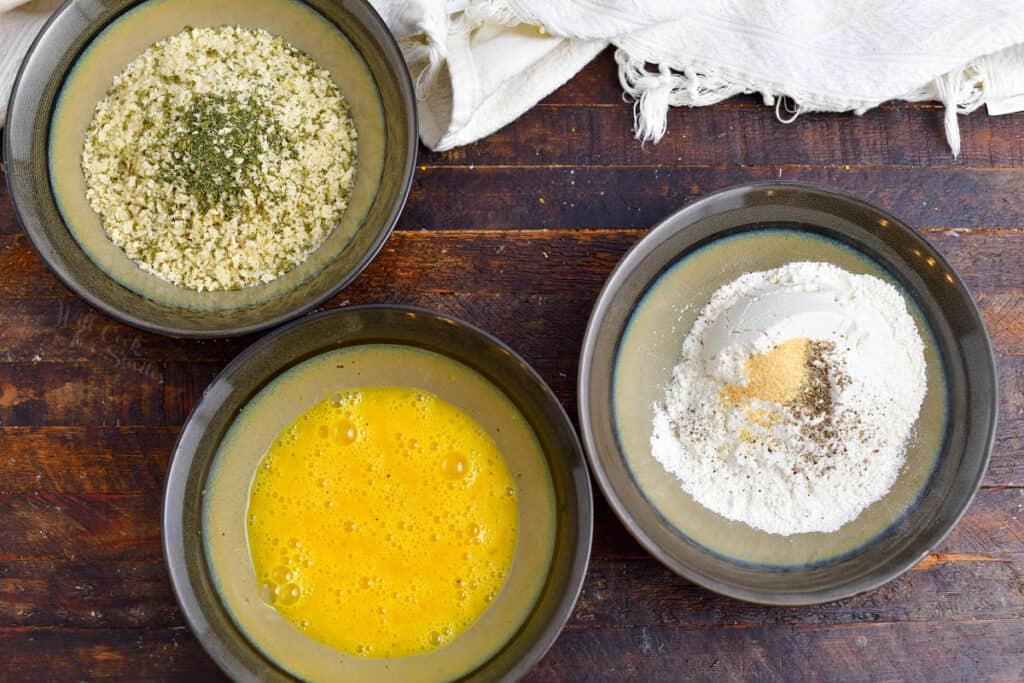
Add the flour, eggs, and Panko crumbs to three separate bowls, then mix the appropriate seasonings into each.
- Bread the chicken.
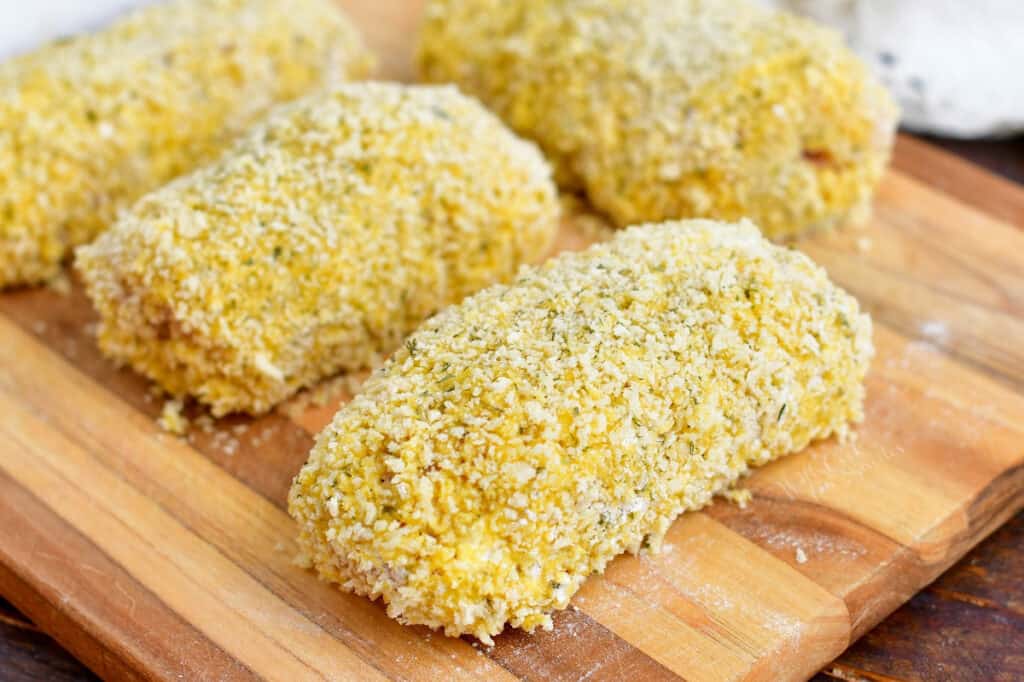
Working with one chicken pocket at a time, carefully remove the plastic, then coat it in flour. Dip into the egg mixture, then the bowl of Panko crumbs. If you’re nervous about it coming undone, use your hands to press on the breadcrumbs.
Then, repeat the entire process again and press gently with your hands so everything adheres well to the surface.
- Deep fry in oil.
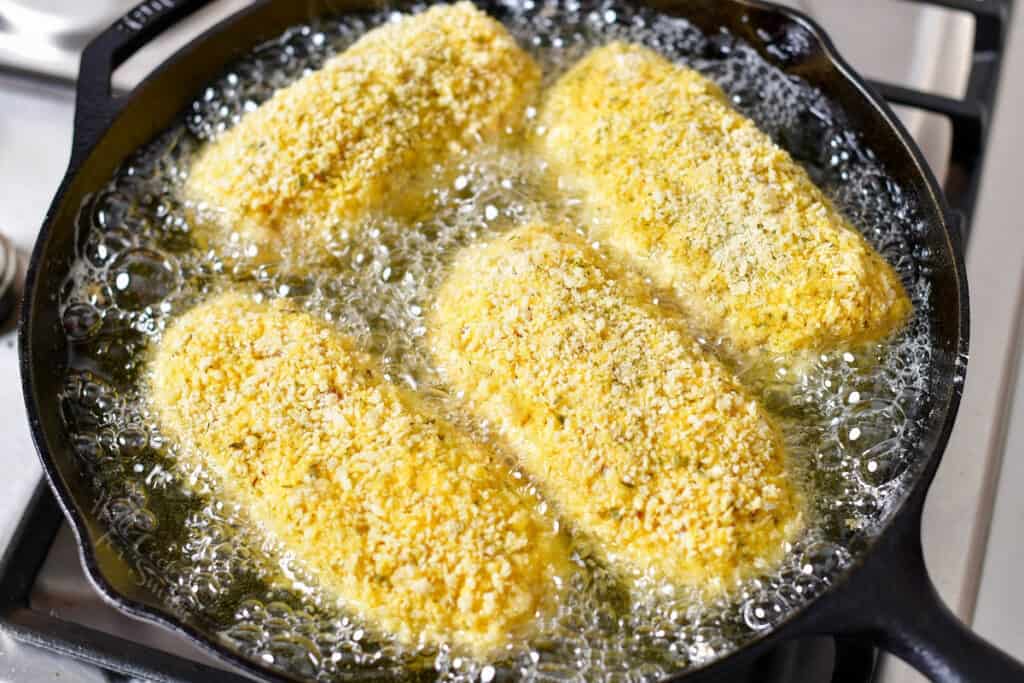
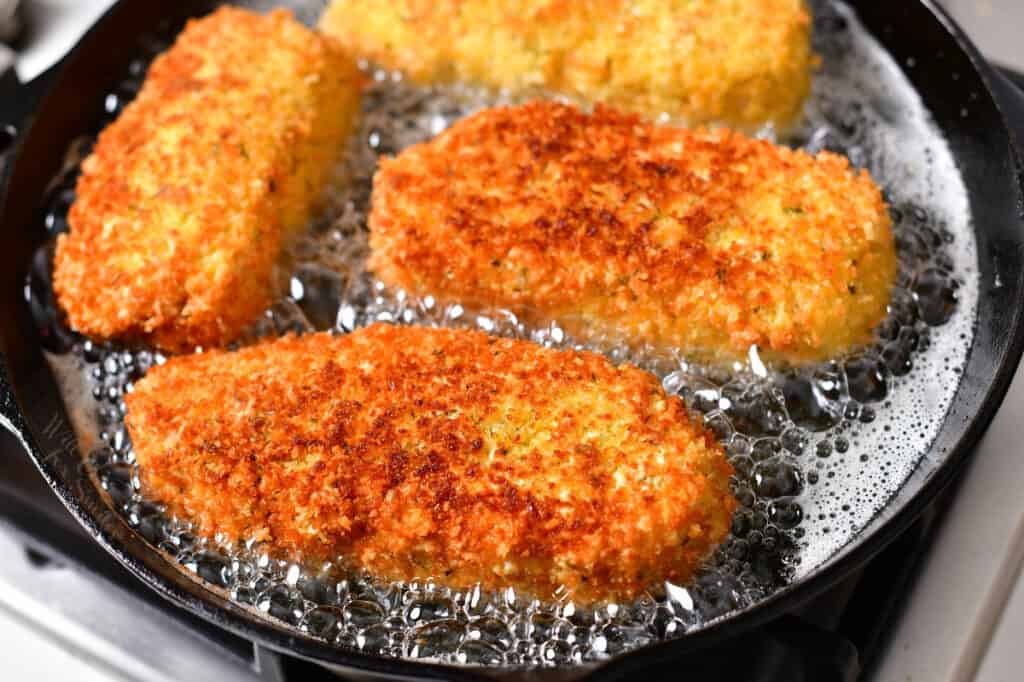
The dish finishes in the oven, so you only need to fry them for a few minutes on each side. Remove them from the oil once the outside is a deep golden brown.
- Bake until done.
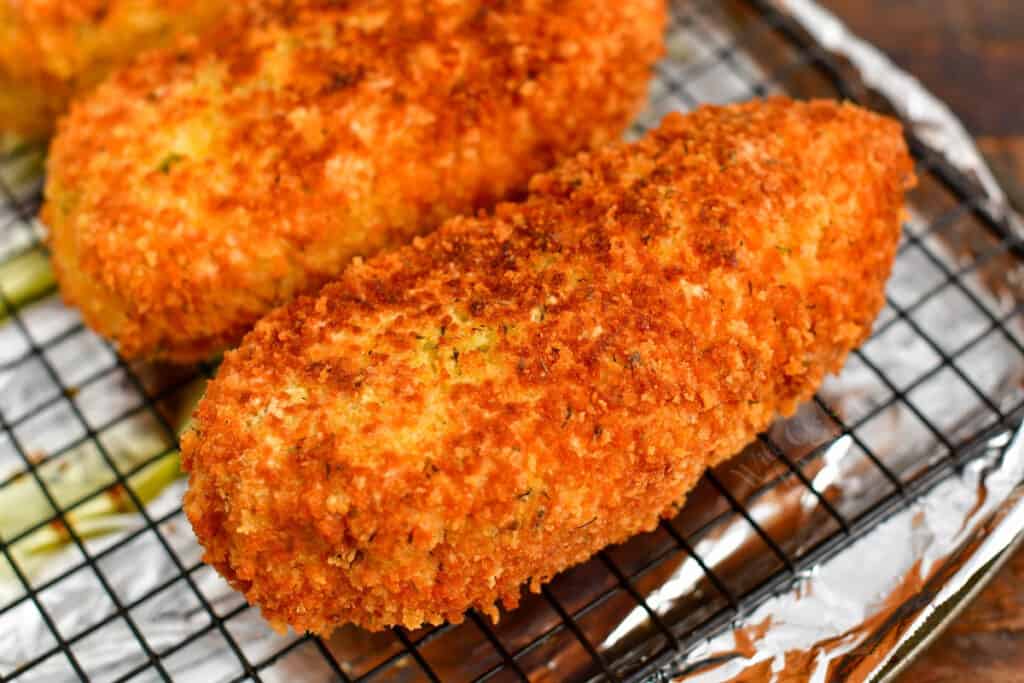
Use a wire rack over the baking sheet so the bottoms of the baked Chicken Kiev remain crisp.
Bake for 20-24 minutes, based on the overall size of each piece, since testing with a thermometer would cause the butter to leak out.
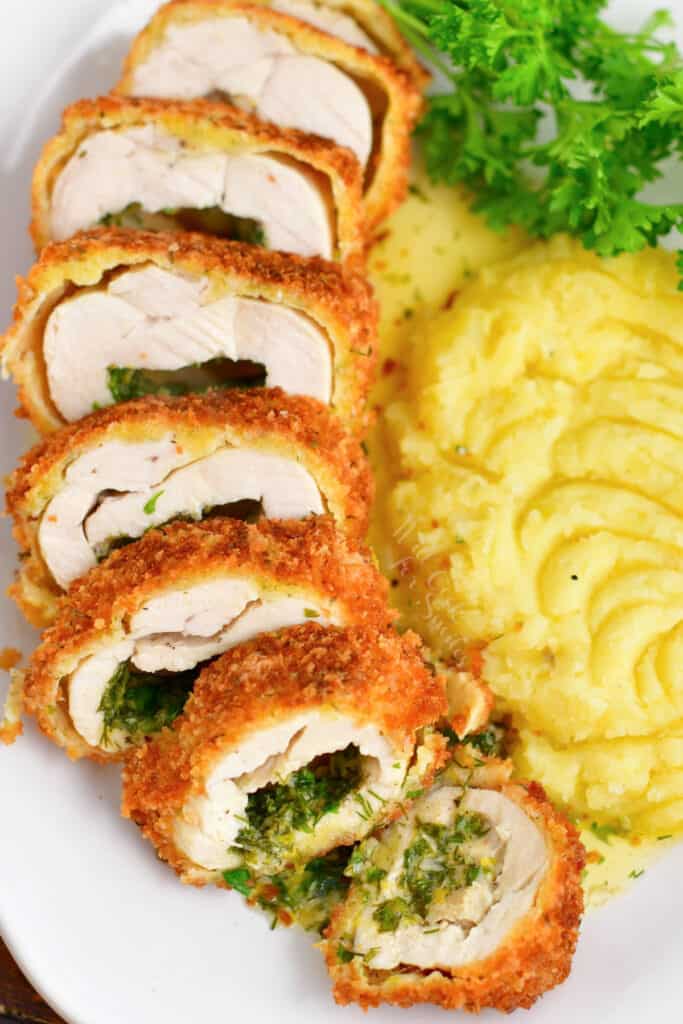
Serving Suggestions
Mashed potatoes is, of course, the best pairing for this comforting chicken dish. Although, you can always pair this entrée with your favorite style of potatoes or rice. Roasted vegetables or ratatouille will round out the meal, or try a fresh salad to balance the richness from the sauce.
Even a simple blend of greens with citrus dressing or a Caesar salad will be a nice addition.
Storing and Reheating
If you have any leftovers, store it in an air-tight food storage container, in the refrigerator. Chicken Kiev will last 3 to 4 days in the refrigerator.
To reheat, you can do it in a microwave until it’s heated through. There is not much that can retain that perfect crispness than when it’s freshly made, but there will be still a little bit of crunch remaining.
MORE RECIPES TO TRY
Russian Mushroom Julienne is a popular Russian side dish that can also be used as a sauce for meat, vegetables, and even pasta. Mushrooms and shallots are cooked in a delicious cream sauce, then baked with shredded mozzarella on top.
If you are in the mood for something more comforting, you can’t go wrong with a hearty beet soup. It has tender cuts of beef and plenty of vegetables to keep you full on chilly nights. Trust me, this is the best borscht recipe you will ever have!
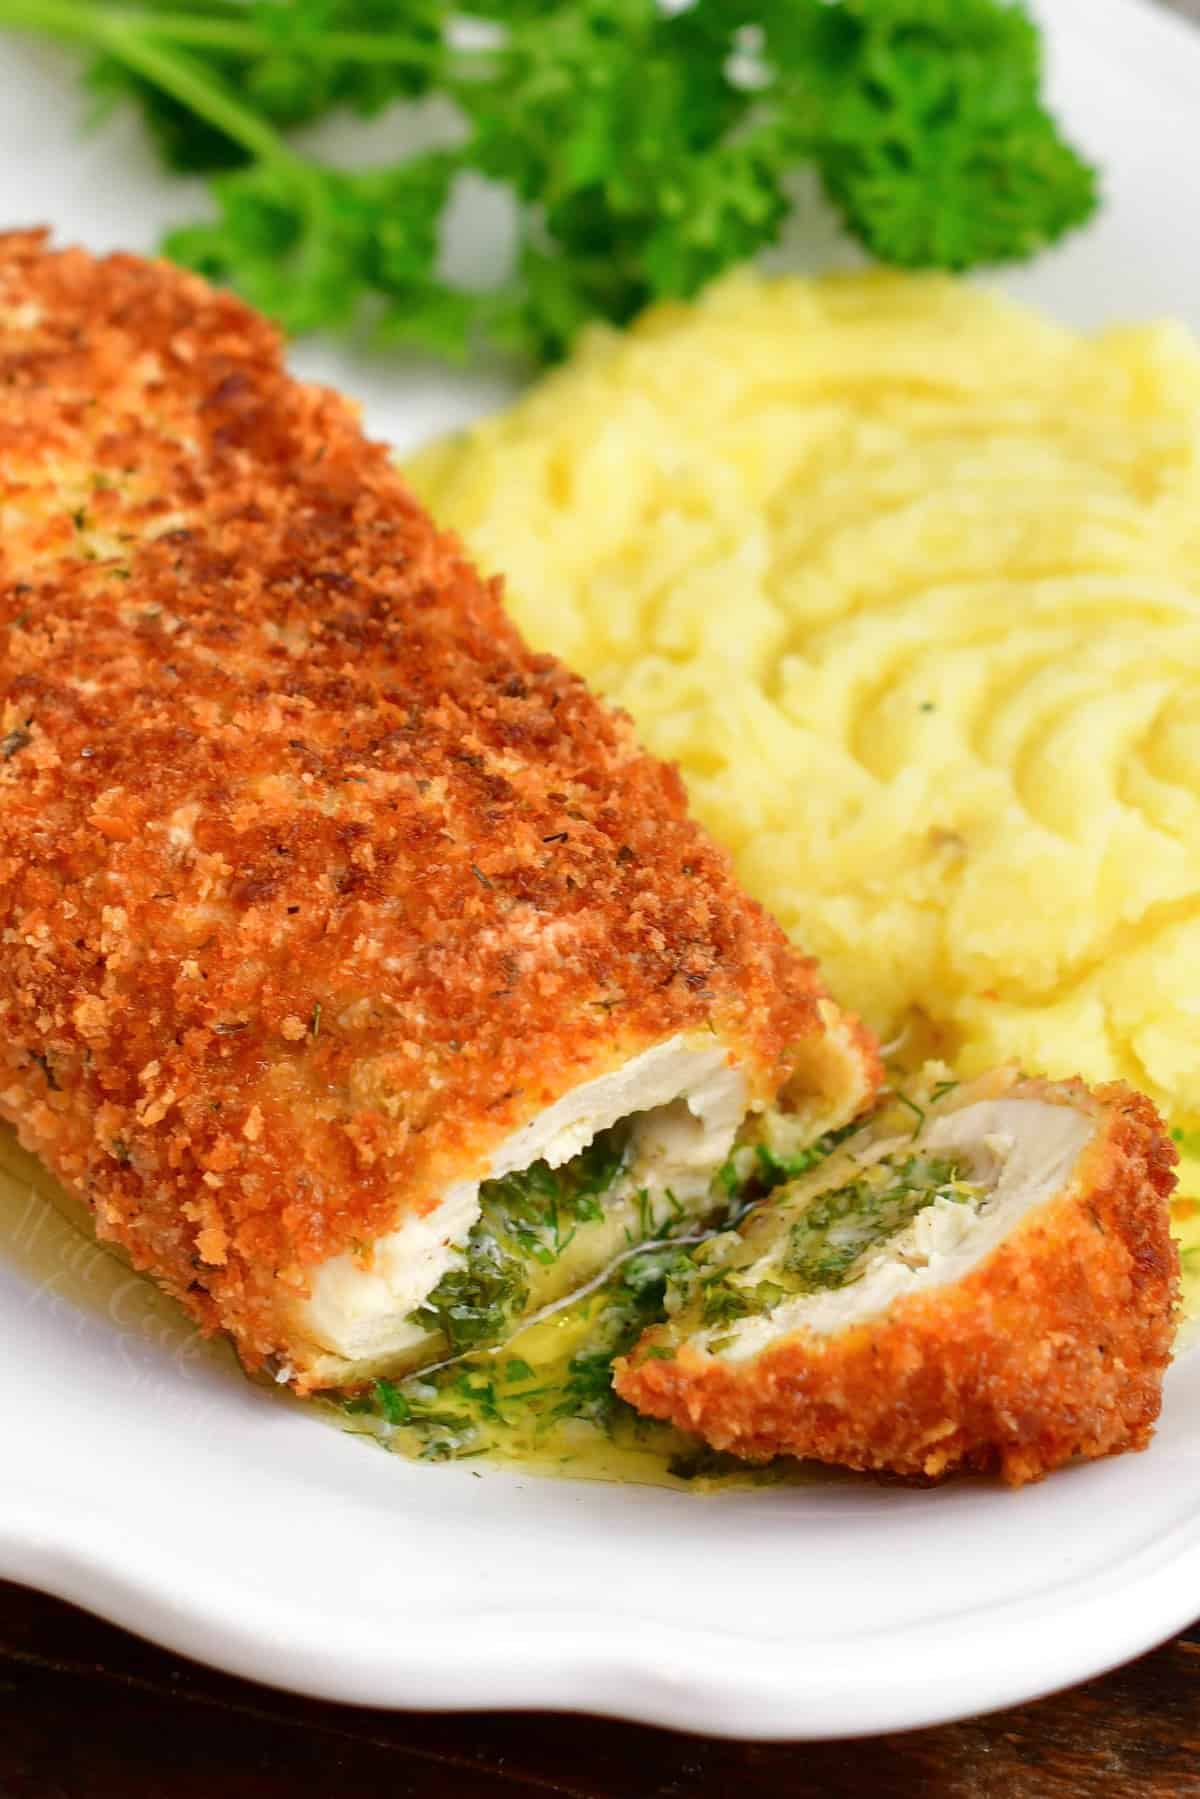
Chicken Kiev
Ingredients
- 4 boneless skinless chicken breasts (6-8 oz. each)*
- Salt
- Black pepper
Compound butter:
- 8 tbsp unsalted butter softened
- 3 garlic cloves pressed
- 3 tbsp fresh minced parsley
- 2 tbsp minced chives
- 2 tbsp fresh minced dill weed
- 1 lemon – zest only
- Salt
- Black pepper
Breading:
- 4 eggs
- 3 cups Panko bread crumbs
- 1 cup all purpose flour
- 1 1/2 tsp garlic powder
- 1 tbsp dried parsley
- 1/2 tbsp dried dill weed optional
- Salt
- Black pepper
Oil for frying:
- 2-3 cups canola oil
Instructions
- Note: You can make compound butter ahead of time and keep in the fridge for up to a month or in a freezer for up to 3 months. Make sure to wrap it tightly in plastic wrap and place it into a zip-lock bag for storing.
Compound butter:
- Take butter out of the refrigerator and let it sit on the counter for 30-45 minutes. Make sure it is softened first so it's easy to mix with other ingredients.
- Mix butter with minced herbs, garlic, lemon zest, salt, and pepper. Use a fork to mix and make sure that all ingredients are evenly incorporated with butter.
- Spread butter in a log-like shape on top of a sheet of plastic wrap and wrap it up tight into a log.
- Place into the freezer for about 15 minutes while preparing the chicken.
Chicken:
- To butterfly chicken breasts: place the chicken breast onto the cutting board place your hand on top, make sure to slightly bend your fingers up and not curl or angle them down. Slice through the center of the chicken all the way to the other side but not cutting it in half.
- Open the chicken like a book (or butterfly wings…hence the name) and place it flat into a zip-lock bag.
- Use the flat side of the meat tenderizer to pound the chicken, working from the center outward to the edges. Make sure the meat is between 1/4 and 1/8 of an inch but not thinner or it will top. Also, make sure not to hit too hard so it doesn't break the meat.
- Take the chicken breast out carefully and set aside. Repeat with remaining chicken breasts.
- Season the chicken with salt and pepper on both sides.
Wrap the chicken and butter:
- Take butter out of the freezer and out of the wrap. Slice the butter log into 8 even slices. You will use 2 per chicken breast.
- Place chicken breast onto a slice of plastic wrap. Make sure there is enough of plastic wrap to wrap the chicken tightly in a couple of layers.
- Place two slices of butter, one next to another, onto one side of the chicken breast and start rolling the butter and chicken together, tucking the sides in as you roll. Once you have a tight chicken pocket, roll it in plastic wrap tightly.
- Repeat with the other three chicken breasts and butter.
- Place rolled chicken into the refrigerator for at least 2 hours or overnight.
- NOTE: you can prepare the chicken the night before and then, batter and cook it the next day. Just don't exceed 24 hours before cooking the chicken.
Batter the chicken:
- Preheat the oven to 350° and add oil to the large skillet for frying. Preheat the oil to 350°. Line a rimmed baking sheet with aluminum foil and place a wire rack inside.
- Prepare three shallow and wide bowls for battering the chicken. In one bowl, whisk together eggs with some salt and pepper. In another bowl, whisk together flour with some salt, pepper, and garlic powder. In a third bowl, mix together Panko bread crumbs with dried herbs, and some salt and pepper. (Make sure to only use a little salt and pepper in each mixture so it's not overly salted!)
- Take chicken out of the refrigerator and carefully unroll it from the plastic wrap. Work carefully to batter the chicken but not disturb the tight roll. Dredge chicken rolls in flour first, then egg mixture and the Panko crumbs. Press it in with your hands and repeat, dredging it in flour first, then in egg, and then in Panko mixture. Press with your hands and set aside. Repeat with remaining chicken rolls.
- Make sure the oil is heated to 350° and carefully add battered chicken using long metal tongues. (Be very careful not to press too hard and not scrape any batter off the chicken.)
- Fry chicken for about 3-4 minutes on each side, until deep golden. Take it out of the oil and place onto the prepared baking pan, on top of the wire rack.
- Bake for 20-24 minutes, depending on how large were your chicken breasts.
- (Since you can't pierce the chicken to check internal temperature, you have to judge by the size of your chicken breasts. If you used chicken breasts that are smaller than 6 oz. each, you may need to use less compound butter inside and bake them for 15-20 minutes.)
Video
Notes
Nutrition
Originally published on Will Cook For Smiles on April 2, 2011. Updated February 15, 2021.
All images and text ©Lyubov Brooke for ©Will Cook For Smiles. Please do not use my images without prior permission. If using my posts in collections and features, please link back to this post for the recipe.
Disclaimer: Nutrition information shown is not guaranteed to be 100% accurate as most ingredients and brands have variations.



Hi Lyuba, Your Chicken Kiev looks so delicious. Your photo tutorial is very good. Thank you so much for sharing with Full Plate Thursday and hope to see you next week!
Thanks for the recipe and step by step! One day I will make it for a special dinner!
This is one of my favorite dishes!
Yummy! I’ve had it at restaurants but never made at home, now I have to try
Oh my! That just looks delicious!!
Hi there! New follower here! Congrats on being featured in the Fun Tuesday Hop! Cute blog, and that dish looks soooo good! Drop by and see me if you get the chance, thanks!
That looks delicious!<
I just drooled on my keyboard! Yum.ChiIL Mama
I love all the pics and how easy you make it sound!
Yum!
Congrats on guest hosting and now let’s party it up UBP style : ) The recipe looks yummy!!
Oh my gosh, I’ve always wanted to try this! Can’t wait!