Beef Stock Recipe
Homemade beef stock is very easy and it will make your soups incredibly delicious and healthy. Learn how to make beef stock from scratch right here in a few simple steps. Use marrow bones for the most health benefits and load it with vegetables like onions, celery, and carrots.

Table of contents
You know what makes the best homemade soups? Homemade stock! It truly makes the world of difference and I hear friends and family say that every time they make it.
Making homemade beef stock is much easier than it sounds and is a great way to use up any extra vegetables or leftover beef bones you may have on hand. It’s much healthier than store-bought, which often has a lot of sodium in it and other preservatives.
Even better, this recipe makes a large batch that’s easy to store or freeze. Yes, you can freeze all or part of the batch and use it in soups and sauces later, when you need it.
The process to cook beef stock is the same as homemade chicken stock and you can keep both in the freezer for later use. Use this homemade beef stock in all your favorite dishes, or try it in my stuffed peppers soup and beef and vegetable soup recipes.

How To Make Homemade Beef Stock
Prep the vegetables: Cut the onion, carrots, and celery into large pieces, removing the skins and ends if you’d like.
Sear the beef bones: Heat the oil in a large pot, then cook the bones on both sides until golden brown. Doing this adds a caramelized flavor to the stock and keeps the meat tender for later use.
Add the other ingredients: Next, toss in the peppercorns and garlic so they’re on the bottom of the pot and sear until fragrant. Then, add the vegetables, herbs, salt, and water.

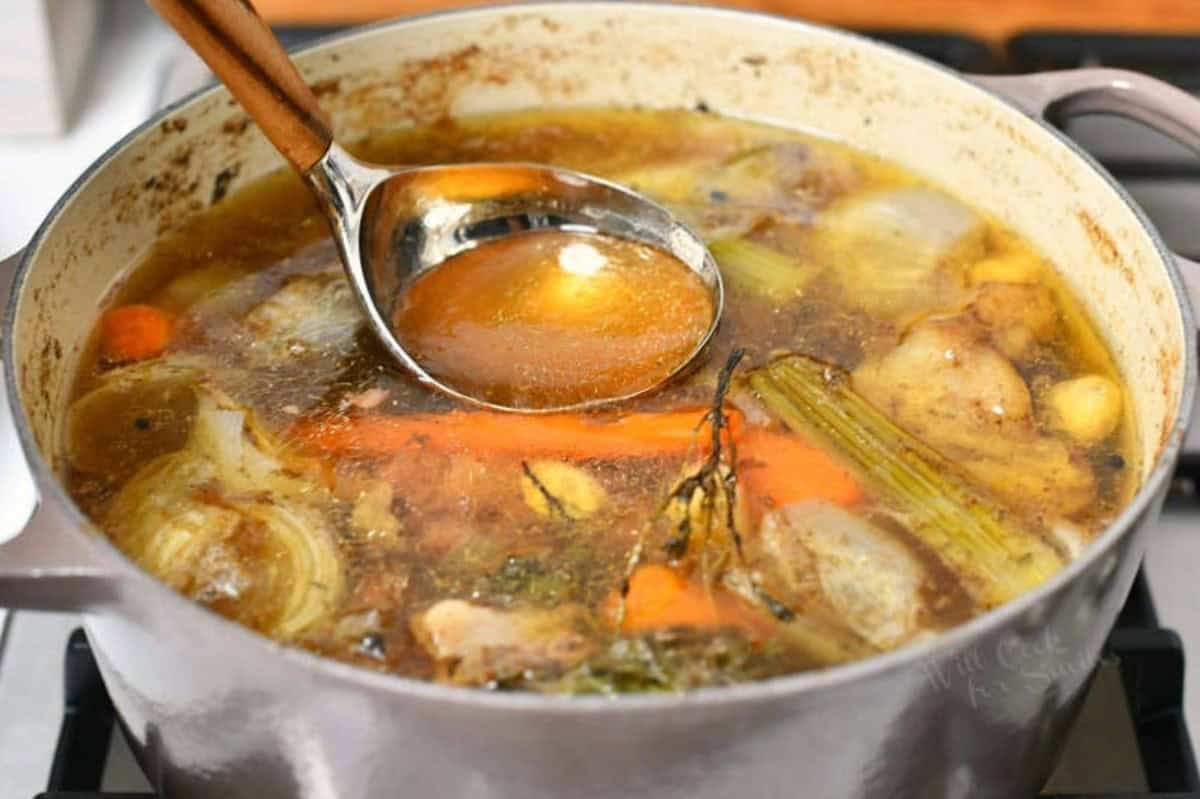
Cook the stock: Bring the mixture to a boil, then lower the heat to almost low, cover with a lid, and let it cook for about 4 hours.

Strain and store: Once done, pour everything through a large, fine strainer into another pot. Leave the strainer over the pot for 10-15 minutes to capture all of the liquid. Discard everything in the strainer, separating the meat from the bones if you’d like, and store the stock as desired.

Difference Between Beef Stock and Beef Broth?
While the ingredients are similar, there is one main difference: Beef stock is made with marrow bones, while beef broth is made using boneless meat.
Interestingly, broth has about half the calories of stock, but stock is much higher in vitamins and other nutrients like collagen, which comes from the bones. So the health benefits will far outweigh the calorie difference.
Even though they can be used interchangeably in recipes, I do want to mention that beef stock has a richer taste and of course, don’t forget about the added nutrients.
What bones should I use in beef stock?
- You want to use large, meaty bones with bone marrow. Marrow bones are an important part of stock because that is what makes the best stock that is rich, meat-flavored, and nutritious.
- Bone marrow is chock-full of nutrients like collages, iron, calcium, zinc, omega-3 fatty acids, Vitamin A, and so much more.
- The most common beef bones that you will find in the grocery store is oxtail bones but you can ask if the butcher also had neck bones, short ribs, and knucklebones. You want to make sure there is a mix of marrow bones and some with a little meat on them. Larger oxtail bones will have both, marrow and meat.

How To Freeze Beef Stock
Note that homemade stock will keep well in the freezer for 4 to 6 months. It’s safe to use beyond that time, but the overall quality will start to diminish.
- Large amounts: Make sure to cool the stock to room temperature first. Divide it among the freezer bags or transfer into large freezer-friendly containers. Fill them no more than 3/4 of the way full to allow room for expanding as it freezes. Seal, label, and place in the freezer. Plastic bags can be laid on a large cutting board or baking sheet to freeze, then stacked when frozen for easier storage.
- Smaller portions: Ladle cooled stock into muffin pan cups or ice cube trays. Carefully place in the freezer and freeze for about 3 hours, or until completely frozen. (set yourself a timer!) After freezing, transfer the cubes into freezer zip-top bags, seal, label, and return them to the freezer. You can also portion the cubes into several smaller freezer bags for convenience.
More Recipes Using Beef Stock
DID YOU MAKE THIS RECIPE? PLEASE leave a 🌟 star rating! Let me know how you liked it by leaving the 📝 comment below or share and tag me on social media @willcookforsmiles. DON’T FORGET to subscribe to my newsletter!

Beef Stock Recipe
Ingredients
- 3 lbs large meaty marrow beef bones (neck, tails, ribs)
- 2 tbsp oil
- 1 large yellow onion
- 3 medium carrots
- 4 celery ribs
- 1 bulb of garlic peeled
- 4 sprigs of thyme
- 4-5 stems of parsley
- 2 bay leaves
- 1/2 tbsp whole peppercorns
- 1 tbsp salt optional
- 16 cups water heated
Instructions
- Peel and cut onion and carrots in fourths. Cut celery ribs as well.
- Preheat a large pot over medium-high heat, add some canola oil. Add beef bones and sear on both sides until golden brown.
- Toss in peppercorns and garlic (so they are right on the bottom of the pot and not on the bones) and let them sear for a couple of minutes. You will notice both will give out a pleasant aroma.
- Add vegetables, herbs, salt, and water. Bring mixture to boil, lower heat to low, cover with a lid, and cook for about 4 hours.
- Pour the stock through a fine strainer and let the beef and vegetables sit in the strainer, over the pot, for 10-15 minutes so that all the liquid comes out.
- If there is enough meat on bones, you may separate it and save it for the soup or discard with the bones. Discard the vegetables and everything else in the strainer.
Notes
- Storing beef stock: In the refrigerator, homemade beef stock will last for up to 5 days. Beef stock does have a longer shelf life than chicken stock.
Transfer homemade beef stock into a glass jar with a lid or another glass airtight container. Note, there may be a layer of congealed fat on top of the stock after refrigerating it overnight. Use a spoon to lift it out and discard if you wish, or use it to cook on, or keep it to use in the soup.
Nutrition
Originally published on Will Cook For Smiles in September 2020.
All images and text ©Lyubov Brooke for ©Will Cook For Smiles. Please do not use my images without prior permission. If using my posts in collections and features, please link back to this post for the recipe.
Disclaimer: Nutrition information shown is not guaranteed to be 100% accurate as most ingredients and brands have variations.


Homemade is so much better than store bought this made my gravy so good!
Can this be done in the instant pot, it has to go much faster,
Sure, you can make it in the instant pot I go over how to do that with my chicken stock recipe and you can apply the same method to this stock here is the link for that. https://www.willcookforsmiles.com/homemade-chicken-stock/